
How to Tie an Oboe Reed
How to Tie an Oboe Reed
Are you learning how to tie an oboe reed? You’ve come to the right place! In this guide, oboist Anna Betuzzi will walk you through the process. Expect lots of tips to increase your success rate along the way!
For a more visual explanation of the process, check out our video on How to Tie an Oboe Reed! We’ve added timestamps throughout this article to guide you to the corresponding section of the video. You can find them in parentheses, like this: (0:00)
Collect Your Supplies (0:15)
Before starting, you will need to collect all the materials to tie your reed. Firstly, you will need gouged and shaped oboe cane. This type of cane has been cut to a specific thickness by a machine called a gouger and then cut again to a specific curve on the sides using a shaper tip. If you don’t have a gouger and a shaper tip, you can purchase gouged and shaped cane from any double reed shop.
Cane needs to be soaked in water before tying. I recommend using lukewarm water (not boiling water!) to soak the cane, as warm water helps the cane soak faster. Soak for 20 to 40 minutes in lukewarm water or 30 to 60 minutes in cool water. Be careful not to oversoak! Oversoaking can render your future reed too soft. I recommend setting a timer so you don’t forget about your soaking cane.
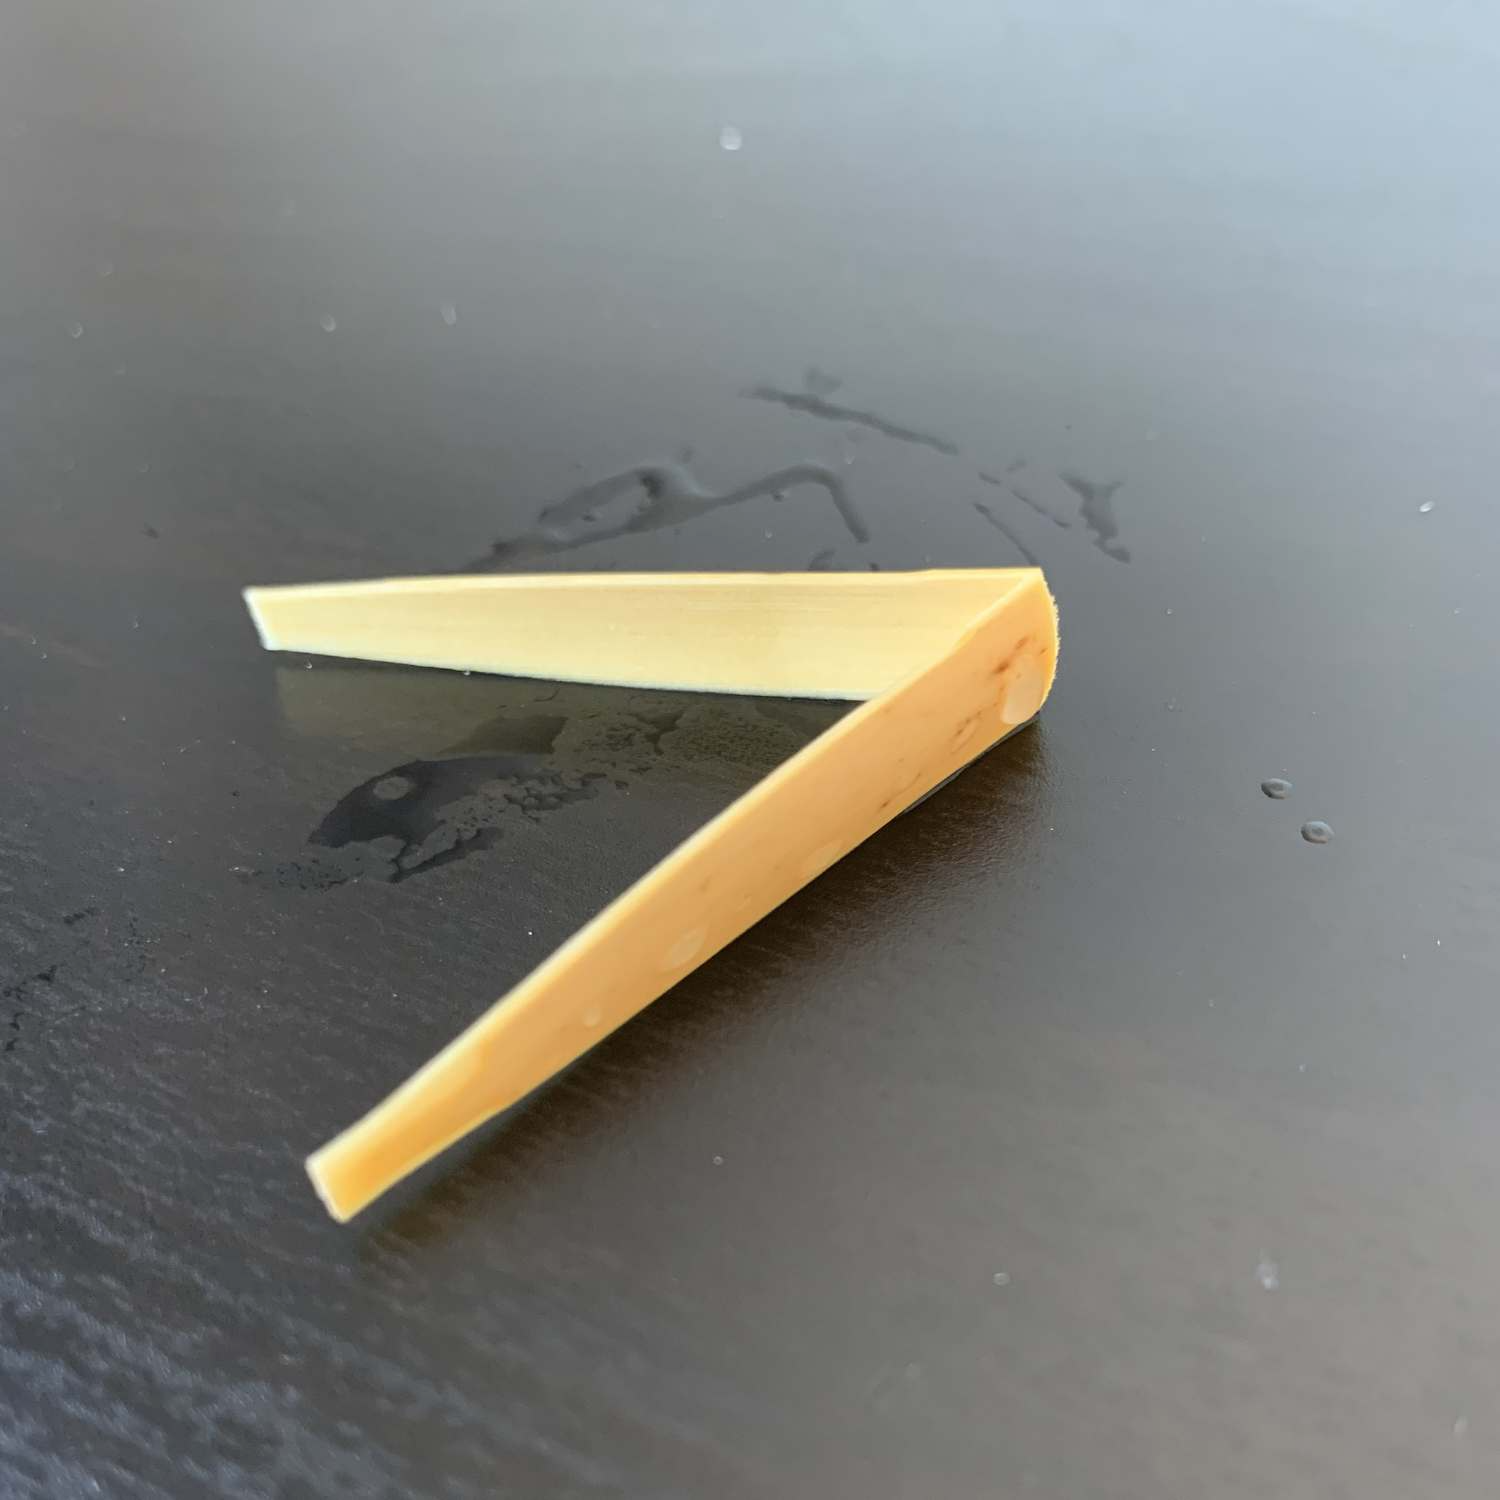
Some people like to wait until the cane sinks in the water before tying. I prefer to time the soaking for more consistency. But it’s an interesting thought—ask your teacher what their opinion is. The cane may take more or less time to sink depending on its density, hardness, and other factors.
In addition to soaked cane, you will need the following items:
- Ruler with millimeter markings
- Oboe reed thread
- Beeswax
- Good lighting
- Chair or C-Clamp to attach the thread to
- Reed knife
- Mandrel
- Staple/tube
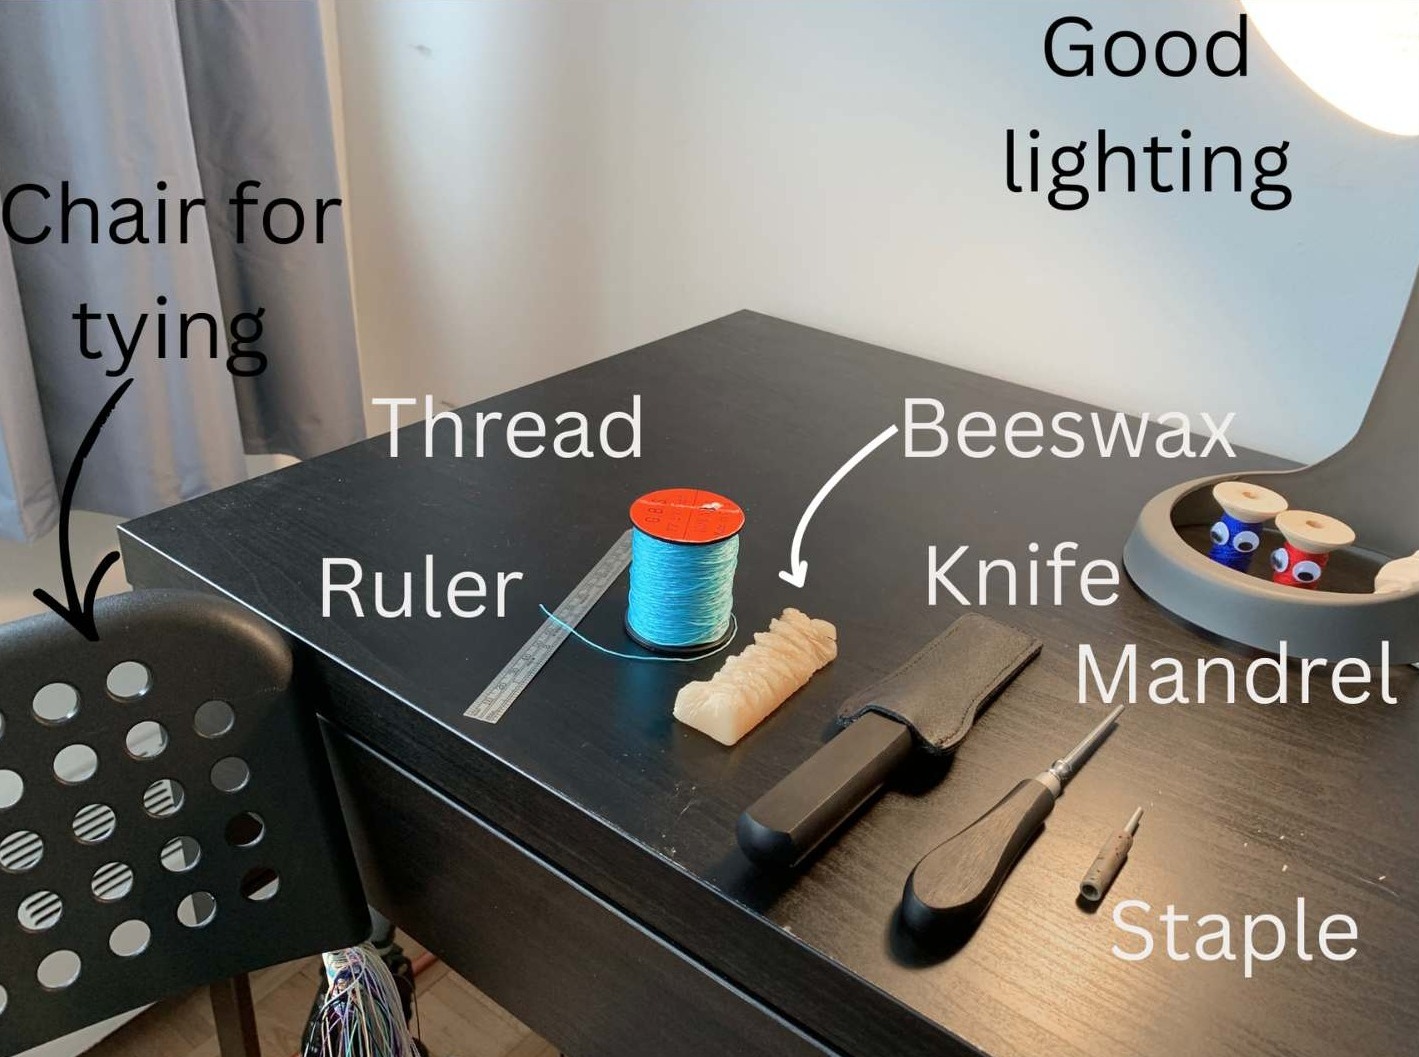
For best results, make sure you know the length of your staples/tubes before tying your reed. The standard length for staples in North America is 47 millimeters. This will be important later! The top of the thread will need to line up with the top of the staple. Check out our video on How to Tie an Oboe Reed at (4:15) for a demonstration on why this is important!
To avoid damaging your staples, ensure that your mandrel is the same brand and style as your staples. For example, use a Glotin mandrel with Glotin staples, use a Chiarugi 2 mandrel with Chiarugi 2 staples, and a Loree mandrel with Loree staples. The bore (inside shape) of the staples is engineered very precisely, and tying a reed with a mismatched staple and mandrel could damage the staple’s bore.
Preparing to Tie the Reed (5:42)
Now that you’ve gathered all your materials, you will need to prepare them for tying. First, determine the desired length of your tied reed. This will depend on the shape of your cane and the length of your staples. Most standard North American cane shapes are designed to be tied to a length between 72 and 74 millimeters, measured from the base of the staple to the top of the cane.
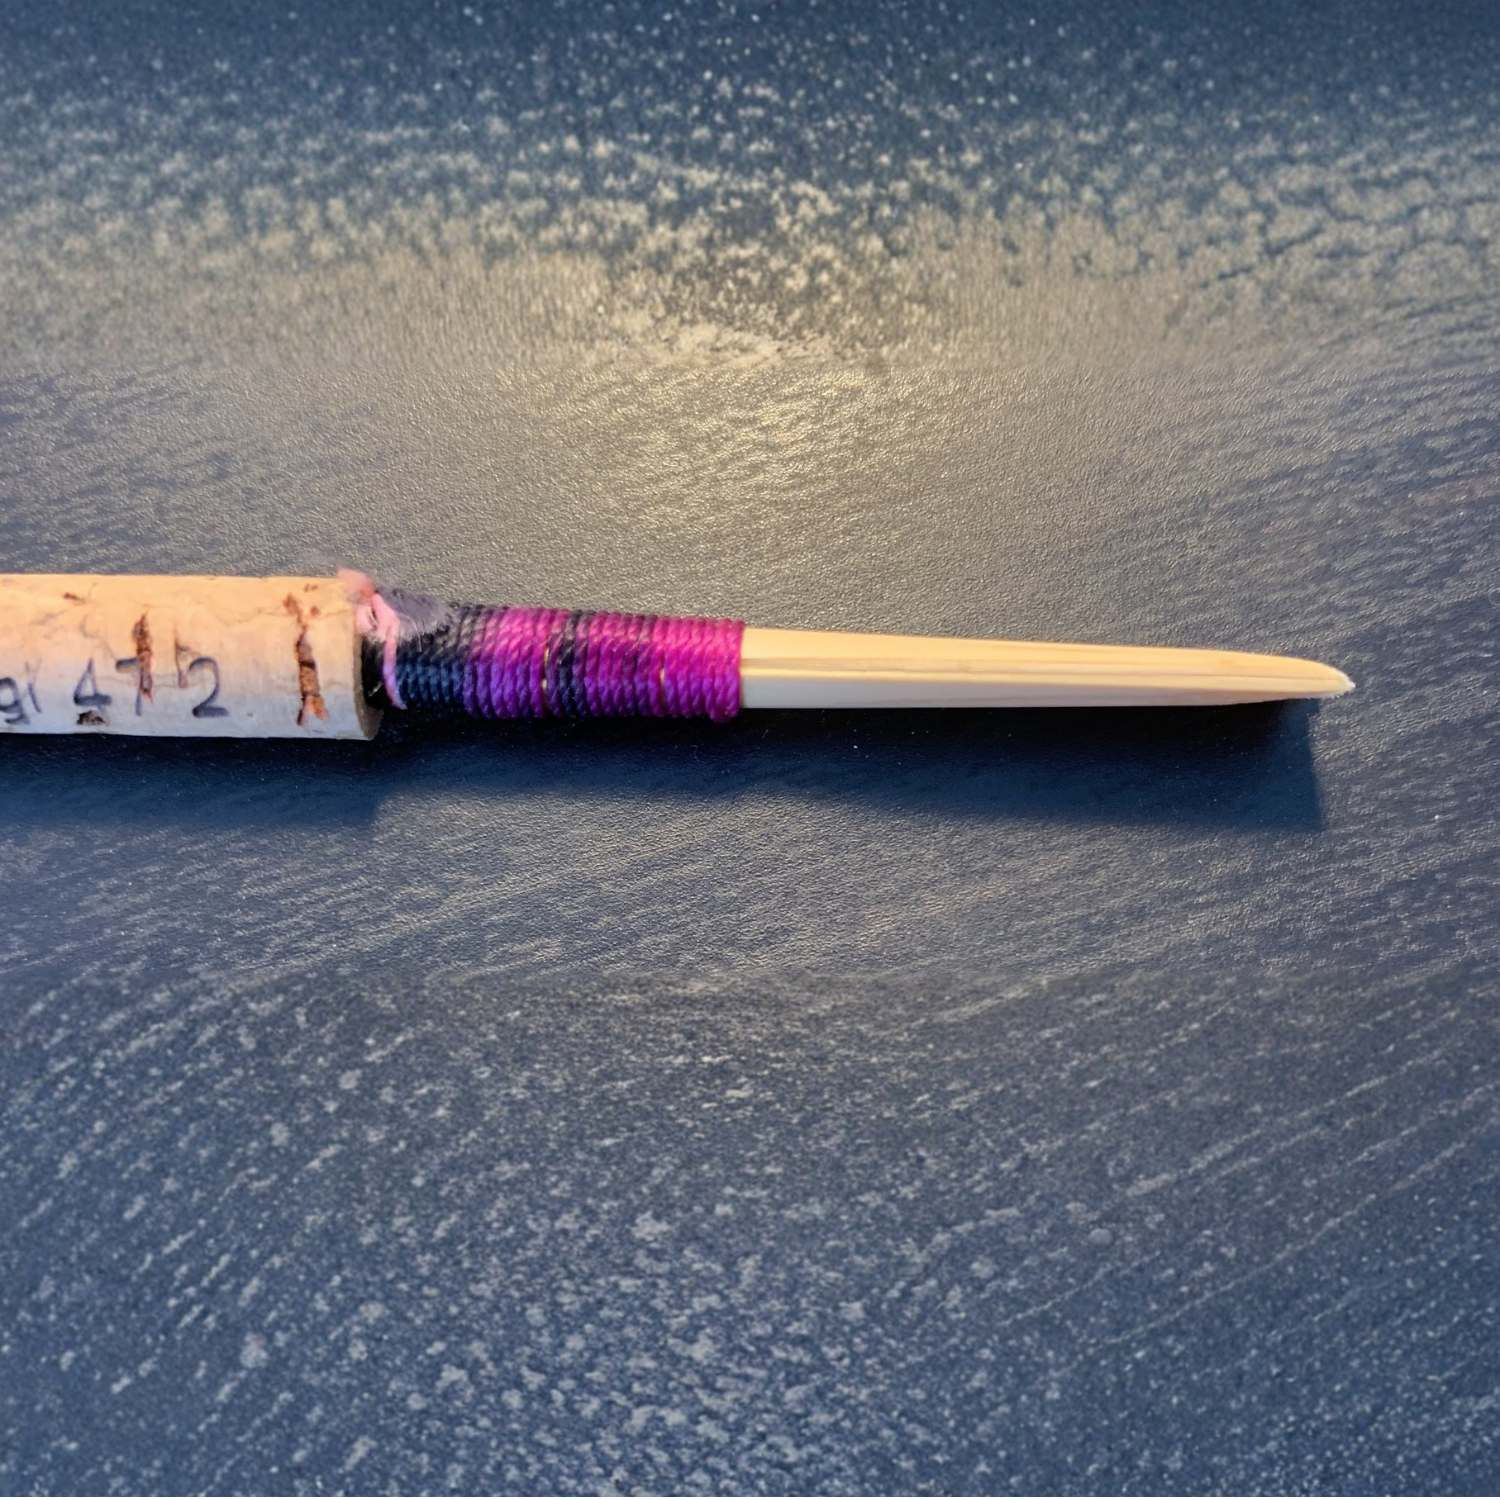
The cane should seal well on both sides, but without ‘choking’ or pinching too much. If the cane does not seal on the sides, you’ve tied too long. If the cane looks choked or very bulky right next to the thread, try a slightly longer tied length. If you don’t know what length to tie, you can always ask your teacher, or you can experiment with a few different lengths to determine the optimal length for your particular shape of cane.
Here’s what a tied reed with an optimal side seal looks like:
Here’s a reed that is not sealed on the side, and should be tied shorter:
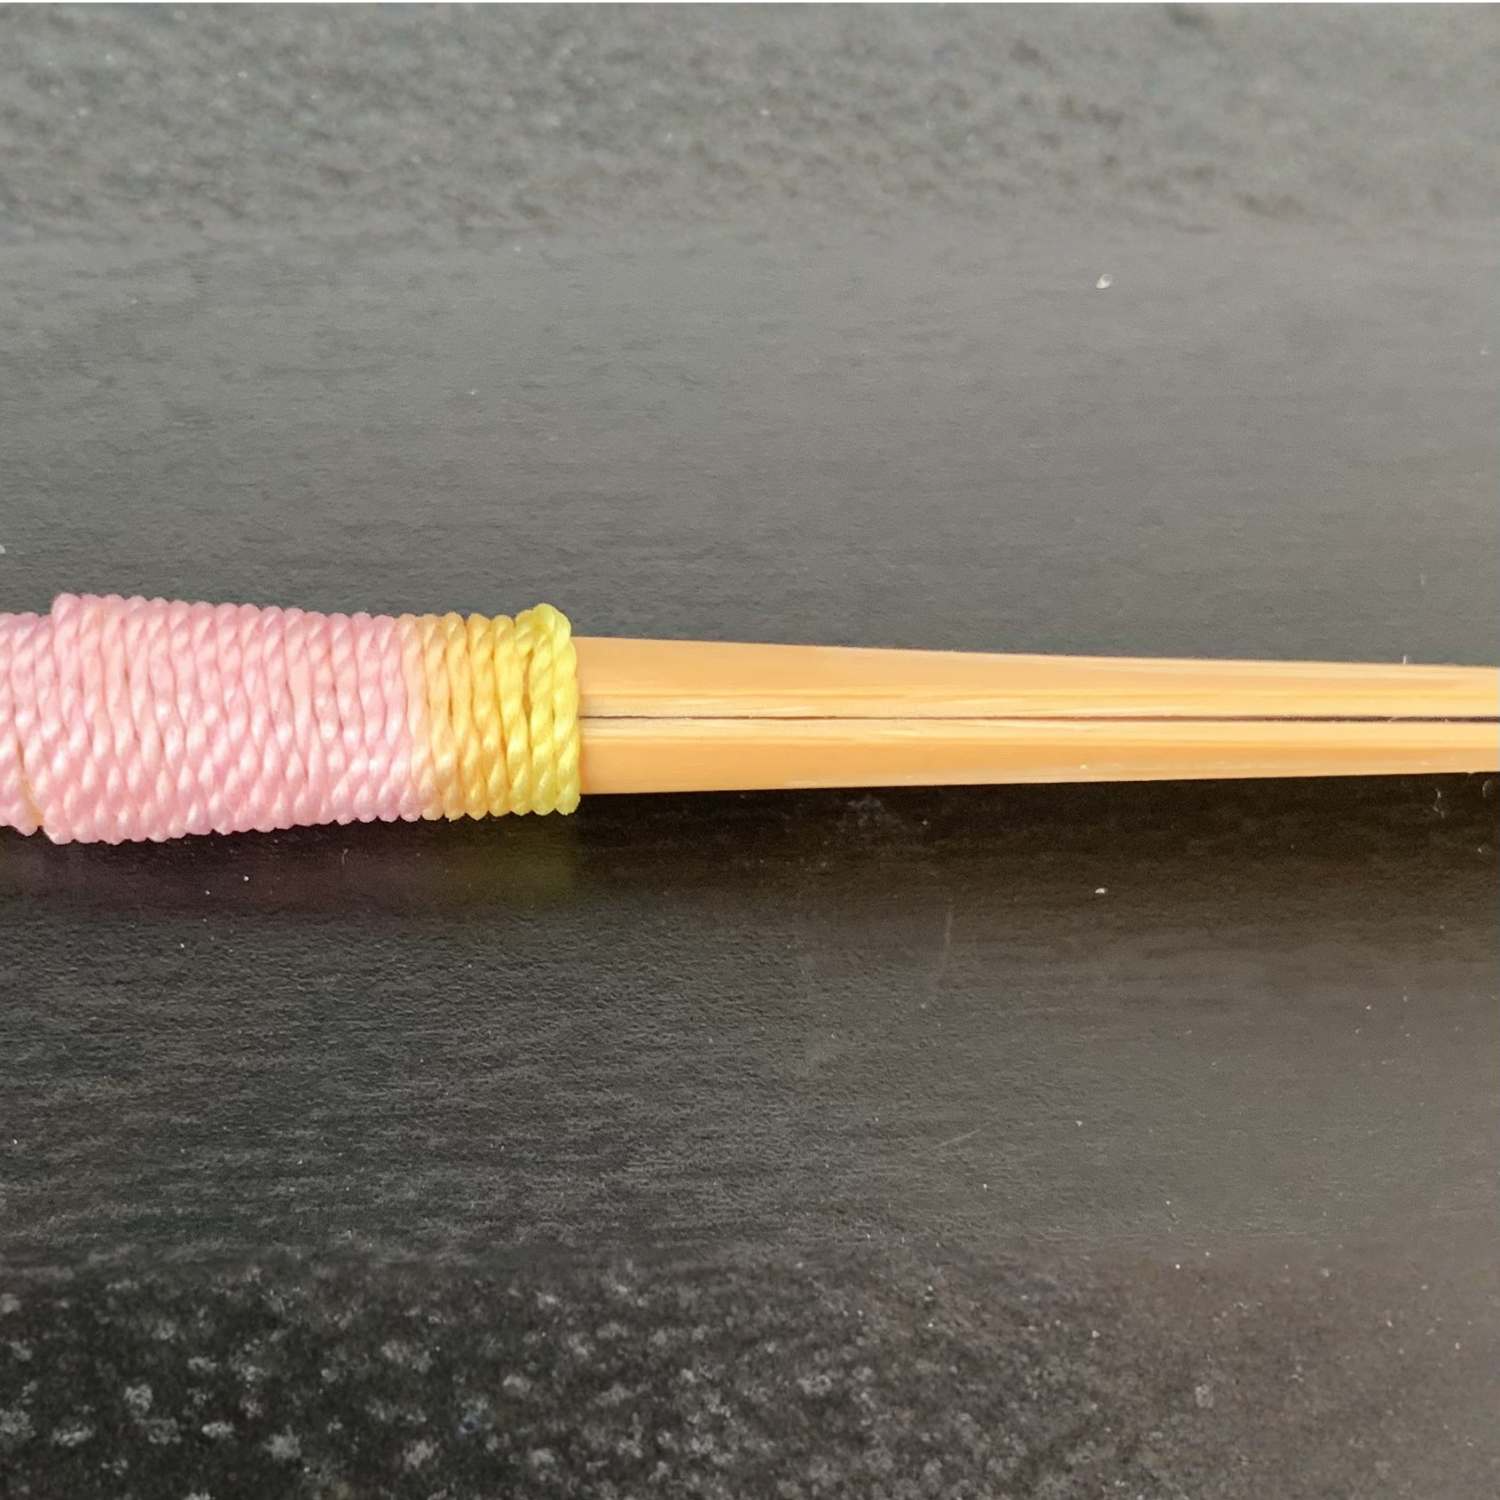
If the end of the reed is not sealing, but the cane is sealed right next to the thread, it is possible that the reed will seal when it is scraped more. However, if there is a gap right above the thread (like in the photo), your reed is sure to leak and will need to be tied shorter.
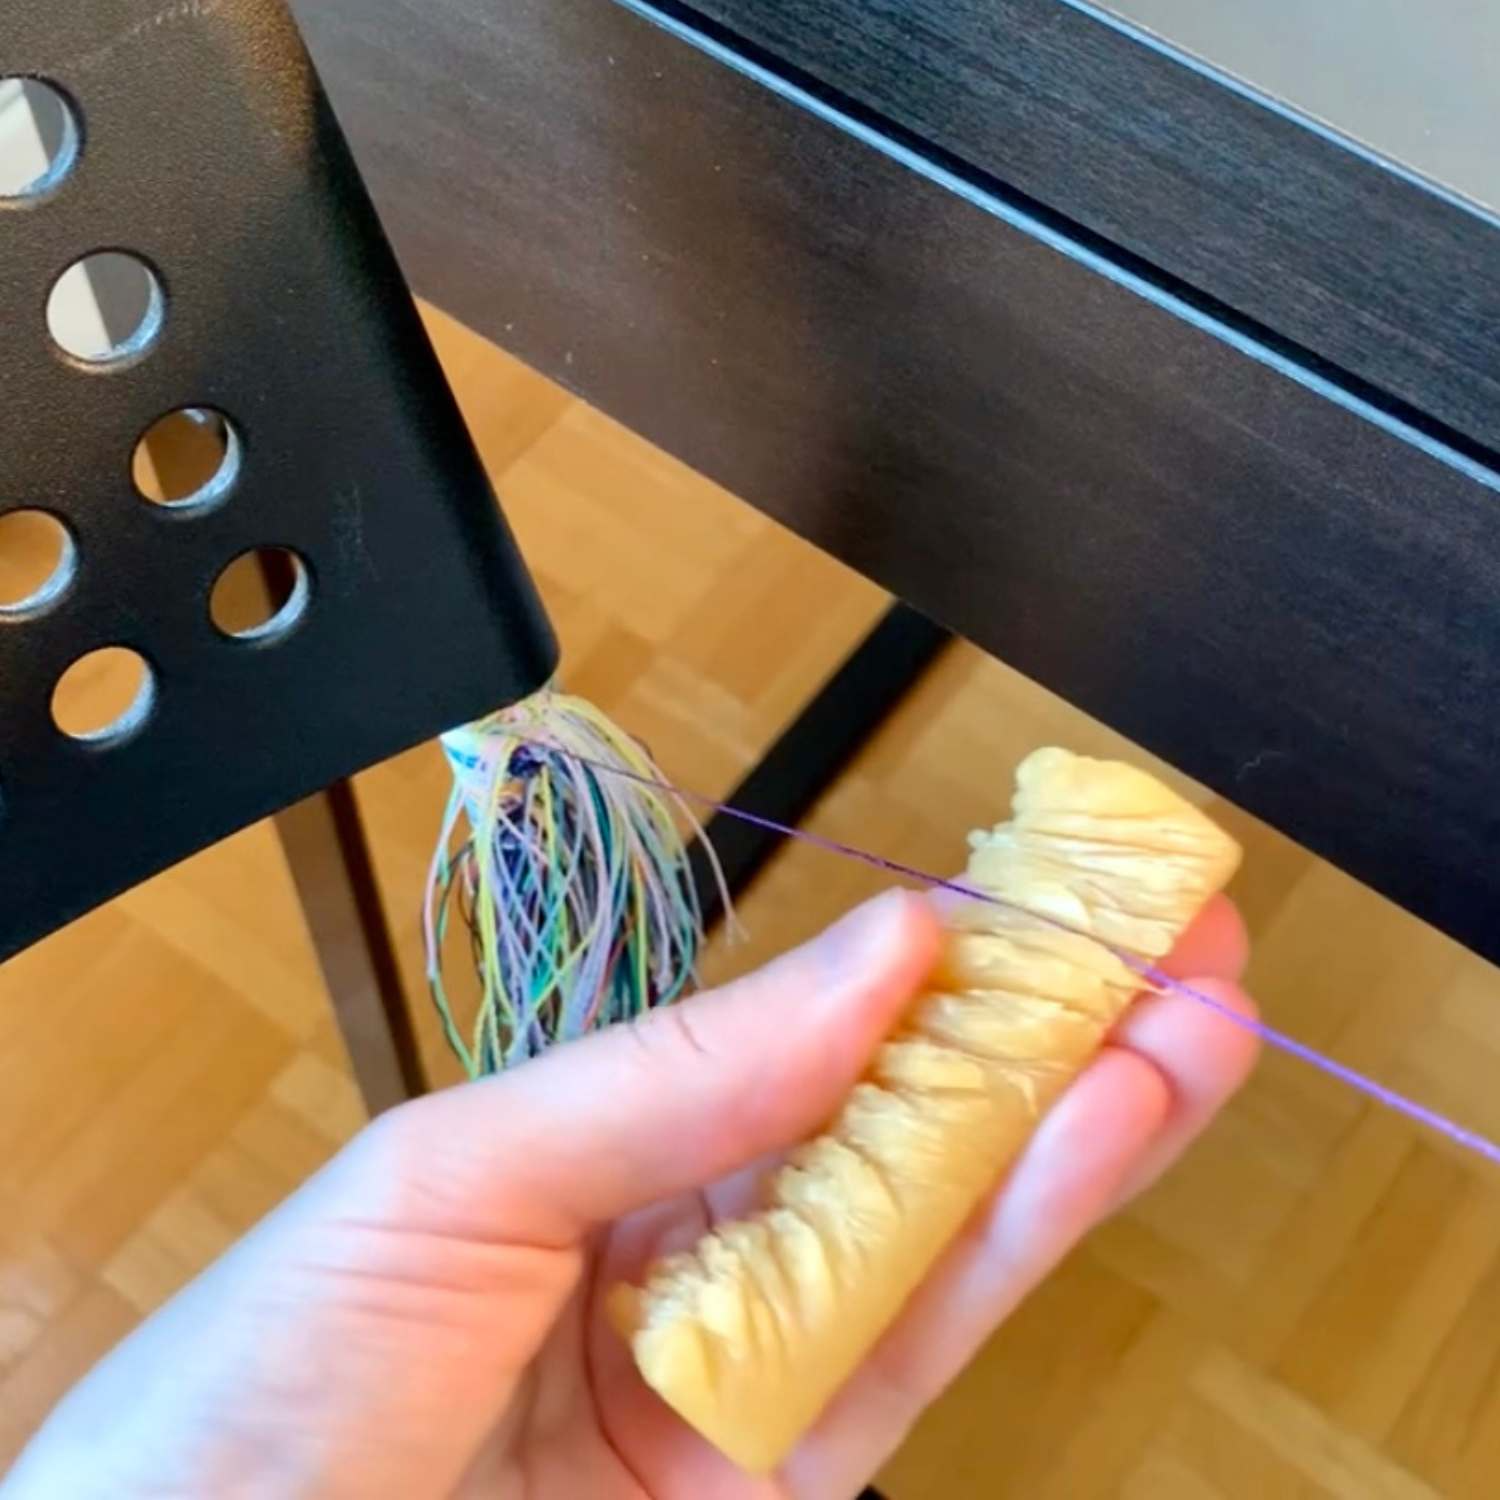
Next, securely tie your thread to a chair or a C-clamp. If you are tying to a chair, I always make sure to sit on the chair to make sure it doesn’t move!
I like to put a bit of beeswax on the end of the thread to prevent it from slipping. Tie at least three knots, two in one direction and one in the other, to ensure the thread can withstand the pressure of tying. I like to pull on the thread after securing it to ensure it won’t move during the tying process.
After securing the thread, apply a small layer of beeswax to 50-70 centimeters of thread (about the same length you would use to floss your teeth). Beeswax has several benefits, including helping to create an airtight seal, as well as improving your grip of the thread when tying. I like to run the wax over the thread one time, then use my fingers to ensure it is spread evenly. Be careful not to use too much beeswax; this could leave chunks on the thread, potentially creating leaks.
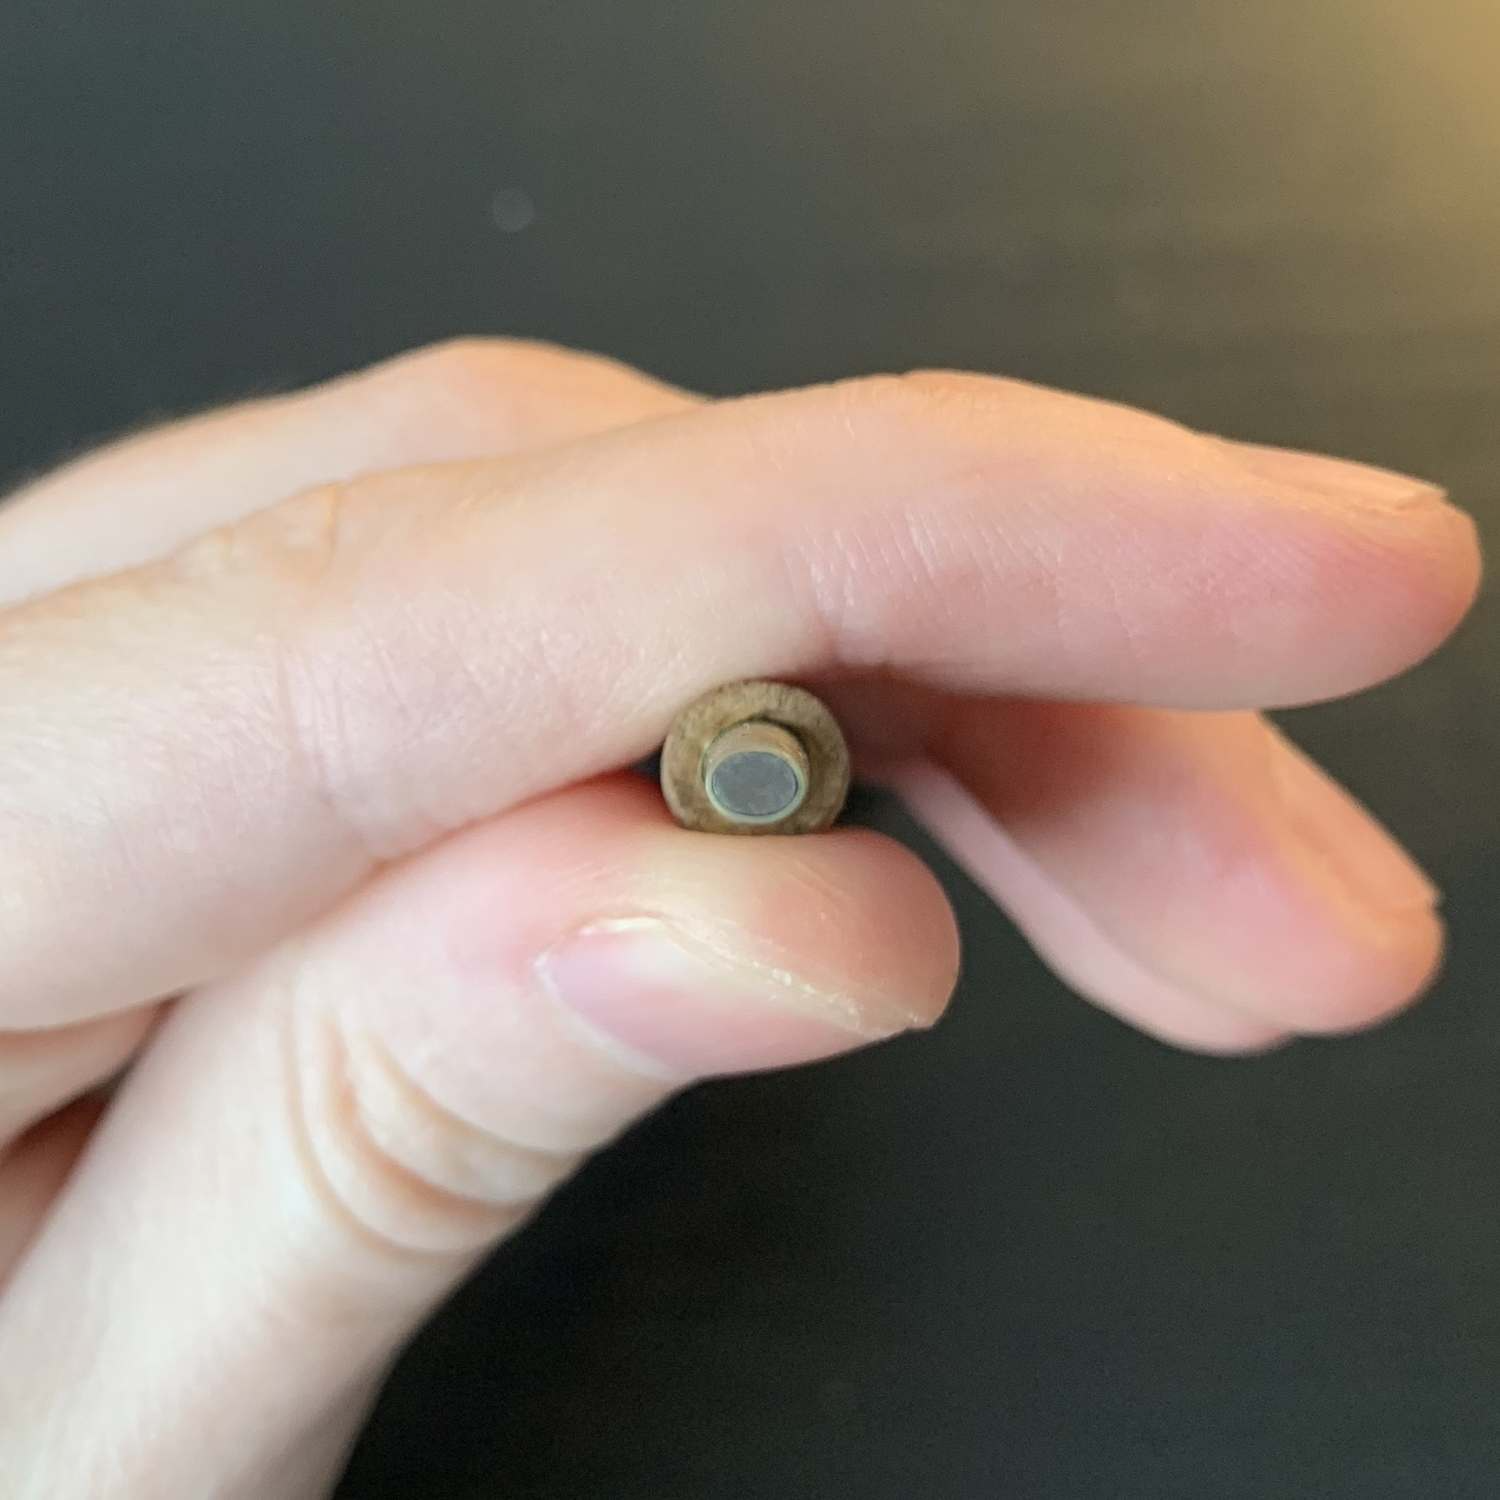
Next, place your staple on the mandrel, and ensure it fits snugly. Notice the top of the mandrel and staple have an oval shape. This is very important! The flat portions of your mandrel’s handle should also line up with the flatter sides of the oval. Here’s a top view of a staple on a matching mandrel:
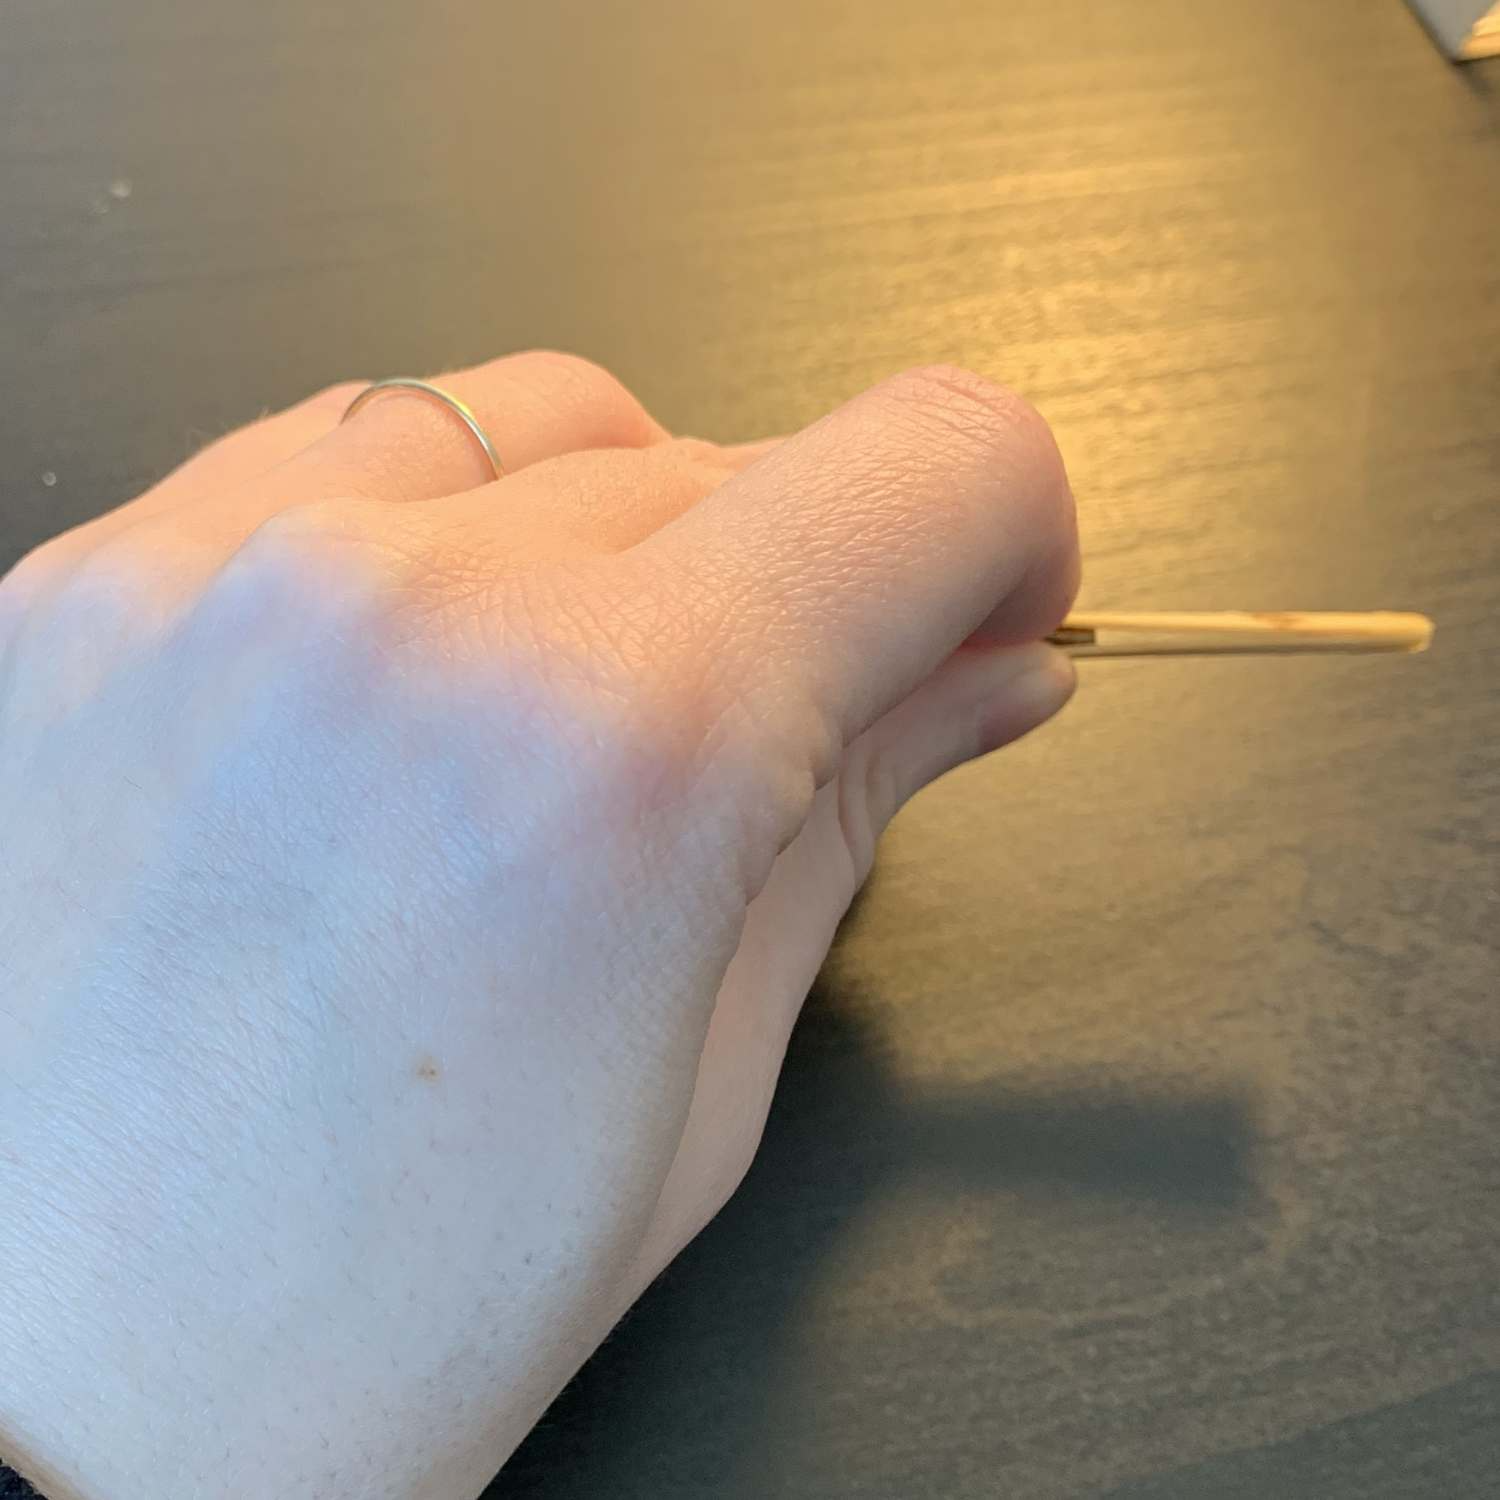
Now, line up the flatter sides of the cane with the flatter sides of the oval. You can pinch the flat sides of the cane between your thumb and index finger of your non-dominant hand. Maintain a strong pinch, then use your ruler to measure the reed to ensure it matches your desired overall length. Here’s what it will look like when holding the mandrel and cane, with the flat part of the cane lined up with the flat part of the mandrel:
Tips to Prevent Leaks
Here are some things to keep in mind while you tie your reed to help prevent leaks:
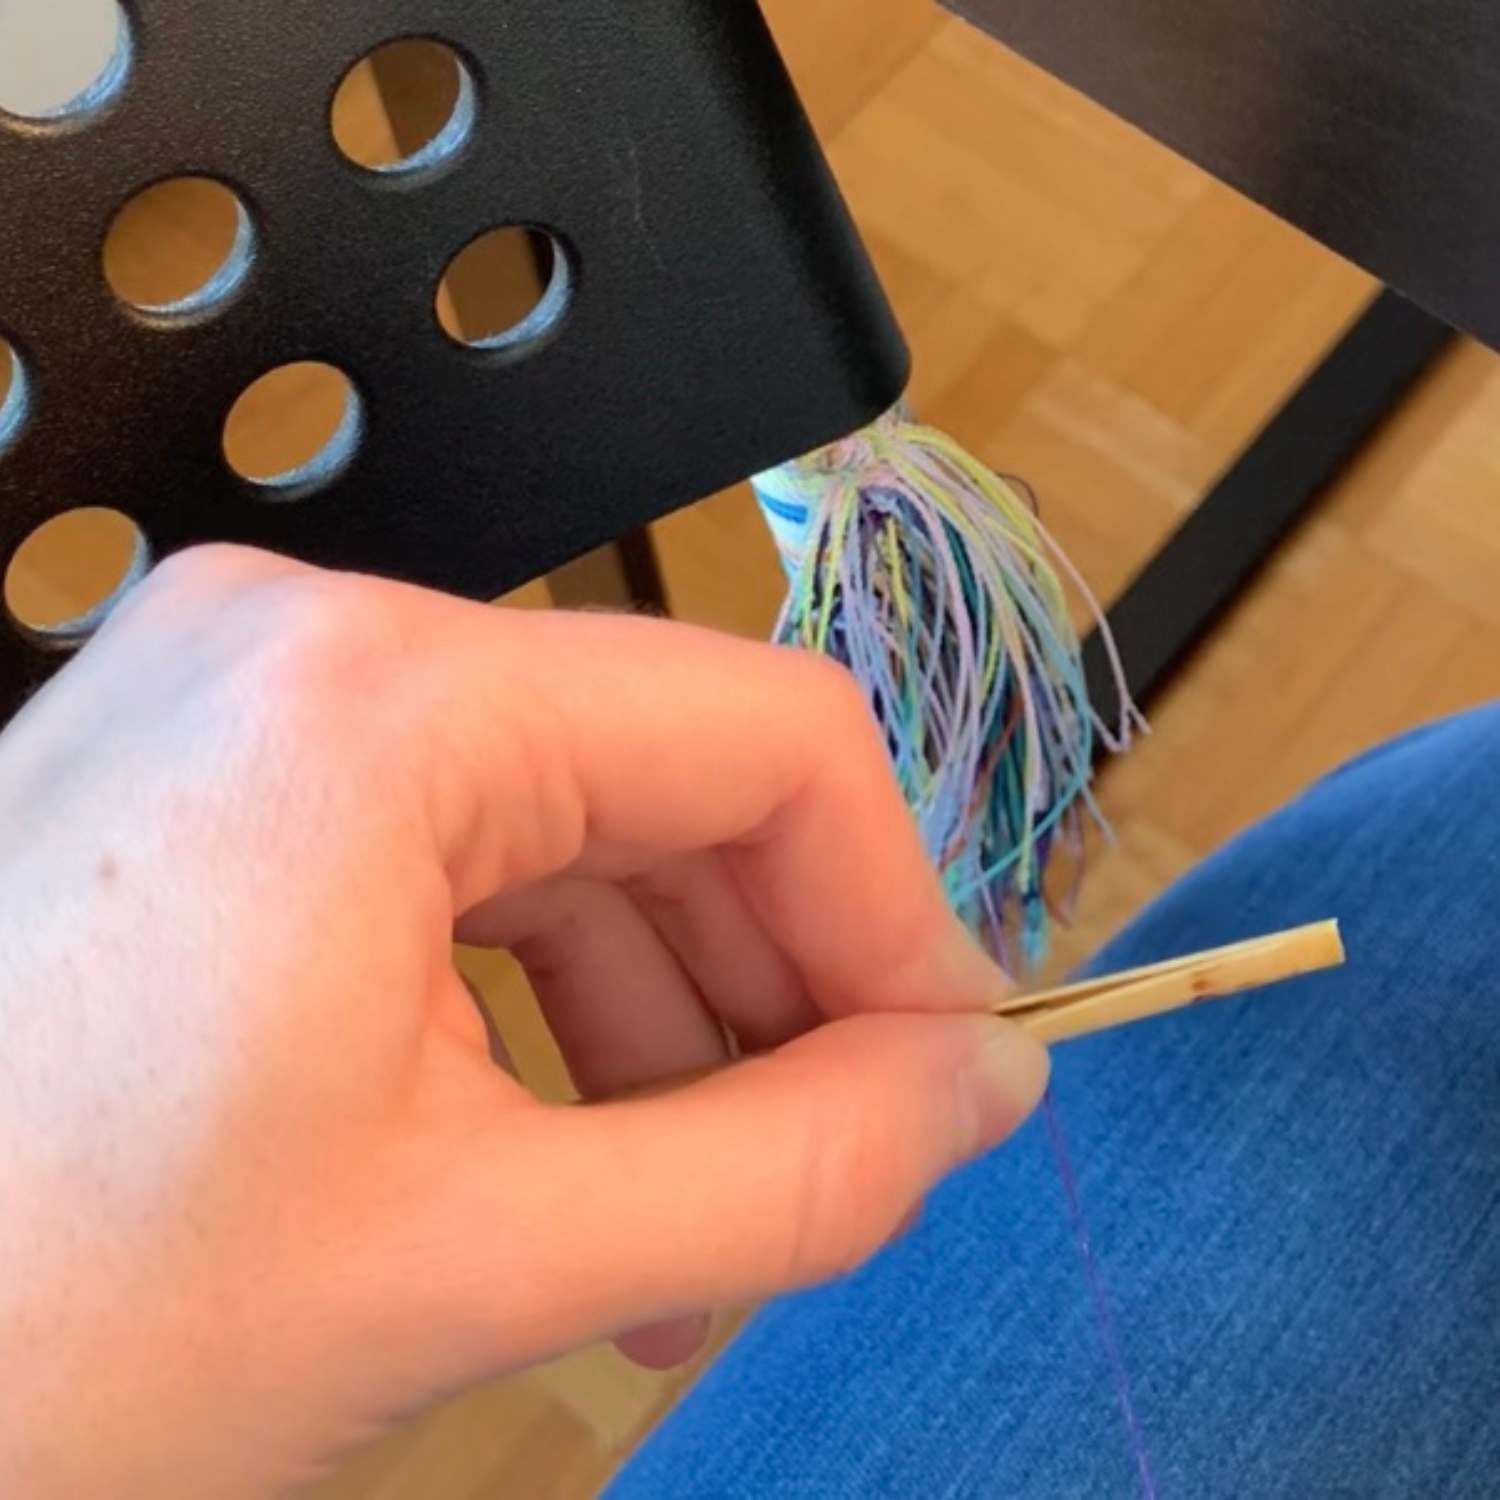
- Always pinch the reed strongly between your fingers. This prevents the cane from moving around and changing your perfect measurements!
- Once you start tying with the thread, maintain tension at all times. You either need to be actively pulling on the thread or strongly pinching the end of the thread between your thumb and index finger. Any loosening of the thread, even for a second, WILL cause leaks.
- Keep the cane and mandrel perpendicular to the thread at all times (in other words, make a T shape). This prevents the cane from twisting around and becoming crooked.
Tie Your Reed (13:15)
With all that in mind, you’re ready to tie your reed!
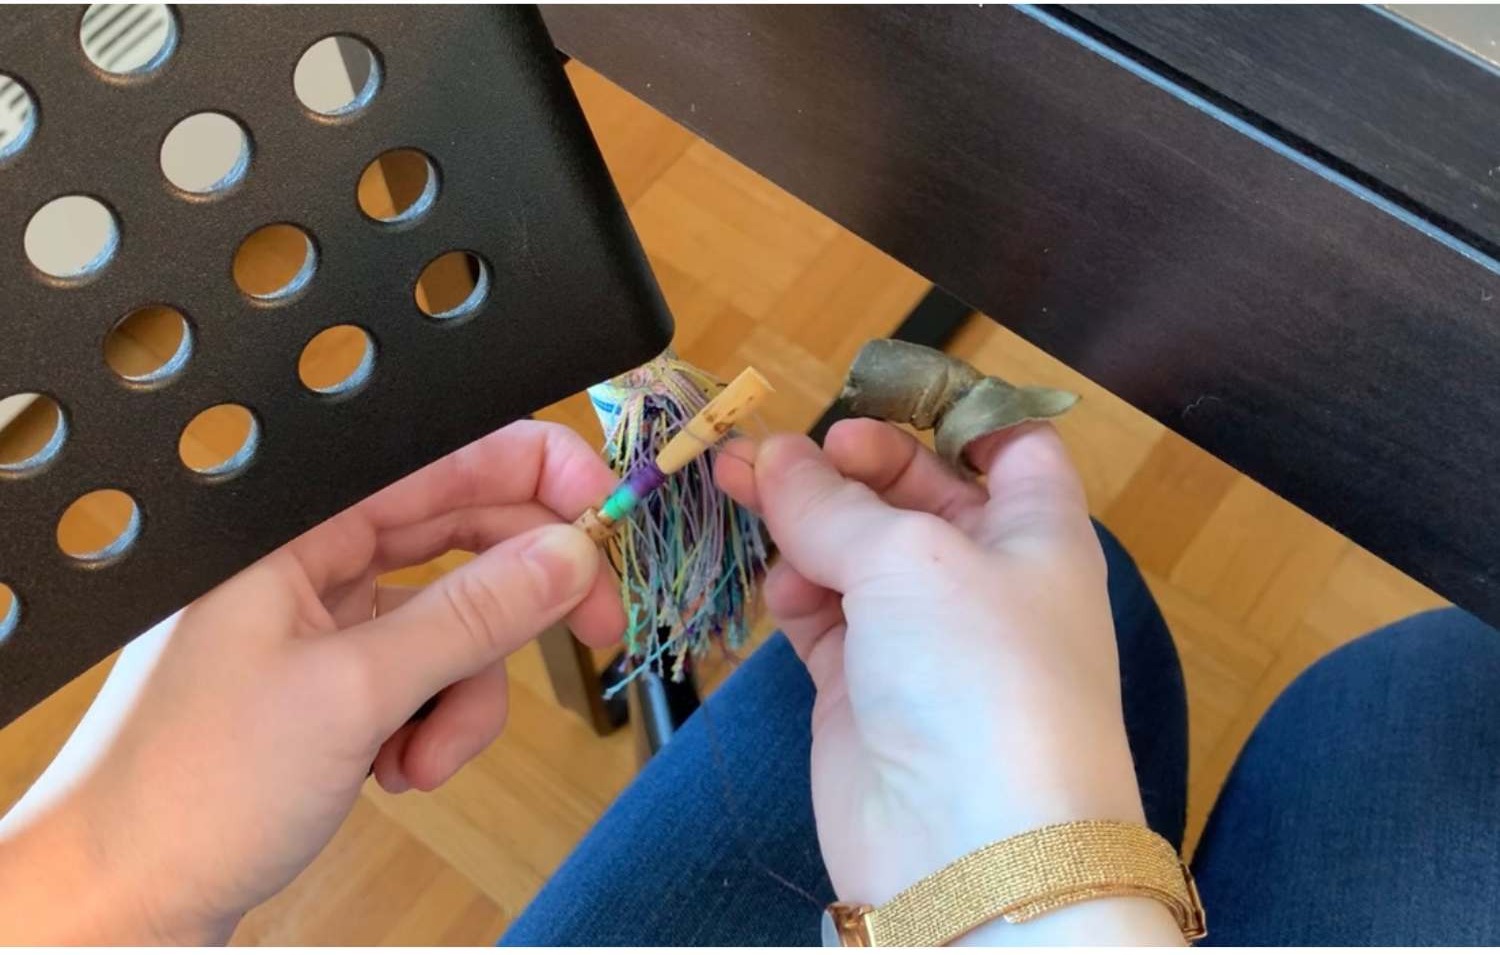
1. Hold the cane and mandrel in your non-dominant hand, and the thread spool in your dominant hand. Use your dominant thumb to precisely control the direction of the thread.
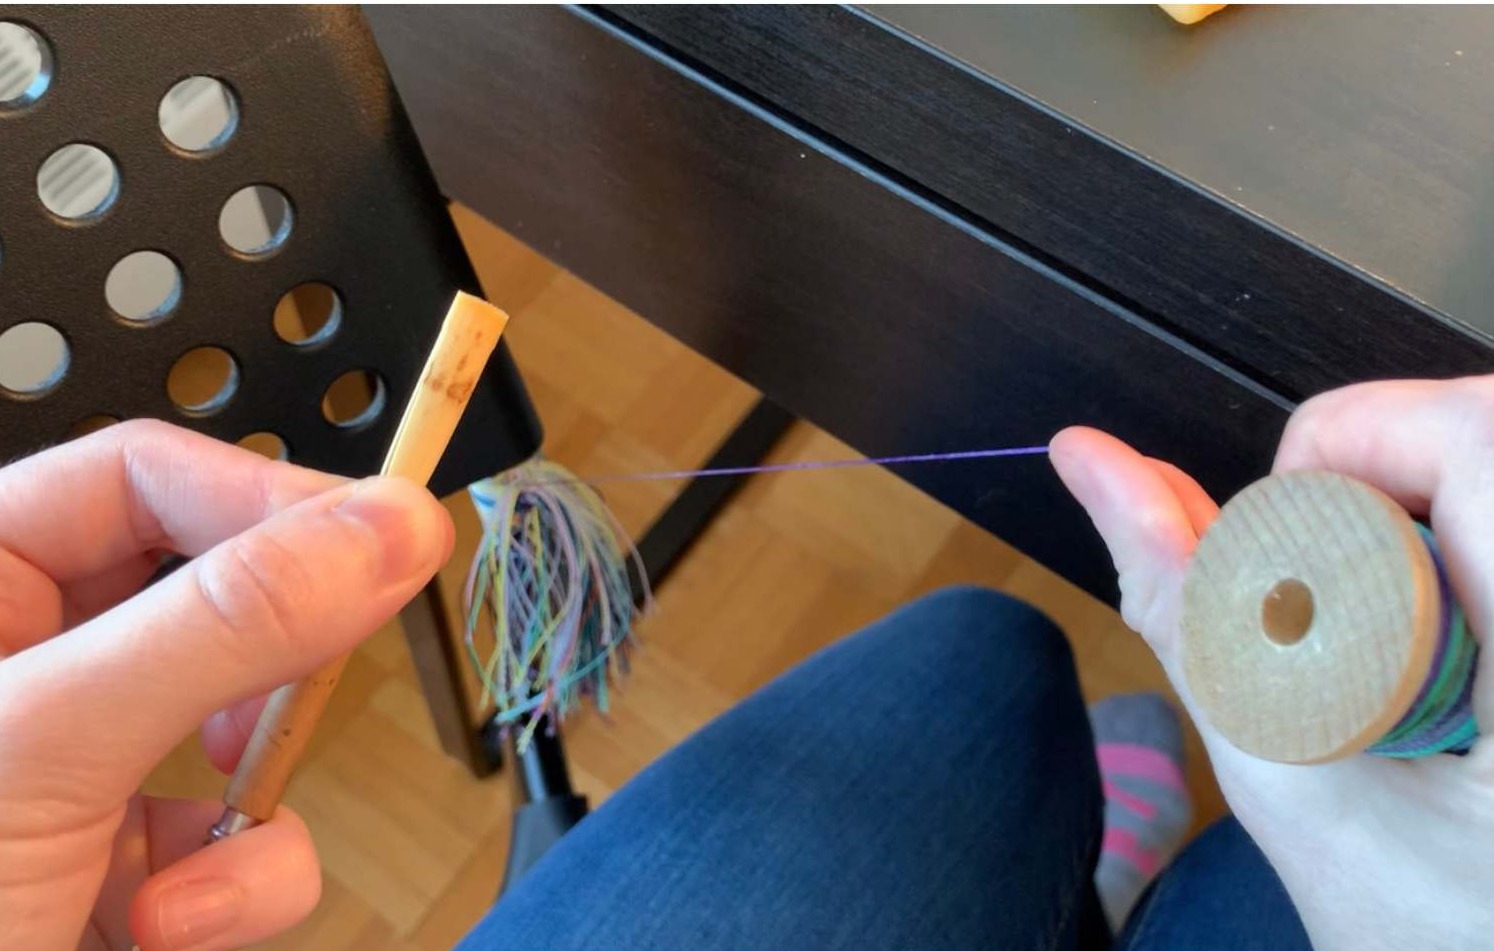
2. Leave at least 10cm between the chair/C-clamp and the portion of thread you use to tie the reed. You will need it later!
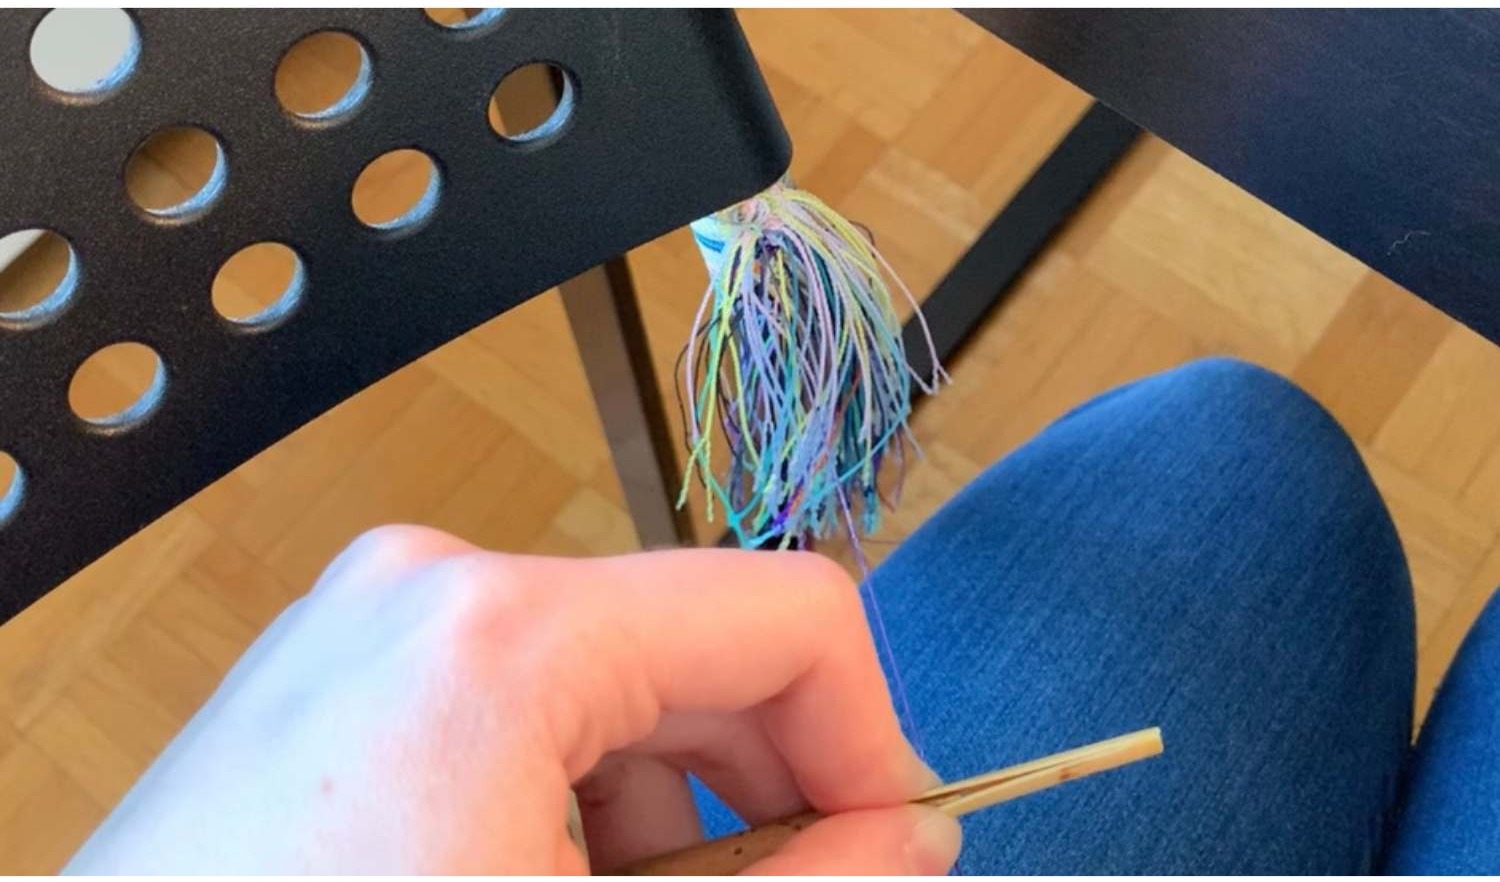
3. Starting with the thread about 1mm below the top of the staple, wrap the thread around the cane two times. The second thread wrap should line up with the top of the staple.
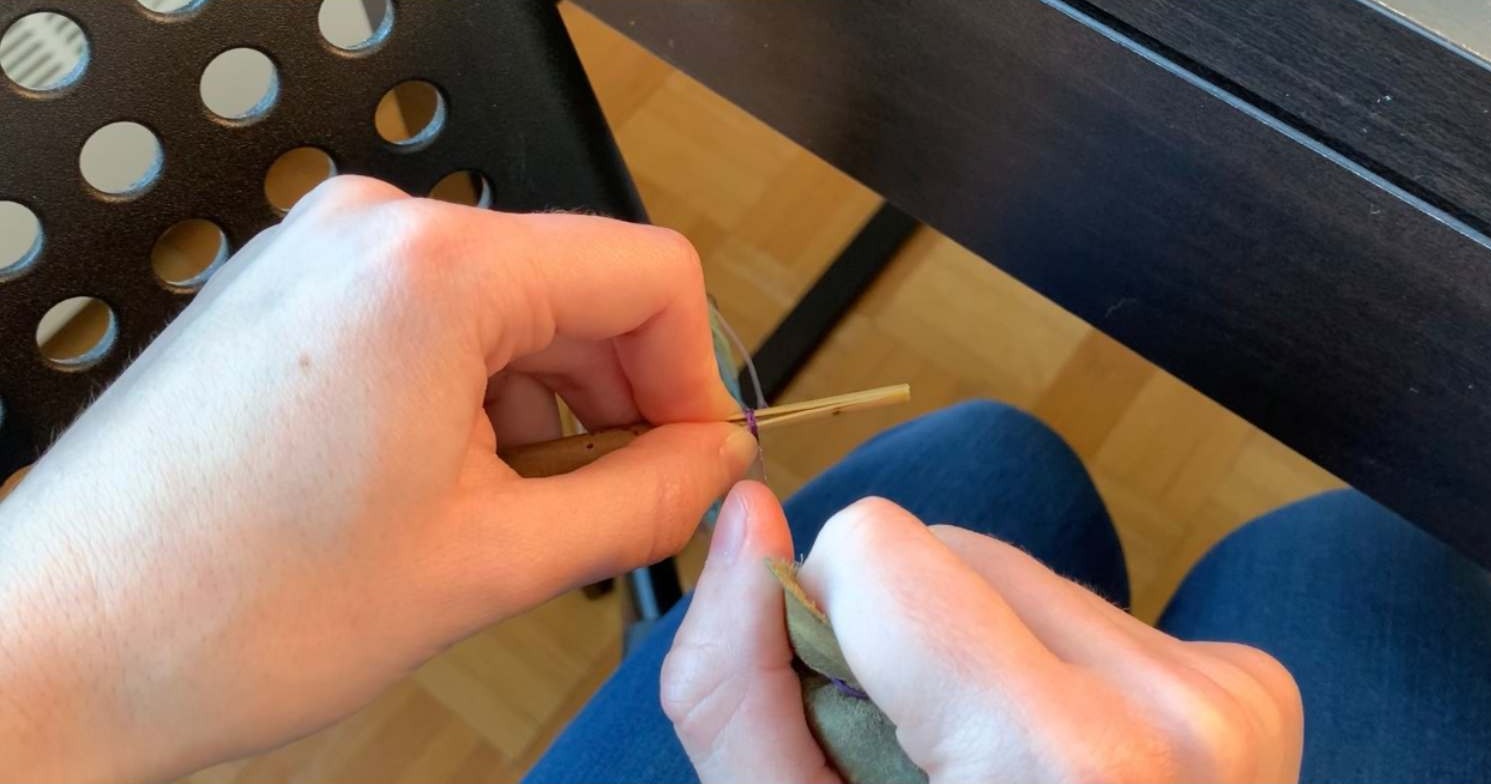
4. Gently pull both the spool of thread and the mandrel/reed towards you, adding more tension until the sides of the cane seal and close.
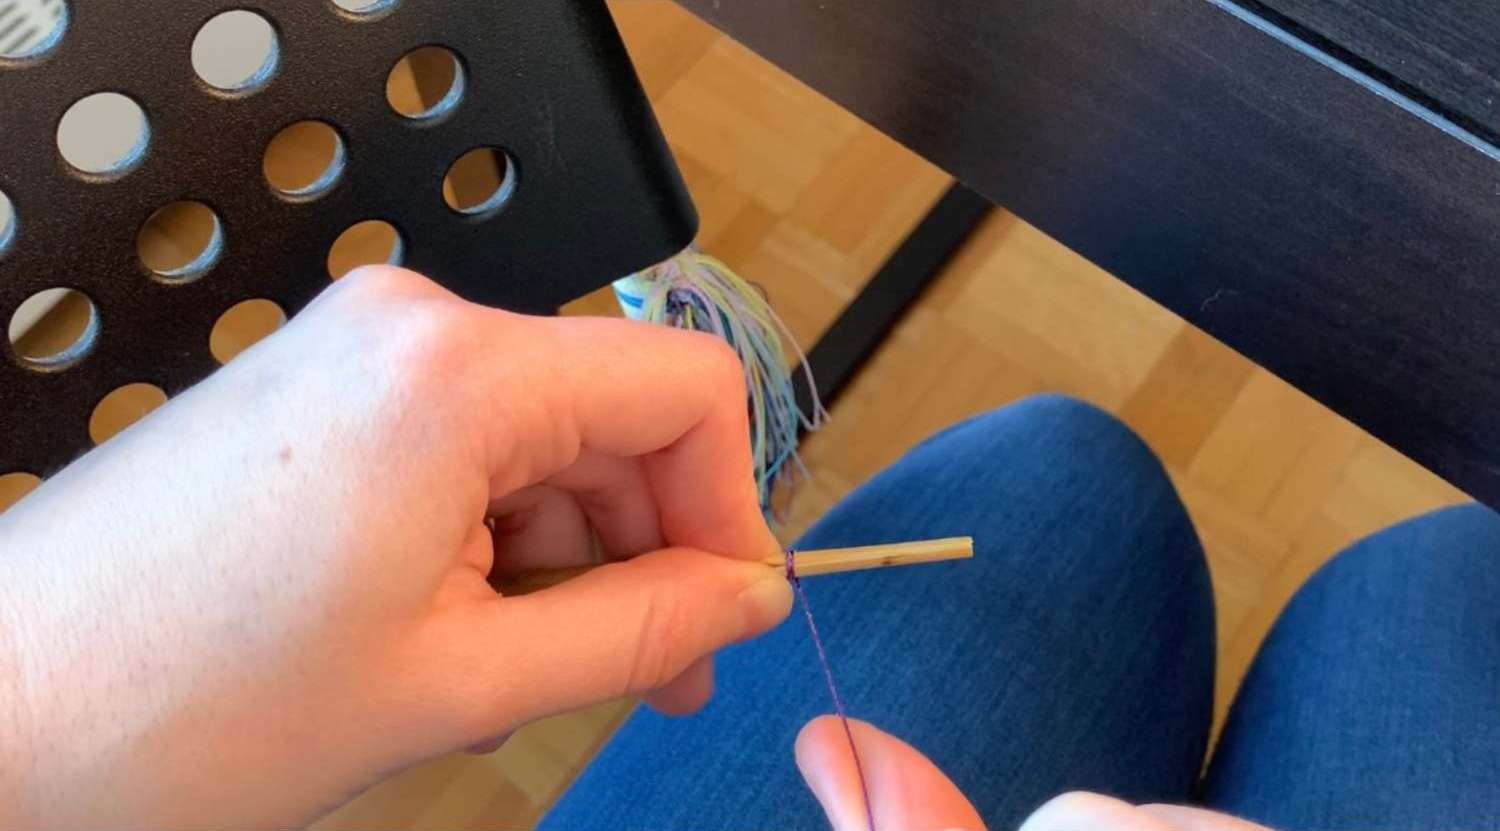
5. From this point onwards, maintain thread tension at all times!
6. Cross the spool-side of the thread over top of the two thread wraps, towards the bottom of the reed. This is called the crossover thread or overlap thread. (14:50)
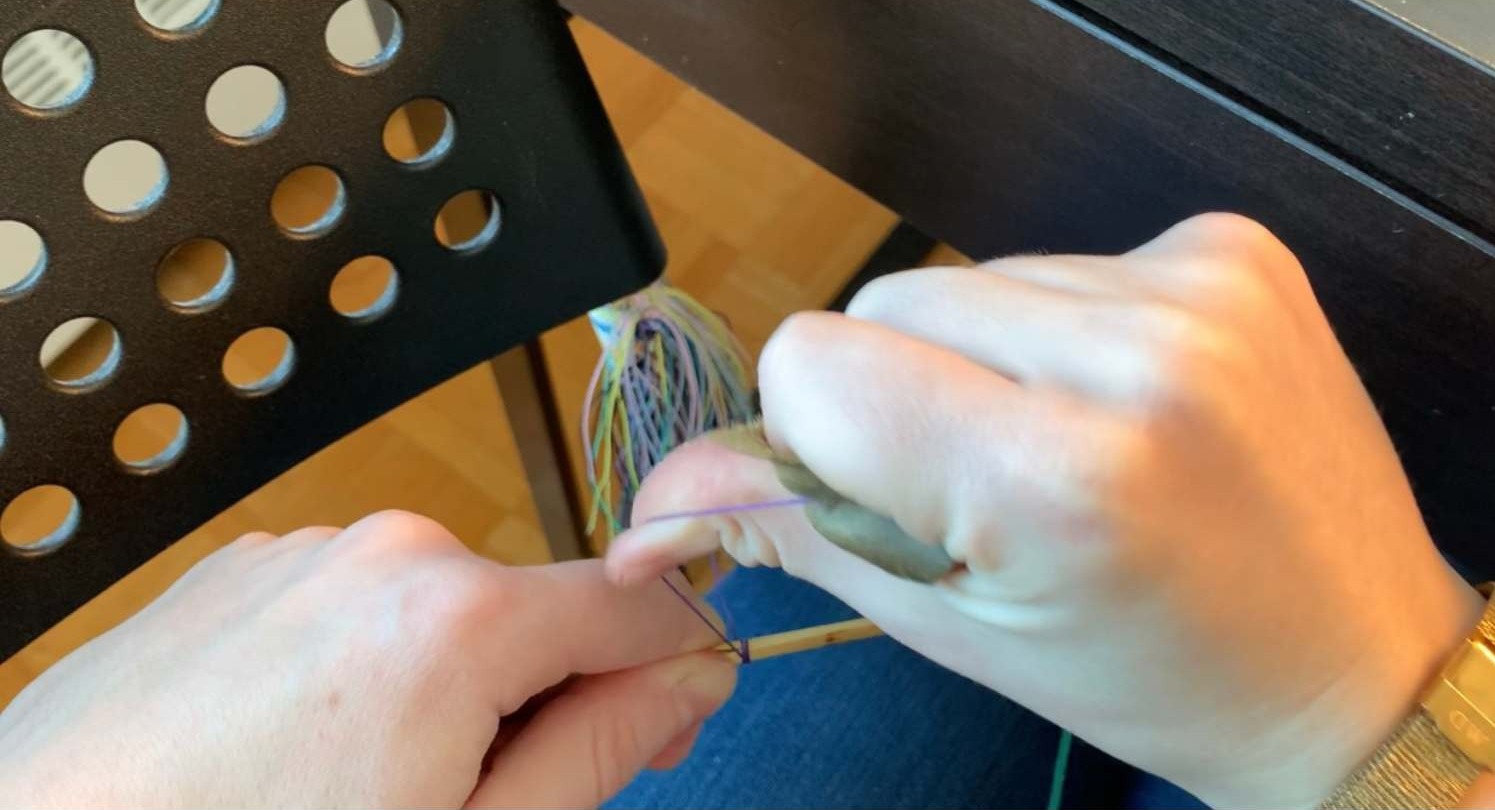
7. Wrap the thread 3-5 times more, now heading in the direction of the bottom of the staple.
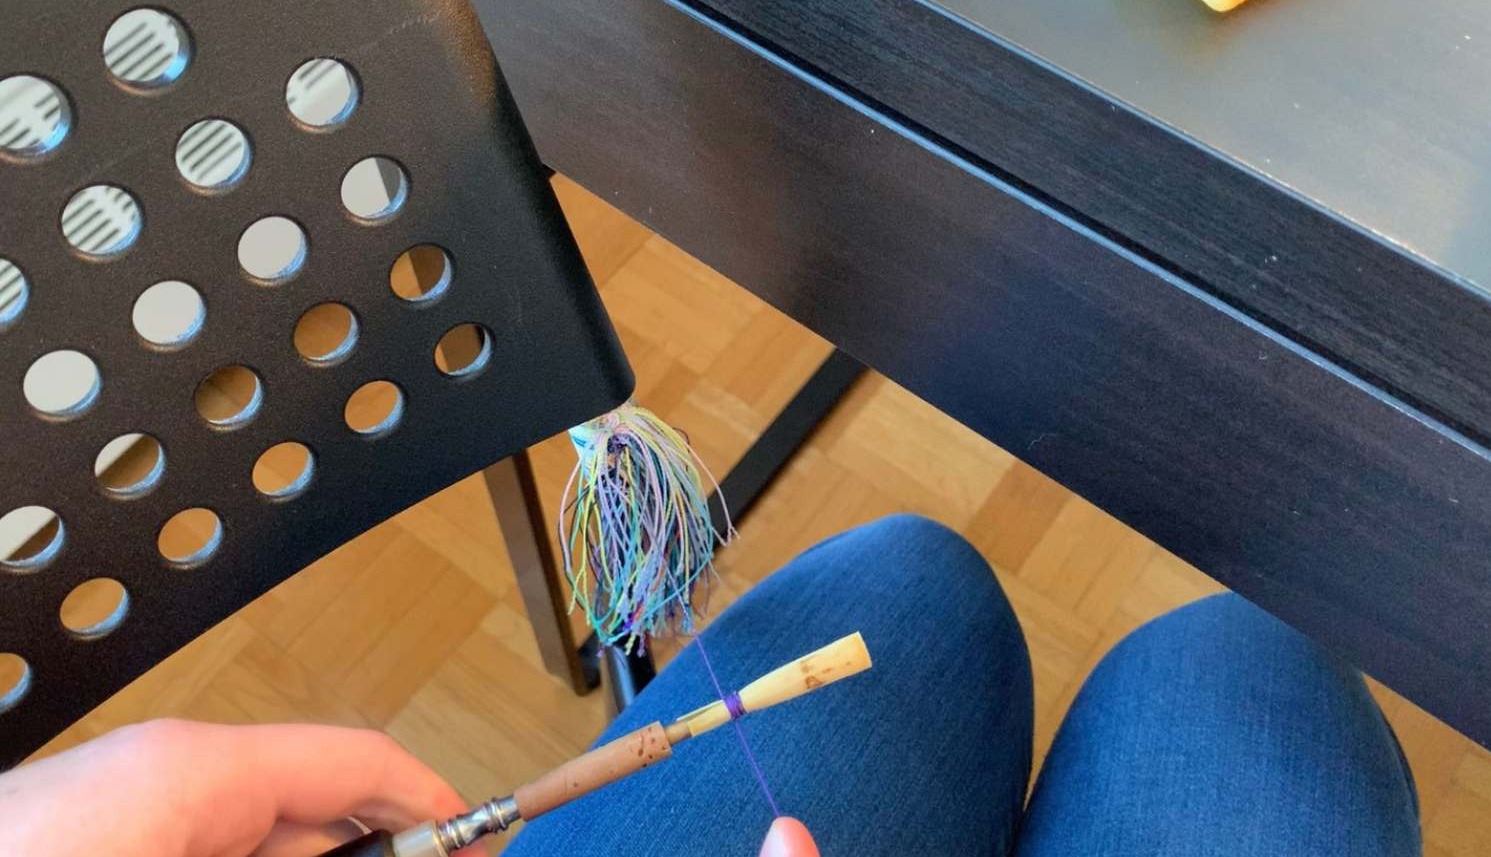
8. Pinch the base of the thread (in the place you just stopped wrapping) strongly with your non-dominant hand, in order to maintain the thread tension.
9. Measure your reed with your dominant hand, while pinching with the non-dominant hand. Measure to ensure the top of the thread lines up with the top of the staple (usually 47mm) and that your total reed length is still the same desired length (between 72-74mm).
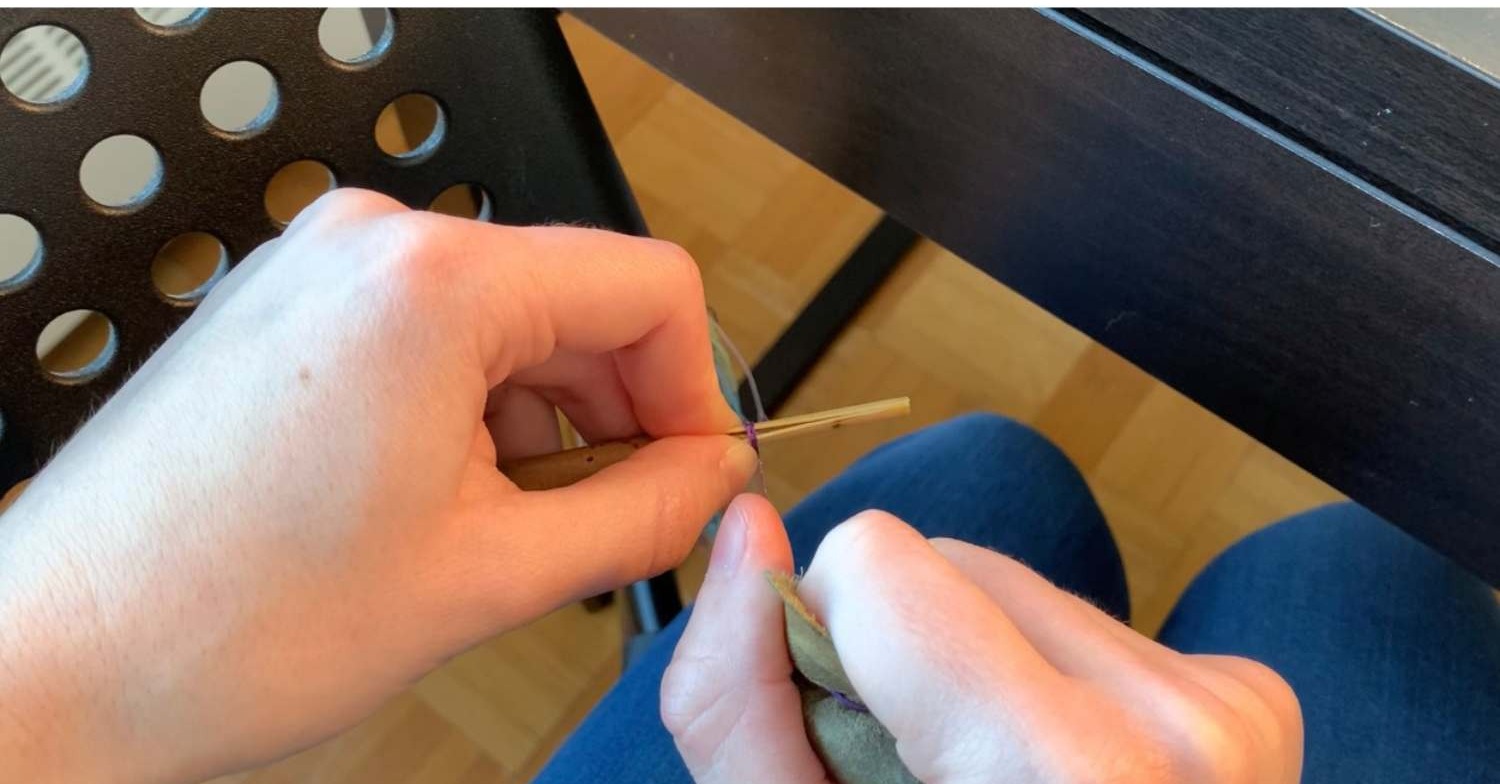
10. If the measurements are not correct, undo the crossover thread and adjust before trying again. I usually have the most success by undoing all the thread and starting over. Trying to make adjustments while the thread is under tension usually results in a crooked reed
11. Once the measurements are correct, continue wrapping the reed all the way down to the cork while maintaining thread tension in your dominant hand.
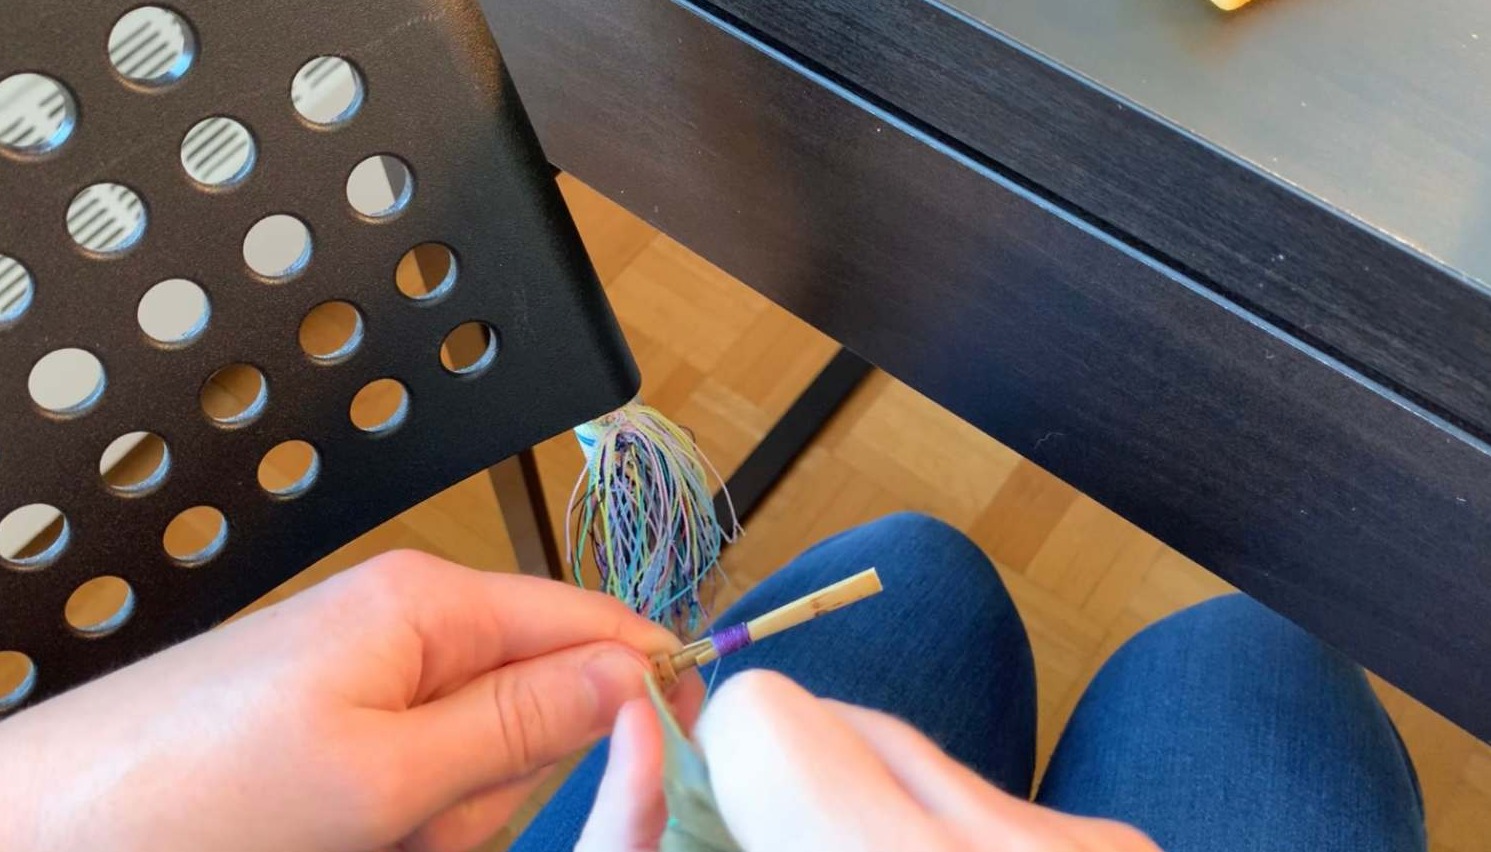
12. About 1mm above the cork, pinch the thread again with your non-dominant hand.
13. Use your dominant hand to create a loop with the side of the thread that is tied to the chair/C-clamp. Put the loop over the top of the reed and tighten it once it’s at the base of your thread — this loop creates a knot. After this knot is secured, you can release the tension.
14. Create 2-3 more loops with the spool side of the thread and loop them over the top of the reed to create more knots. Pull strongly to secure the knots.
15. Cut both threads with scissors or a razor blade to release the reed.
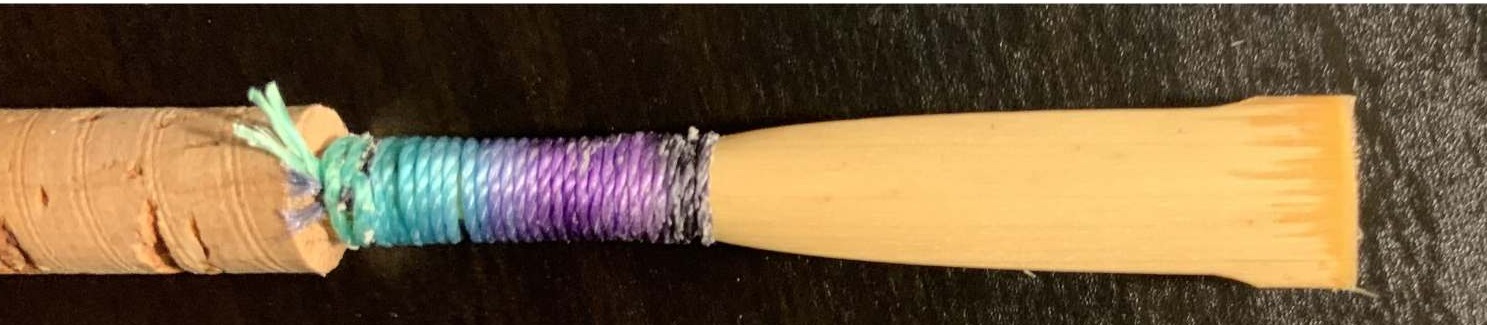
16. Congratulations, you have a tied reed!
After the Reed Is Tied (20:52)
Once you have tied your reed, it is now called a reed blank (or just a blank), meaning it is tied but not yet playable.
Before putting your blank away, you will need to make a few adjustments first!
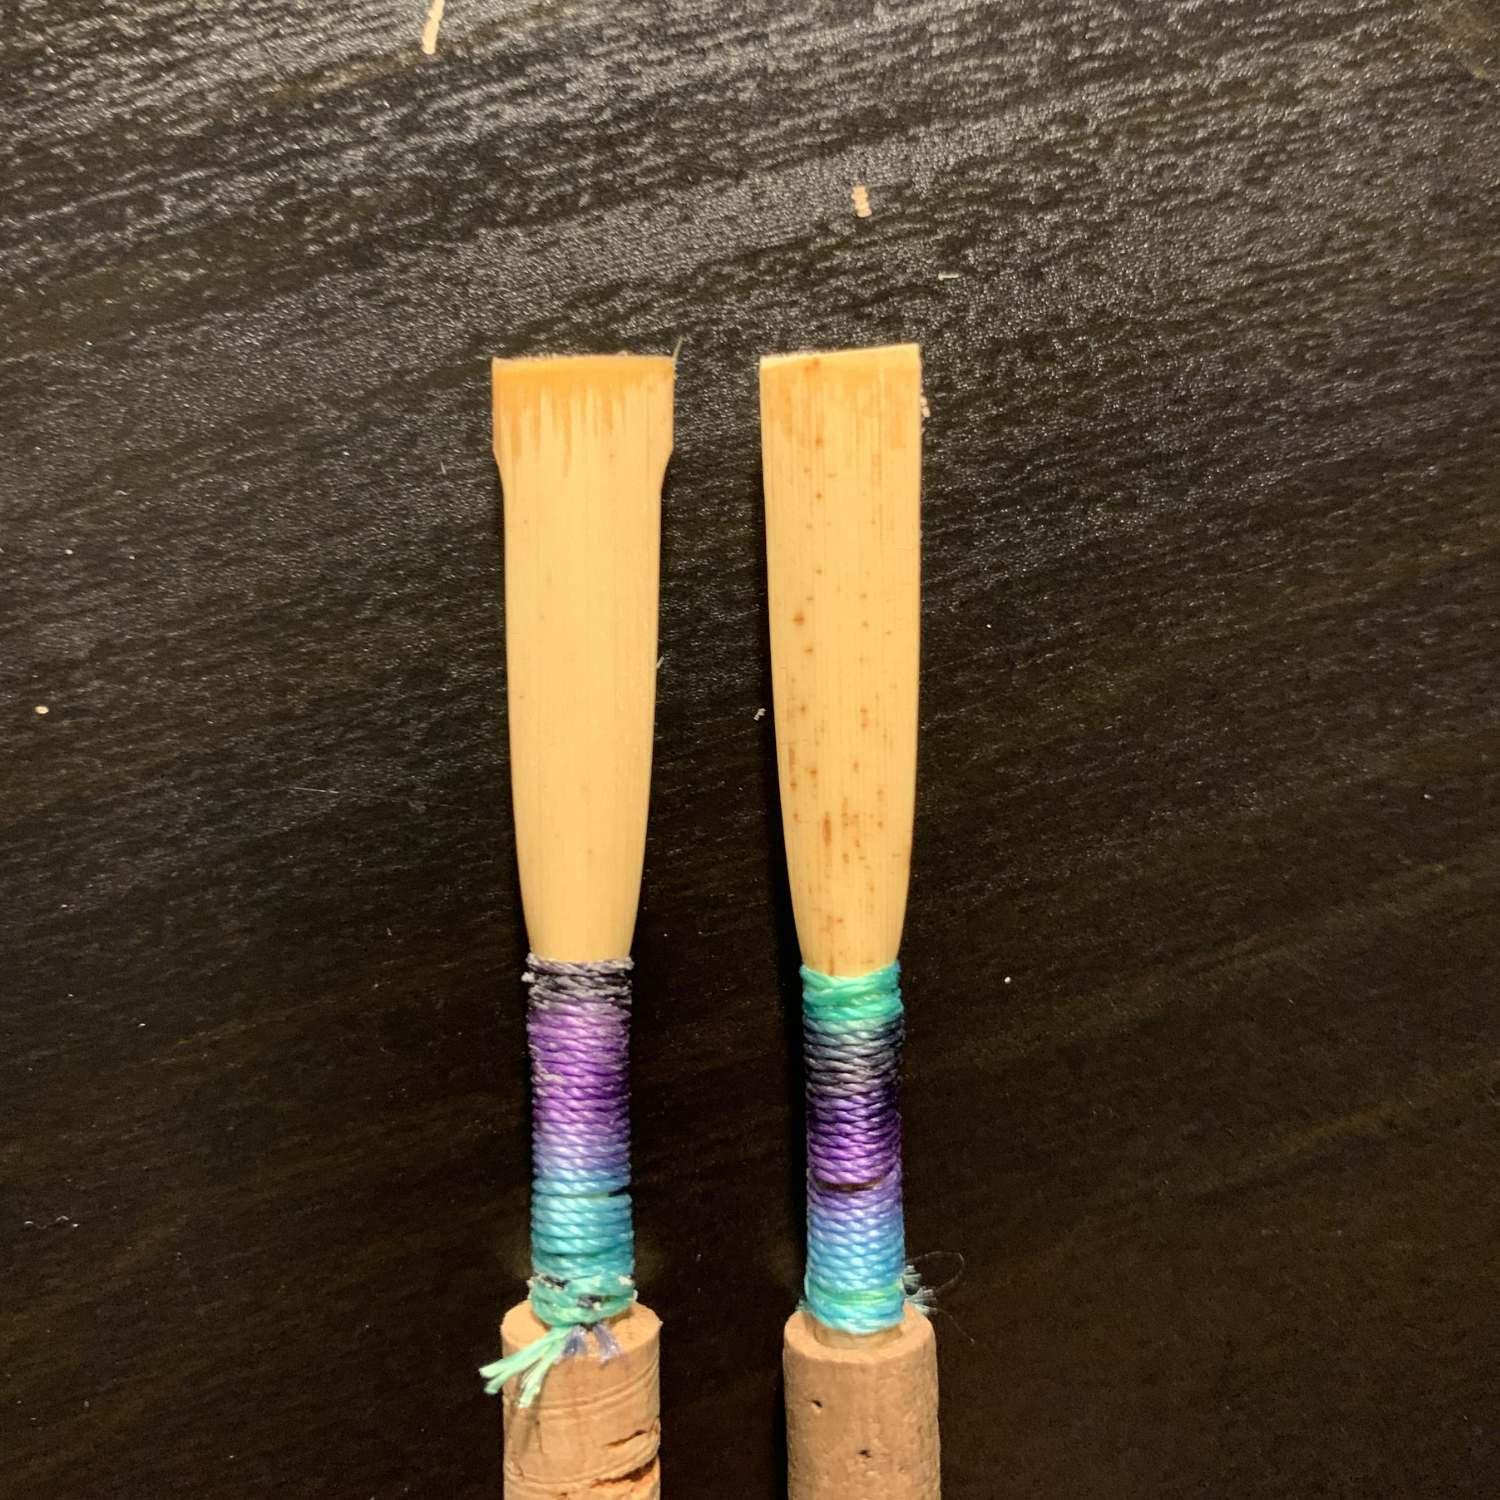
First, if your cane has ears, meaning wider chunks of cane at the top of the reed, you will need to carefully remove them. Some gouged and shaped cane has the ears removed already, so if your cane doesn’t have ears, you don’t need to remove any more cane on the sides.
Here are two blanks, one with and one without ears:
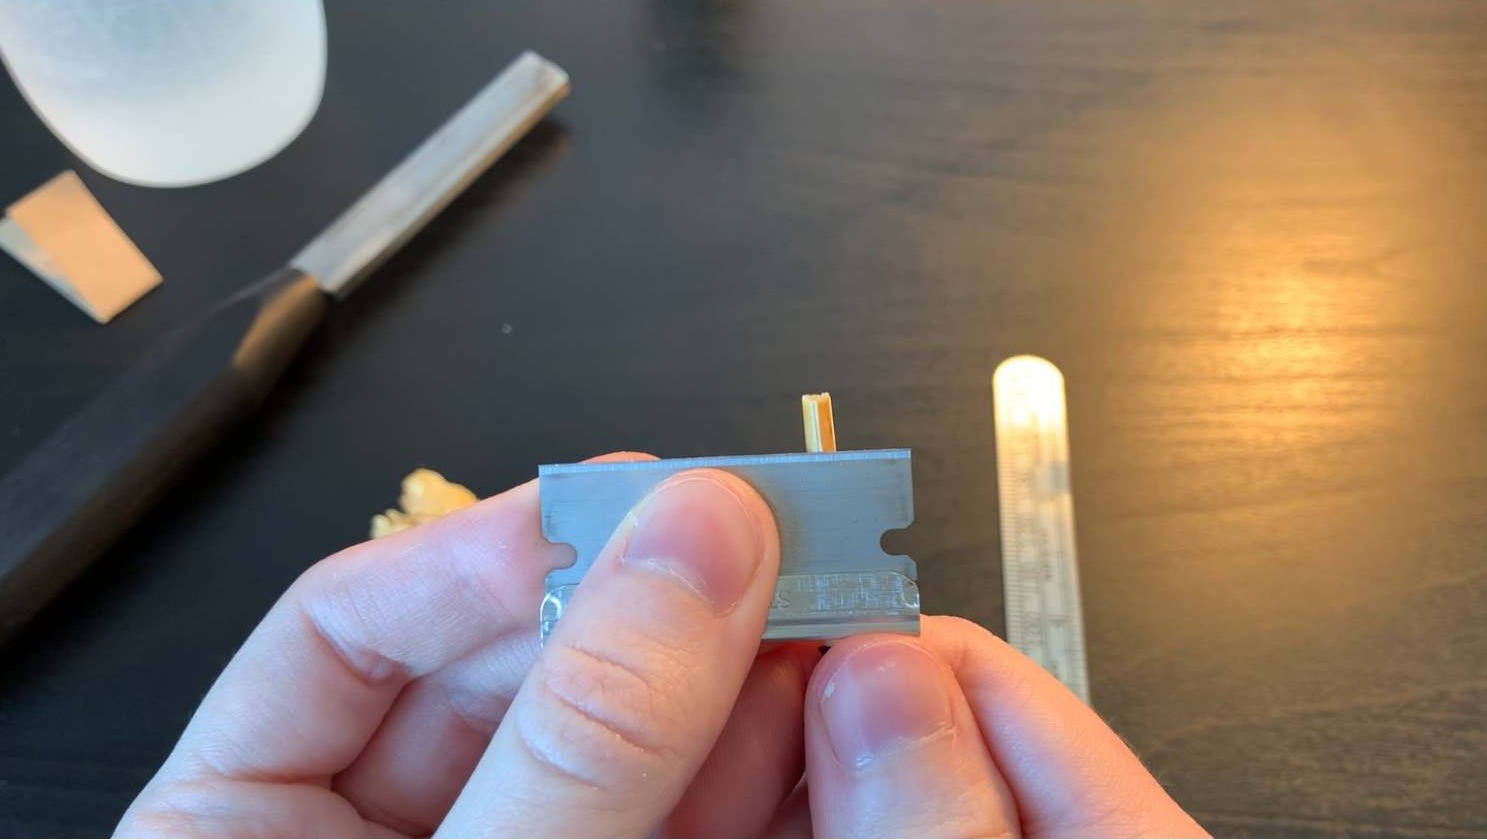
To remove the ears, use a new razor blade. Pointing the razor blade away from you, use your thumb to gently push the razor blade into the base of the section of cane that sticks out. You can also put the blank upside down on a cutting block and cut downwards using the razor blade. Ensure the ears are cut off parallel to each other, without cutting further into the reed itself. Use some sandpaper to smooth it off.
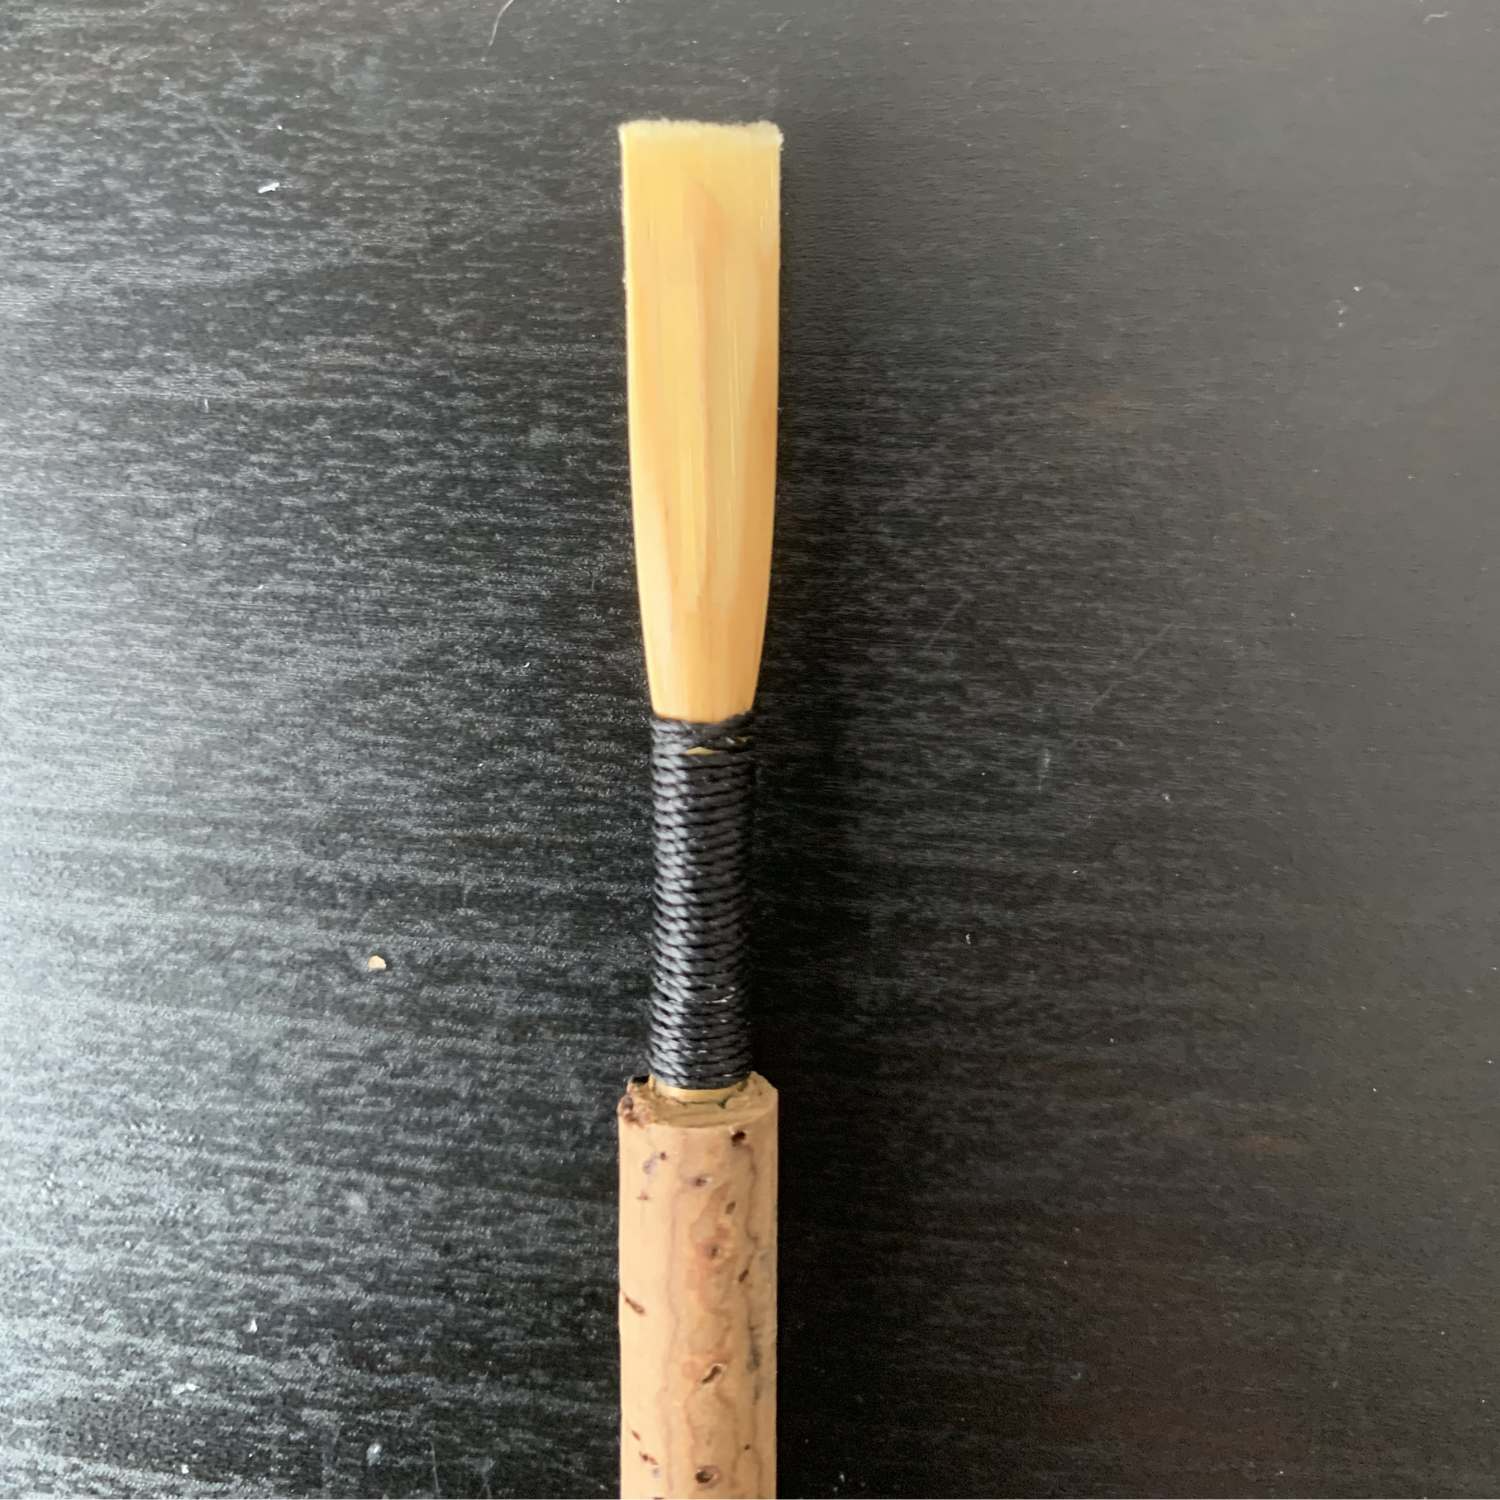
Now that the ears are removed, you will need to scrape the blank a little. Scraping the blank allows the cane to ‘get used to being a reed’ before you fully scrape it and cut it open. Simply use your reed knife to remove the bark (the shiny exterior of the cane) from the tip of the reed, and create two channels on either side of the reed. Be careful not to scrape in the middle of the reed. It should look like this:
Next, decide whether you want to clip the blank open and scrape it into a reed right away, or let it sit. Clipping it right after tying will create a very open reed, and letting the blank sit creates a more closed reed.
I recommend beginners let the blank sit at least 2-3 days, ideally longer, before clipping it open and scraping it into a reed. This will create a more manageable, beginner-friendly reed opening.
I personally let my blanks sit for 2-3 weeks before clipping and scraping them into reeds. I would encourage more seasoned reed-makers to experiment with different ‘blank maturing’ timelines to find what works best for you! If you like more open reeds, try clipping sooner, maybe even right after tying. Or if you are looking for more closed reeds, try maturing for longer.
You can even combine this with the variable of diameter (smaller diameter cane yielding more open reeds, and larger diameter yielding more open reeds). Perhaps a smaller diameter plus a longer blank maturing timeline, or clipping a larger diameter blank right away, will create a winning combination. Keeping track of your experiments in a reed-making journal can be very useful!
What to do about cracks in my reed? (28:45)
If you notice your reed is cracked close to the thread, do not worry! A small crack close to the thread can actually be a good sign. Harder, denser cane is more likely to crack close to the thread, and this type of cane usually makes great reeds (in my experience).
You can make some crosshatch cuts with a razor blade along the crack to prevent it from extending further up the reed, like this:
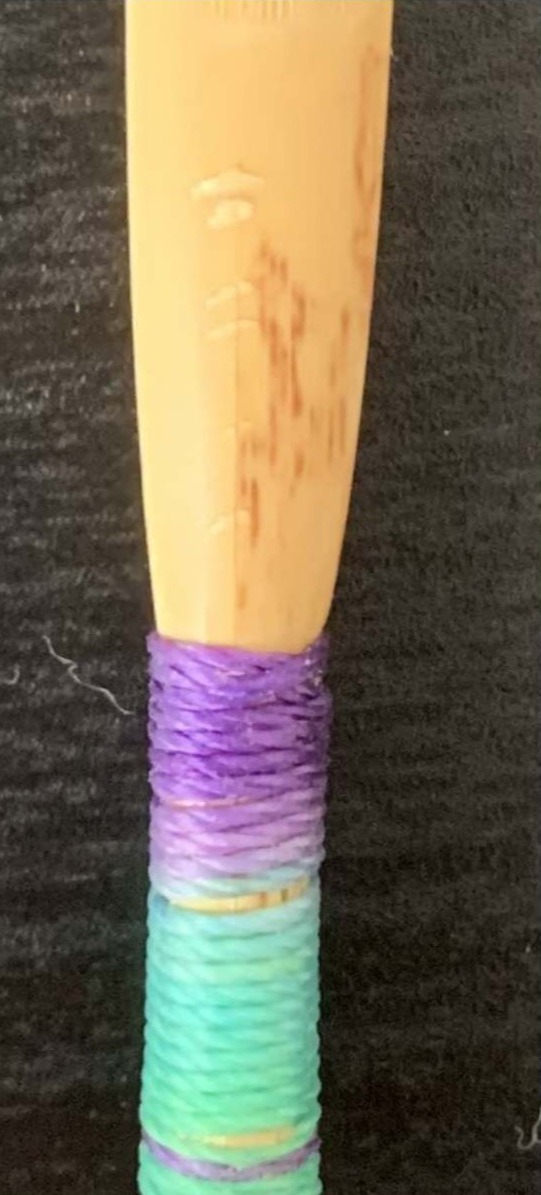
However, a crack that is too large or extends more than a third of the way up the reed may leak. Check any cracked blank for leaks by dipping it in water and blowing air into the base of the staple.
If your reeds consistently have large cracks near the thread, you may need to soak your cane longer before tying, or tie the reed to a longer total tie length.
What Does Slipping the Cane Mean? (30:49)
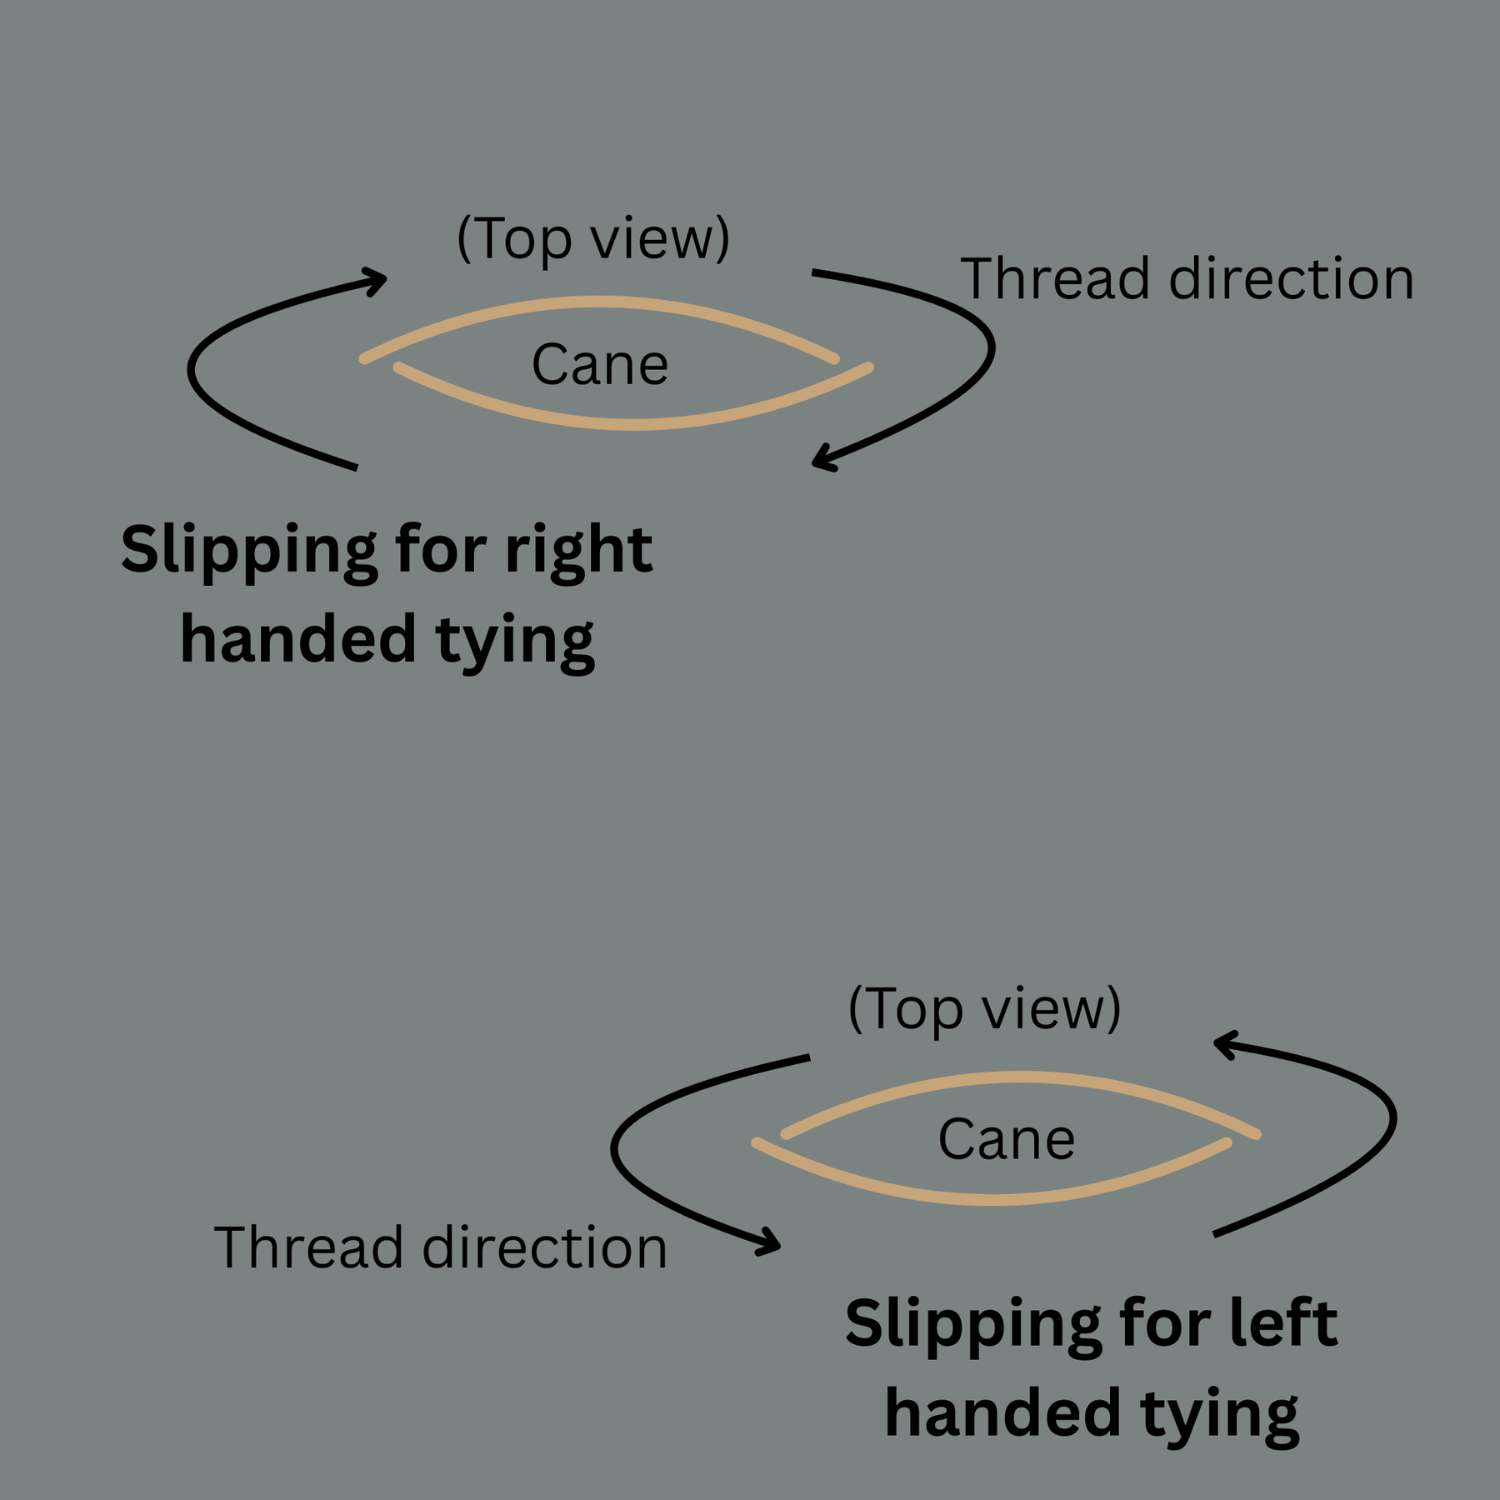
A more advanced topic, slipping the cane means tying the cane pieces slightly off-center, so that the directional force of the thread pulls the cane into itself, therefore creating a tighter seal. It is done right before tying the reed.
First, hold the cane on the staple and look at one side of the flat portion of the cane. For right-handed reed makers, move the piece of cane closest to you slightly to the right, and the piece furthest from you slightly to the left. For left-handed reed makers, it will be the opposite.
And here’s what the side of a ‘slipped’ blank looks like, made by a right-handed reed maker. Notice the lower blade of cane is tucked into the blade on the top.
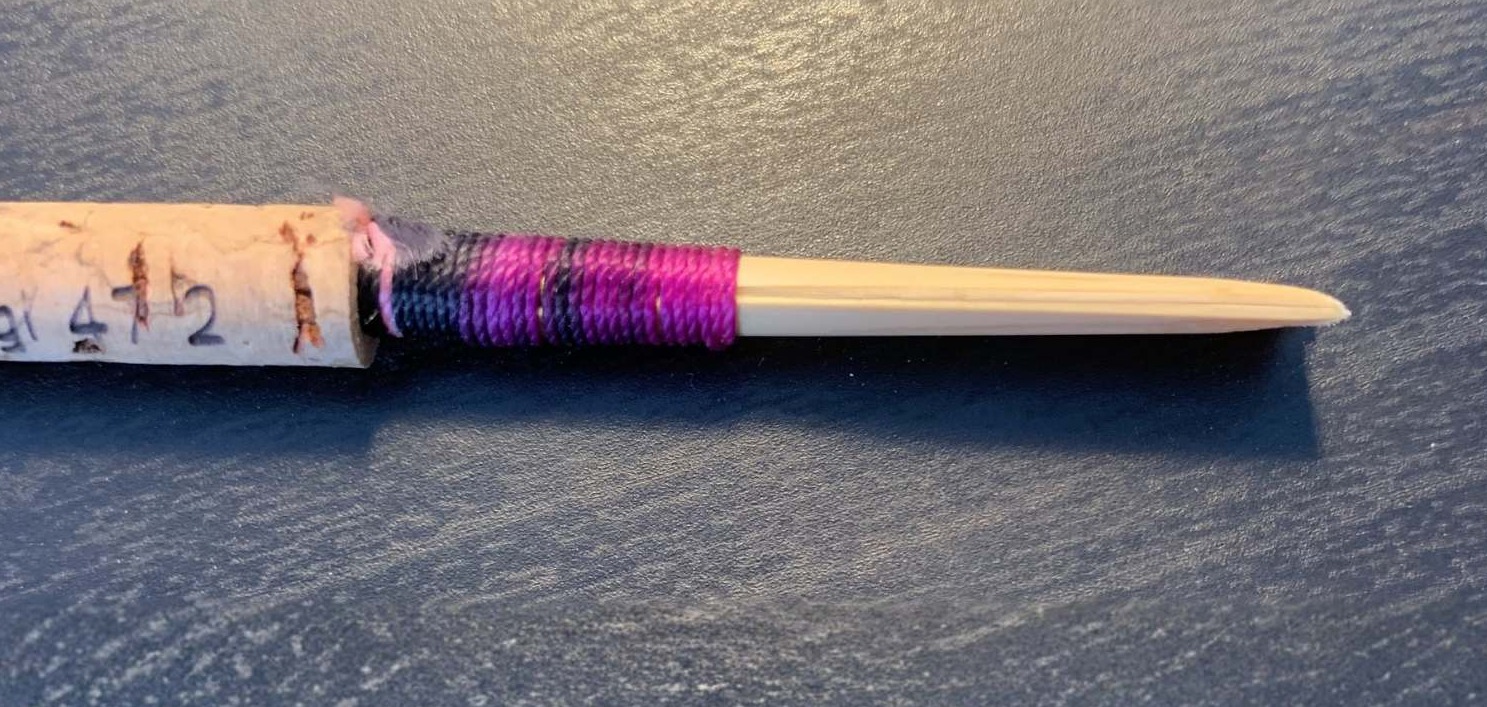
If this sounds too daunting for you, simply tie with the pieces of cane parallel with each other for now. With time and practice, you will eventually feel up to the task of slipping the cane!
Conclusion
I hope you have enjoyed this overview of how to tie an oboe blank! For a more visual explanation of the process, check out our How to Tie an Oboe Reed video.
0 comments