
How to Start Your Practice Session:
Warm Up & Fundamentals
Are you looking to increase your productivity during your practice time? In this article, oboist Anna Betuzzi and bassoonist Zachary Senick will walk you through some techniques for warming up and working on the basics of your playing. These techniques are fundamental to all aspects of your music-making and will help you learn music more efficiently and effectively.
Read on to find out where to start!
Setting yourself up for success
The first step for an effective practice session is creating a space where you can truly focus. If possible, dedicate one corner of your living space as your ‘practice nook’ and keep your music stand, music folder, and instrument all in one place for easy access.
Next, make sure your practice nook is free of clutter and distractions. A quick 5-minute tidy of your space can do wonders for your concentration.
How to organize your practice session
While your daily practice plan will differ depending on the specific goals you are working towards, we recommend incorporating these four elements into each session to maximize your productivity:
- Warm up: taking the time to properly warm up your instrument and your body will ensure an enjoyable practice session. It also helps to prevent injury to yourself and prevent damage to your instrument.
- Etudes: these are short exercises or pieces of music written for your specific instrument. They target specific elements/challenges on your instrument, such as articulation, technique, rhythm, intonation, and musicality.
- Repertoire (or Ensemble) pieces: these are the pieces of music that you are actively working on, including excerpts for an audition, pieces for a concert, or even a fun piece that you enjoy playing. Check out our other article on How to Learn Repertoire Effectively for more info on this topic!
- Breaks: even a 5-minute break in the middle of a practice session can increase your focus and productivity!
How to warm up properly
Warming up to play a wind instrument, especially woodwinds like oboe and bassoon, involves two components:
- Warming up your body (just like an athlete would stretch and do gentle exercises to prepare for a workout session)
- Warming up the instrument
Here are some ways to warm up your body:
- Do some stretches, especially the muscles that you use to play your instrument (neck, arms, wrists, chest/back, so you can breathe well, etc.)
- If you have chronically cold hands (like Anna does), warm up your hands on your neck or under your armpits, or consider wearing gloves in the winter. You can also rapidly open and close your fingers for 30 seconds to a minute to increase circulation in your fingers.
- Try some breathing exercises. These help warm up your body, and also help put your mind in a more relaxed state so you can concentrate better. There are many variations of breathing exercises out there, but you could start by inhaling for a count of four and exhaling for a count of eight.

Warming up your body will allow you to play your instrument with the least amount of tension in your body, which will give you a better sound quality and an improved playing experience. It also helps reduce the risk of injury, especially overuse injury, which, unfortunately, is common among musicians.
Warm up your instrument
Your instrument needs to be gradually warmed up as well, including both the physical temperature of the instrument and in the way you first make a sound.
Oboes should be physically warmed up before playing, especially the top joint. Warm it using the heat of your hands, or tuck the top joint under your arm. If you play on a cold instrument, your pitch will be very flat, and you risk getting condensation stuck in the tone holes. Special care should be taken to warm up a wooden oboe. Playing a cold wooden oboe risks cracking the wood and should not be done under any circumstances.

The bassoon is very similar, where the pitch will be flat if the instrument is physically cold. If possible, allow the instrument to warm up to room temperature after travelling outside. Because a bassoon is lined with metal and has a wider bore, there is less of a worry for it to crack. After a couple of minutes playing on a cold bassoon, the pitch will rise. The main thing one will notice playing on an instrument before it is at room temperature is that condensation will build faster in the instrument, particularly the boot and the bocal. This will require the bassoonist to swab sooner in their practice session.
After your instrument is physically warm, take 5-10 minutes to play ‘low and slow.’ In other words, play only lower notes on your instrument in a very slow, legato manner. On oboe, Anna recommends playing from middle E-flat and down for at least the first 5 minutes (in other words, don’t use any octave keys at first). On bassoon, a player should start their practice session in the middle range at a comfortable dynamic level. Pay special attention to keeping steady support, air speed, and voicing as you expand the range and dynamic levels.
Fundamentals
After warming up your body and instrument, we recommend spending 5-10 minutes on fundamentals, which are the basic concepts that elevate your overall skills. Fundamentals can include long tones, intonation, scales, and articulation exercises, and you can mix and match which exercises you work on in each practice session, depending on your specific short and long-term goals.
Long Tones
Long tones are a type of exercise that can be done on any wind instrument. They involve playing one pitch over an extended time, usually around 6-8 seconds, while varying the dynamic level (volume) of that pitch.
Long tones help improve your control over your instrument, especially by expanding your dynamic range and helping develop stable intonation. Take special care to maintain your pitch as you increase and decrease volume. The oboe and bassoon have a tendency to change pitch when getting louder or softer.
Here’s a written example of a long tone exercise:
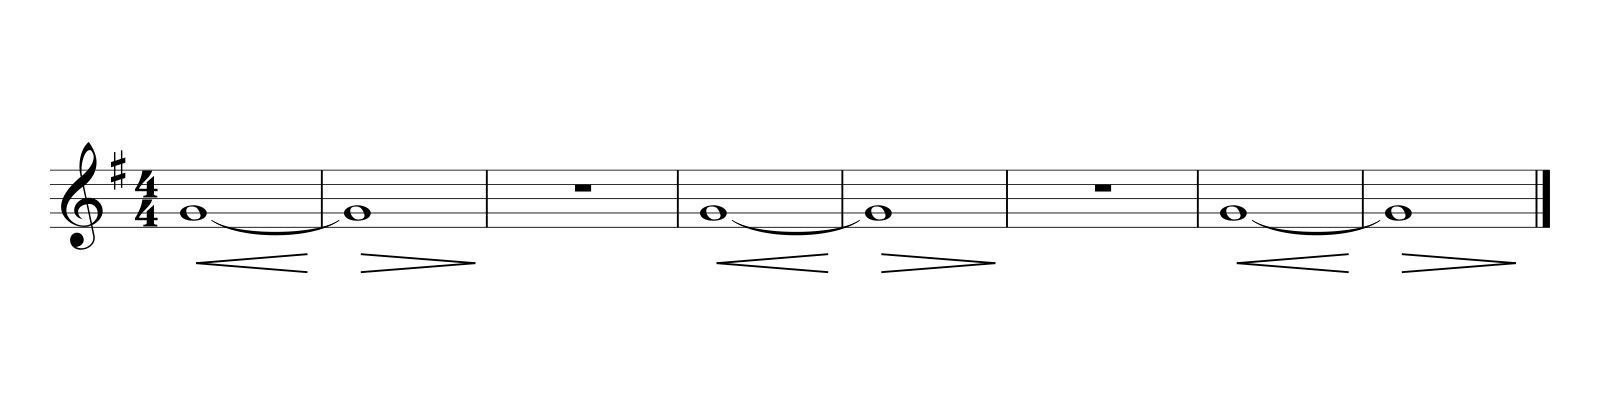
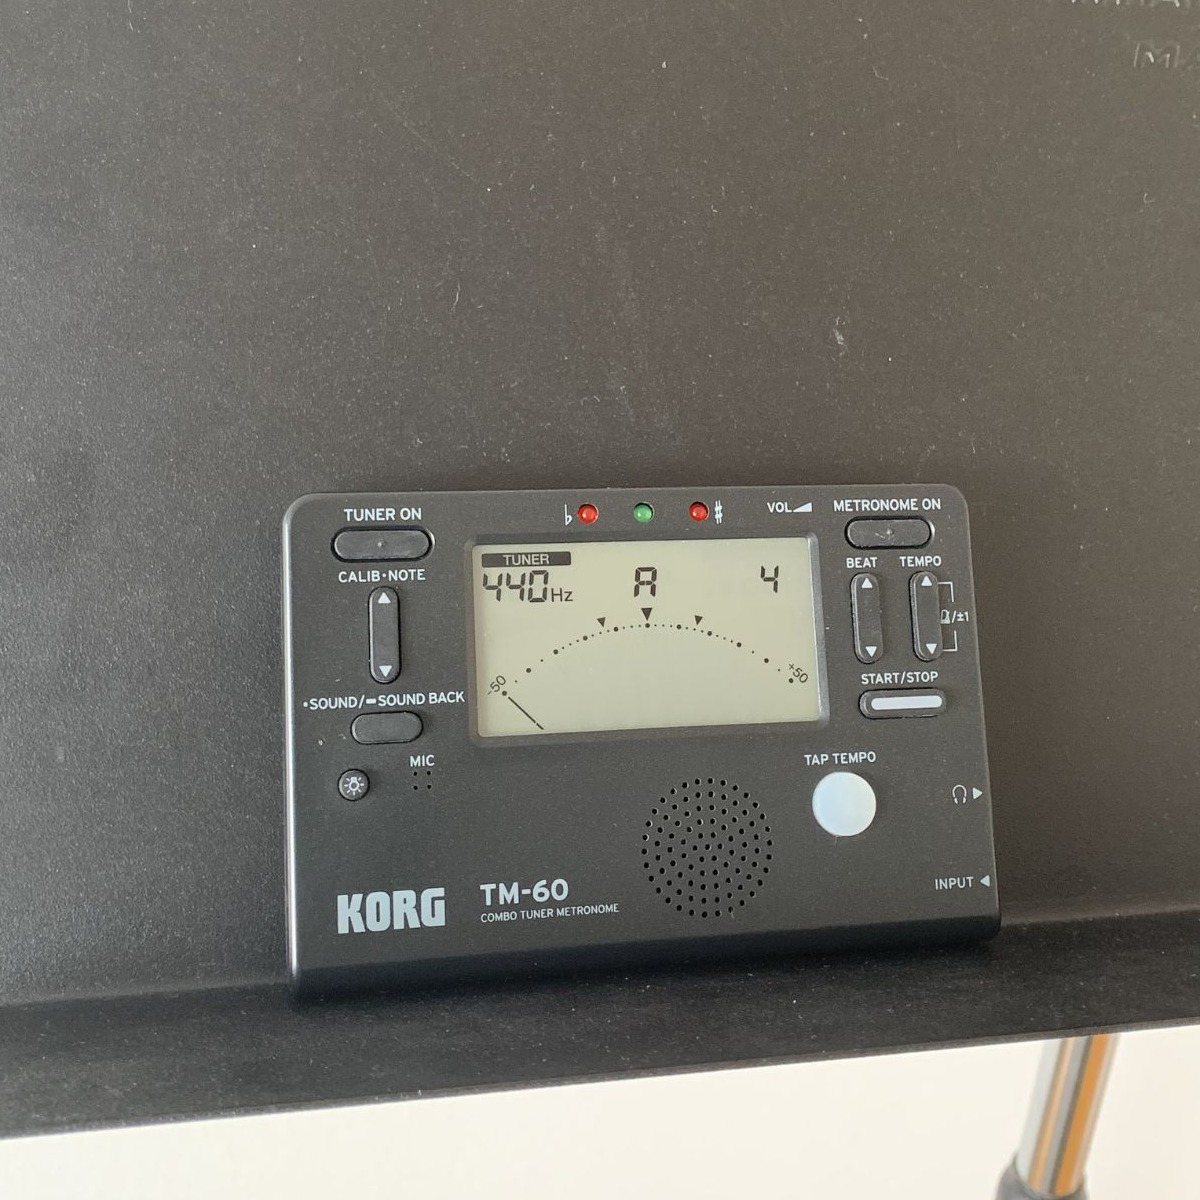
We recommend using a tuner and/or a drone while practicing long tones, as this will enable you to determine what your own pitch tendencies are when playing loudly or softly. Work towards a smooth, gradual crescendo and diminuendo to your maximum loud and soft dynamics, while maintaining the same pitch level.
Be sure to practice long tones on as many different notes as you can, ideally from your lowest note all the way up to your highest note. This will help you gain control over your entire range!
Long tones can also be used to develop your vibrato. You can experiment with different speeds and amplitudes of vibrato. Then add the vibrato to your crescendos and diminuendos to develop a wide palette of vibrato colours to use in your performances.
Practicing long tones can also help improve your sound quality. By going back to the fundamentals, this allows you to figure out what air support, embouchure, and voicing are needed to achieve the most resonant and in-tune sound on every note.
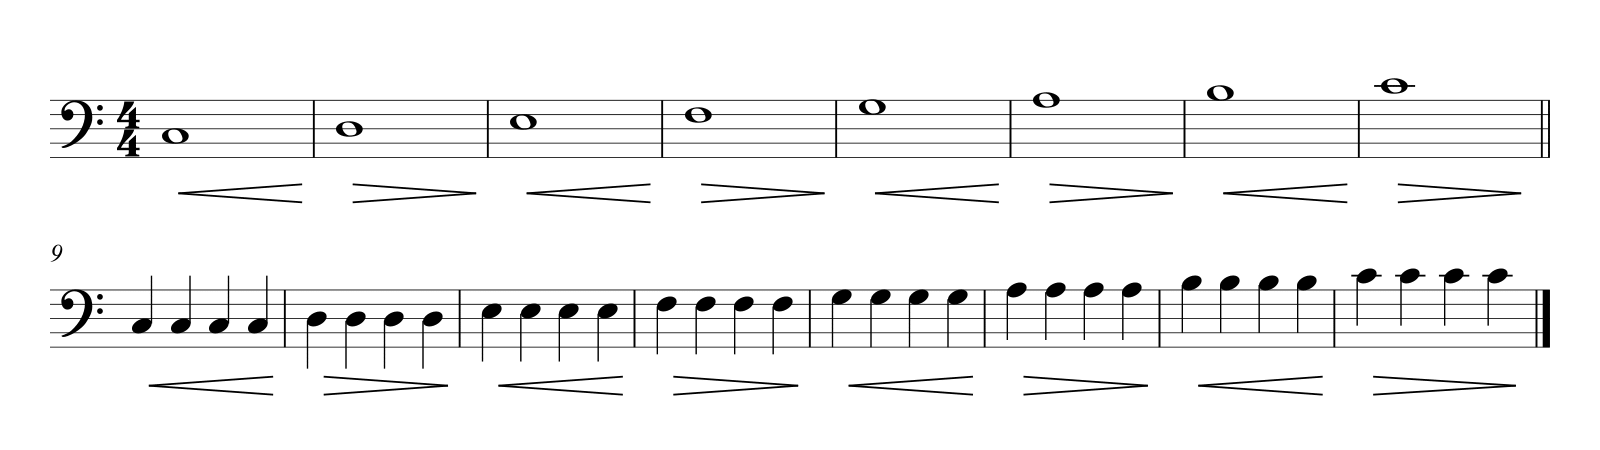
As you make progress in your long tones, begin to add slow and repetitive articulation to isolate how to articulate while keeping the resonance and pitch even.
Here is a sample exercise based on C major (written for bassoon but can be played up the octave on oboe as well):
Intonation
Practicing intonation (or tuning) is very similar to practicing long tones. Using a drone to practice intonation is a great way to improve your ear. Many tuner devices/apps have a built-in drone function that you can use.
If you’re not sure where to start, here’s a sample routine for practicing intonation with a drone:
- Set the drone to the tonic note of your choice. Let’s use C for this example.
- Start by playing in unison with the drone. Listen carefully to match your sound colour to the drone.
- Next, play a note one octave higher than your drone, in this case, a high C. Again, listen so you match the sound colour of the drone. An octave should have a pure, open sound.
- Now, play Perfect 4ths and Perfect 5ths above your drone. Above a drone on the note C, this would be an F and a G, respectively. Similar to an octave, Perfect 4ths and 5ths will have a pure, open sound, so listen for that as you practice.
- Finally, play Major 3rds and Minor 3rds above your drone. Above the note C, this would be an E and an E-flat, respectively. These intervals will need to be tuned a bit differently than perfect intervals: the top note of a Major 3rd needs to be a bit lower than usual, and the top note of a Minor 3rd needs to be a bit higher than usual. When you are in tune with the drone, you will hear a steady buzzing sound, and this sound will be much more obvious than when you play a 4th, 5th, or octave.
How to tell if you are in tune?
An interval is considered ‘in tune’ when the overtones (or the resonant frequencies above a pitch) are in harmony with each other.
When you are out of tune, there will be a pulsing or beating sound. This happens because the overtones are going in and out of alignment with each other. The closer you get to being in tune, the slower this pulsing or beating will get. Once you arrive at the correct intonation, the pulses/beats will stop entirely.
To train your ear to hear these pulses/beats, put on a drone and play in unison with it. Then, slowly bend your pitch up and down, and notice what happens!
If you have the opportunity, practicing intonation with another person can also be very useful (and fun!). Take turns ‘being the drone’ by holding a long note while the other person tunes different intervals above that drone note. Bonus points if you both play the same instrument—this will make the overtone buzzing much more obvious when you are in tune with each other!
Scales
There are many different ways to practice scales in order to keep them interesting.
First, you can expand the types of scales you practice. Major, natural minor, harmonic minor, melodic minor, chromatic, and whole tone scales are just some of the scale types you can learn. Start by gradually learning all 12 major and all 12 harmonic minor scales, so it’s easier for you to play any piece of music in those keys. There are many ways to organize your learning, but most people start with C Major and then add one sharp or one flat as they go. (This is known as the Circle of Fifths.)
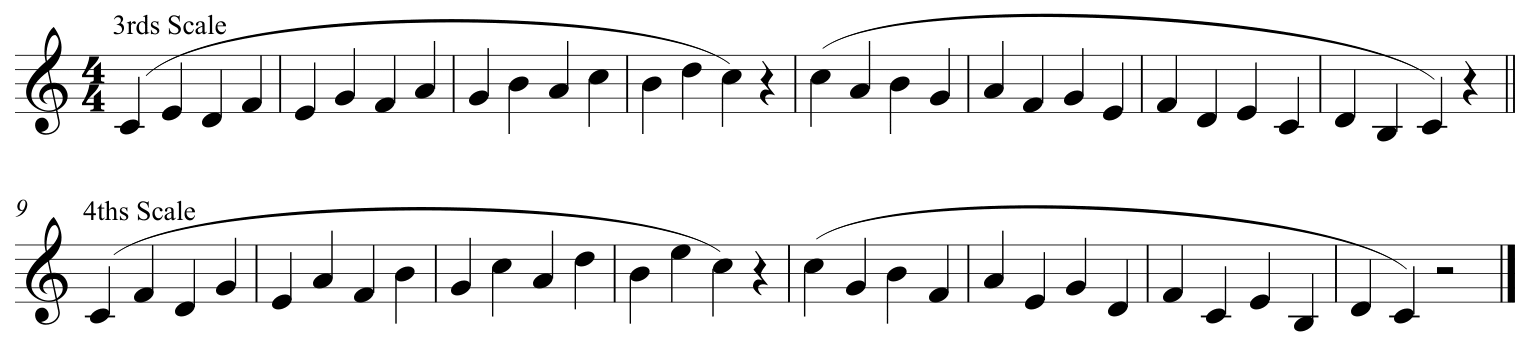
You can also try different scale patterns. 3rds and 4ths are an excellent way to get your fingers around the notes, while improving your legato on larger interval jumps. Here’s an example of a C major scale in 3rds and 4ths:
Similarly to long tones, you can also practice your scales in different dynamics. Try getting louder as you go up, and softer as you go down, and vice versa.
You can also practice scales using different articulations. Try all slurred, all staccato, or some combination of the two.
Many etude and method books include scale patterns you can try, so be sure to check them for ideas.
Articulation
Articulation is the way that a note is started and/or ended. On oboe and bassoon, articulation is produced with a combination of the tongue, air, and support.
There are a huge variety of articulation types, from very short and separated (staccato) to completely connected (legato), with many types in between. If you’re not sure where to start, check your method or etude book. Many of these books will have articulation exercises.
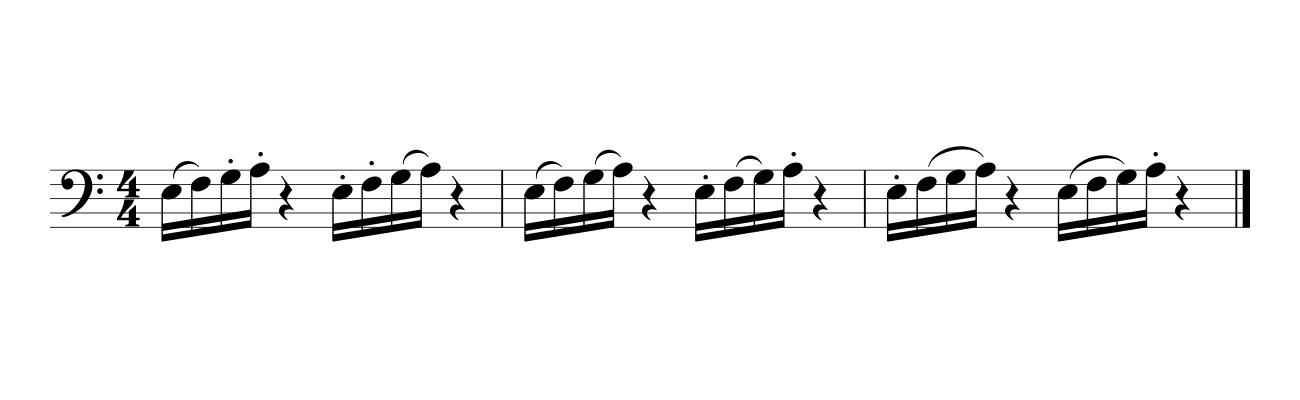
Here are some examples of different articulation patterns you can try:
Anna’s preferred exercises for oboe are in the Barret Oboe Method. The Thirty Scales for the Study of Articulation and the Twelve Articulation Exercises can both be found in his method book.
Zach enjoys taking the Milde 25 Studies in Scales and Chords, op. 24, and playing them in a variety of different articulations rather than just the slurred articulations.
For intermediate and advanced players, you can incorporate single and double tonguing into your practice routine. Play steady repeated notes and scales, both single and double tongued, while focusing on the clarity of your articulation. Be sure to have complete control over your single and double tongue at a slower tempo before speeding it up.
Etudes
Etudes are short exercises or pieces of music written to target a specific challenge on your instrument. They may focus on technique, rhythm, articulation, intonation, and/or musicality. You can select your etudes based on your specific goals.
When practicing an etude, consider the specific challenge that the composer might be targeting with the etude. This can ensure that you get the most out of the etude. Also, try to play the etude as musically as possible, as if it were a true piece of music intended for public performance. This will help you synthesize the concepts you work on in the etude into your repertoire pieces!
Conclusion
We hope this article has set you up to begin your practice session well and improve your fundamentals on your instrument. By incorporating a good warmup of stretching, long tones, intonation exercises, scales, articulation exercises, and/or etudes at the beginning of your practice session, you can improve your playing skills overall. All these techniques will also have a positive impact on how you learn actual music!
If you are looking for tips on how to practice your repertoire music, check out our How to Learn Repertoire Effectively article!