
How to Put Your Oboe Together
A Step-by-Step Guide
So, you just got a new oboe and can’t wait to put it together and start playing? You’ve come to the right place! In this quick guide, oboist Anna Betuzzi will walk you through the steps to safely assemble your oboe while avoiding accidental damage.
Parts of the Oboe
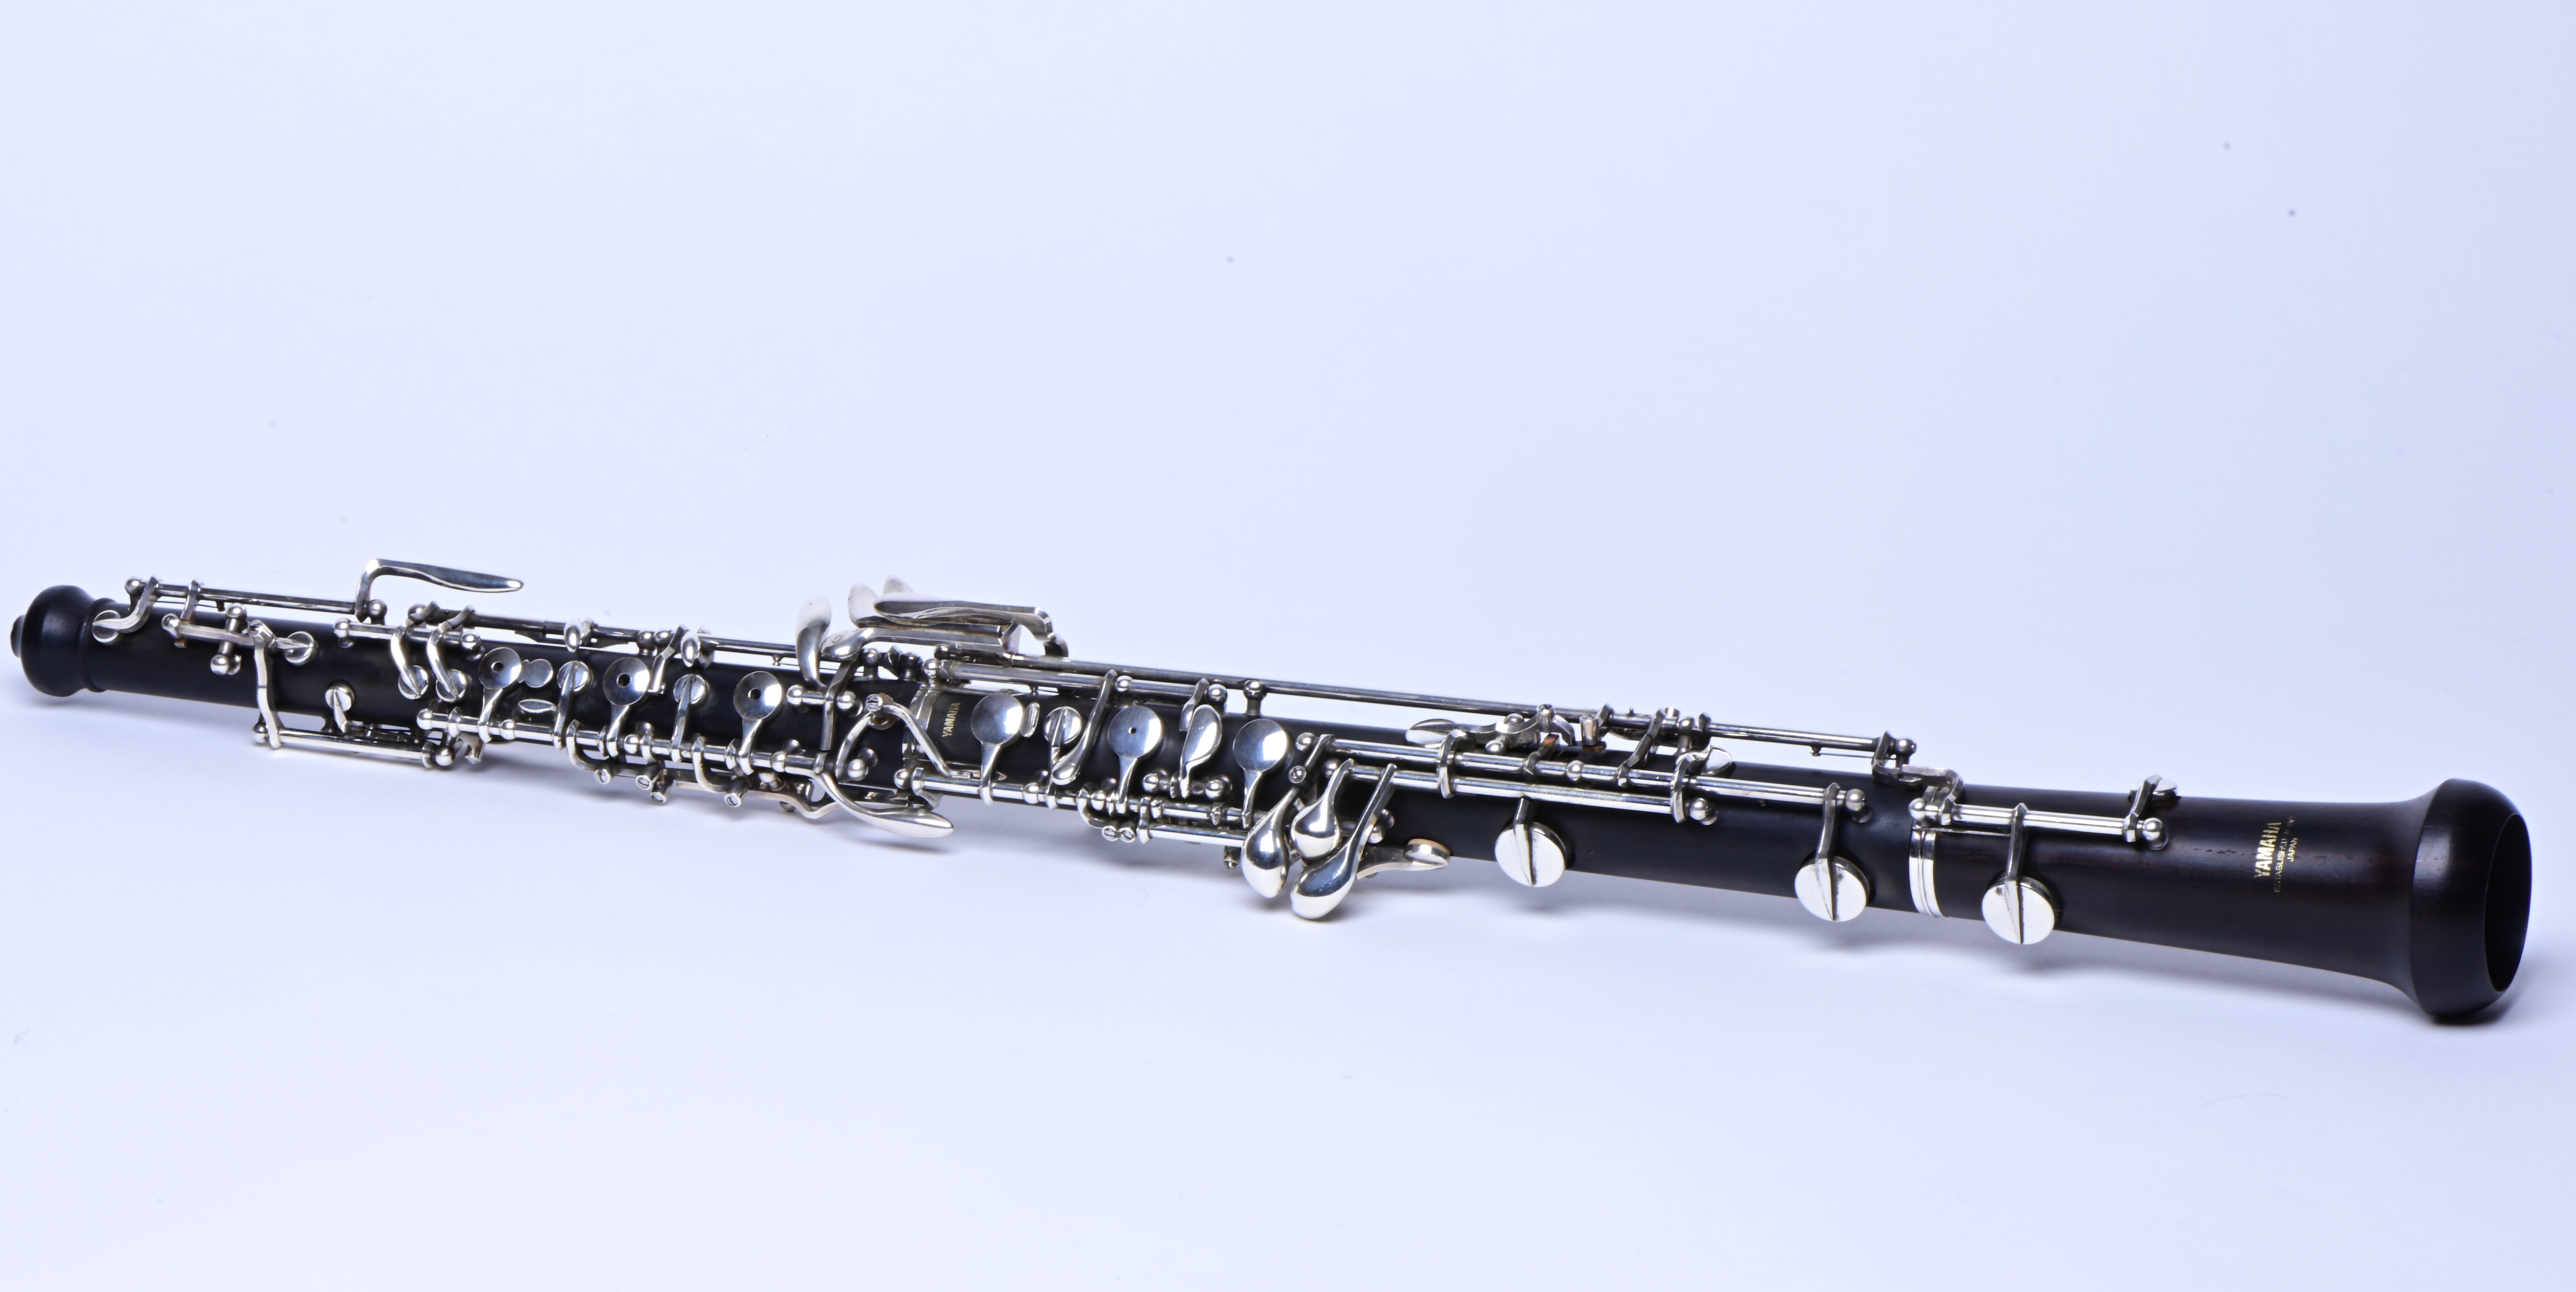
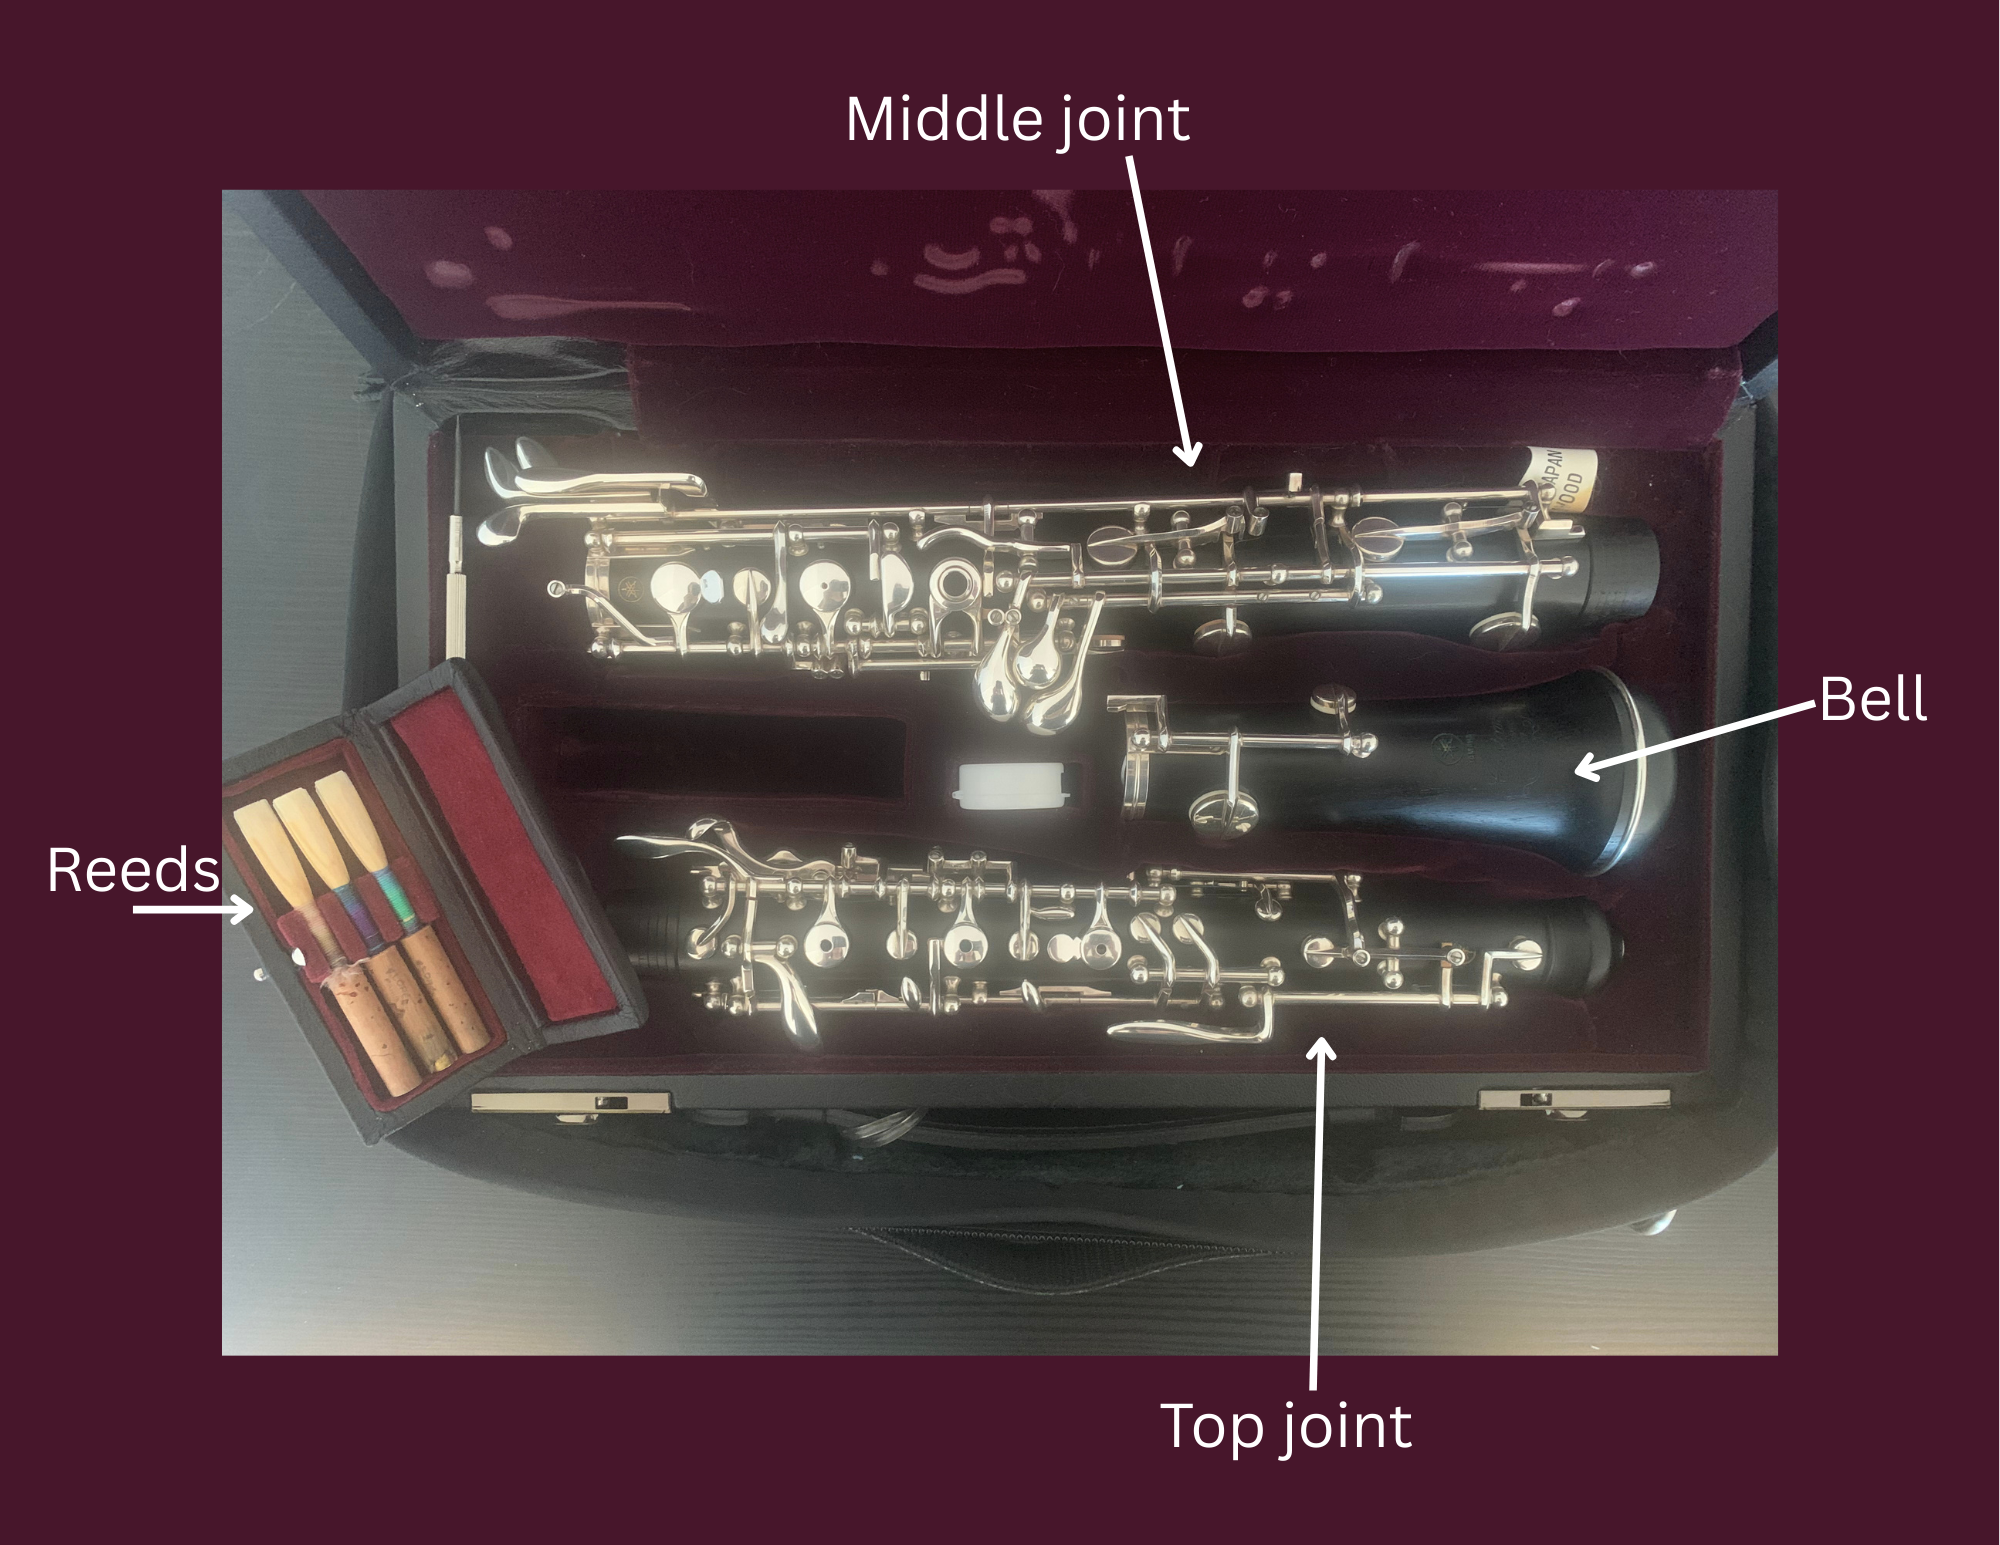
The oboe has four main pieces. There are three pieces made of plastic (or wood) with metal keys on them, plus the oboe reed.
Here’s a diagram so you know which piece is which:
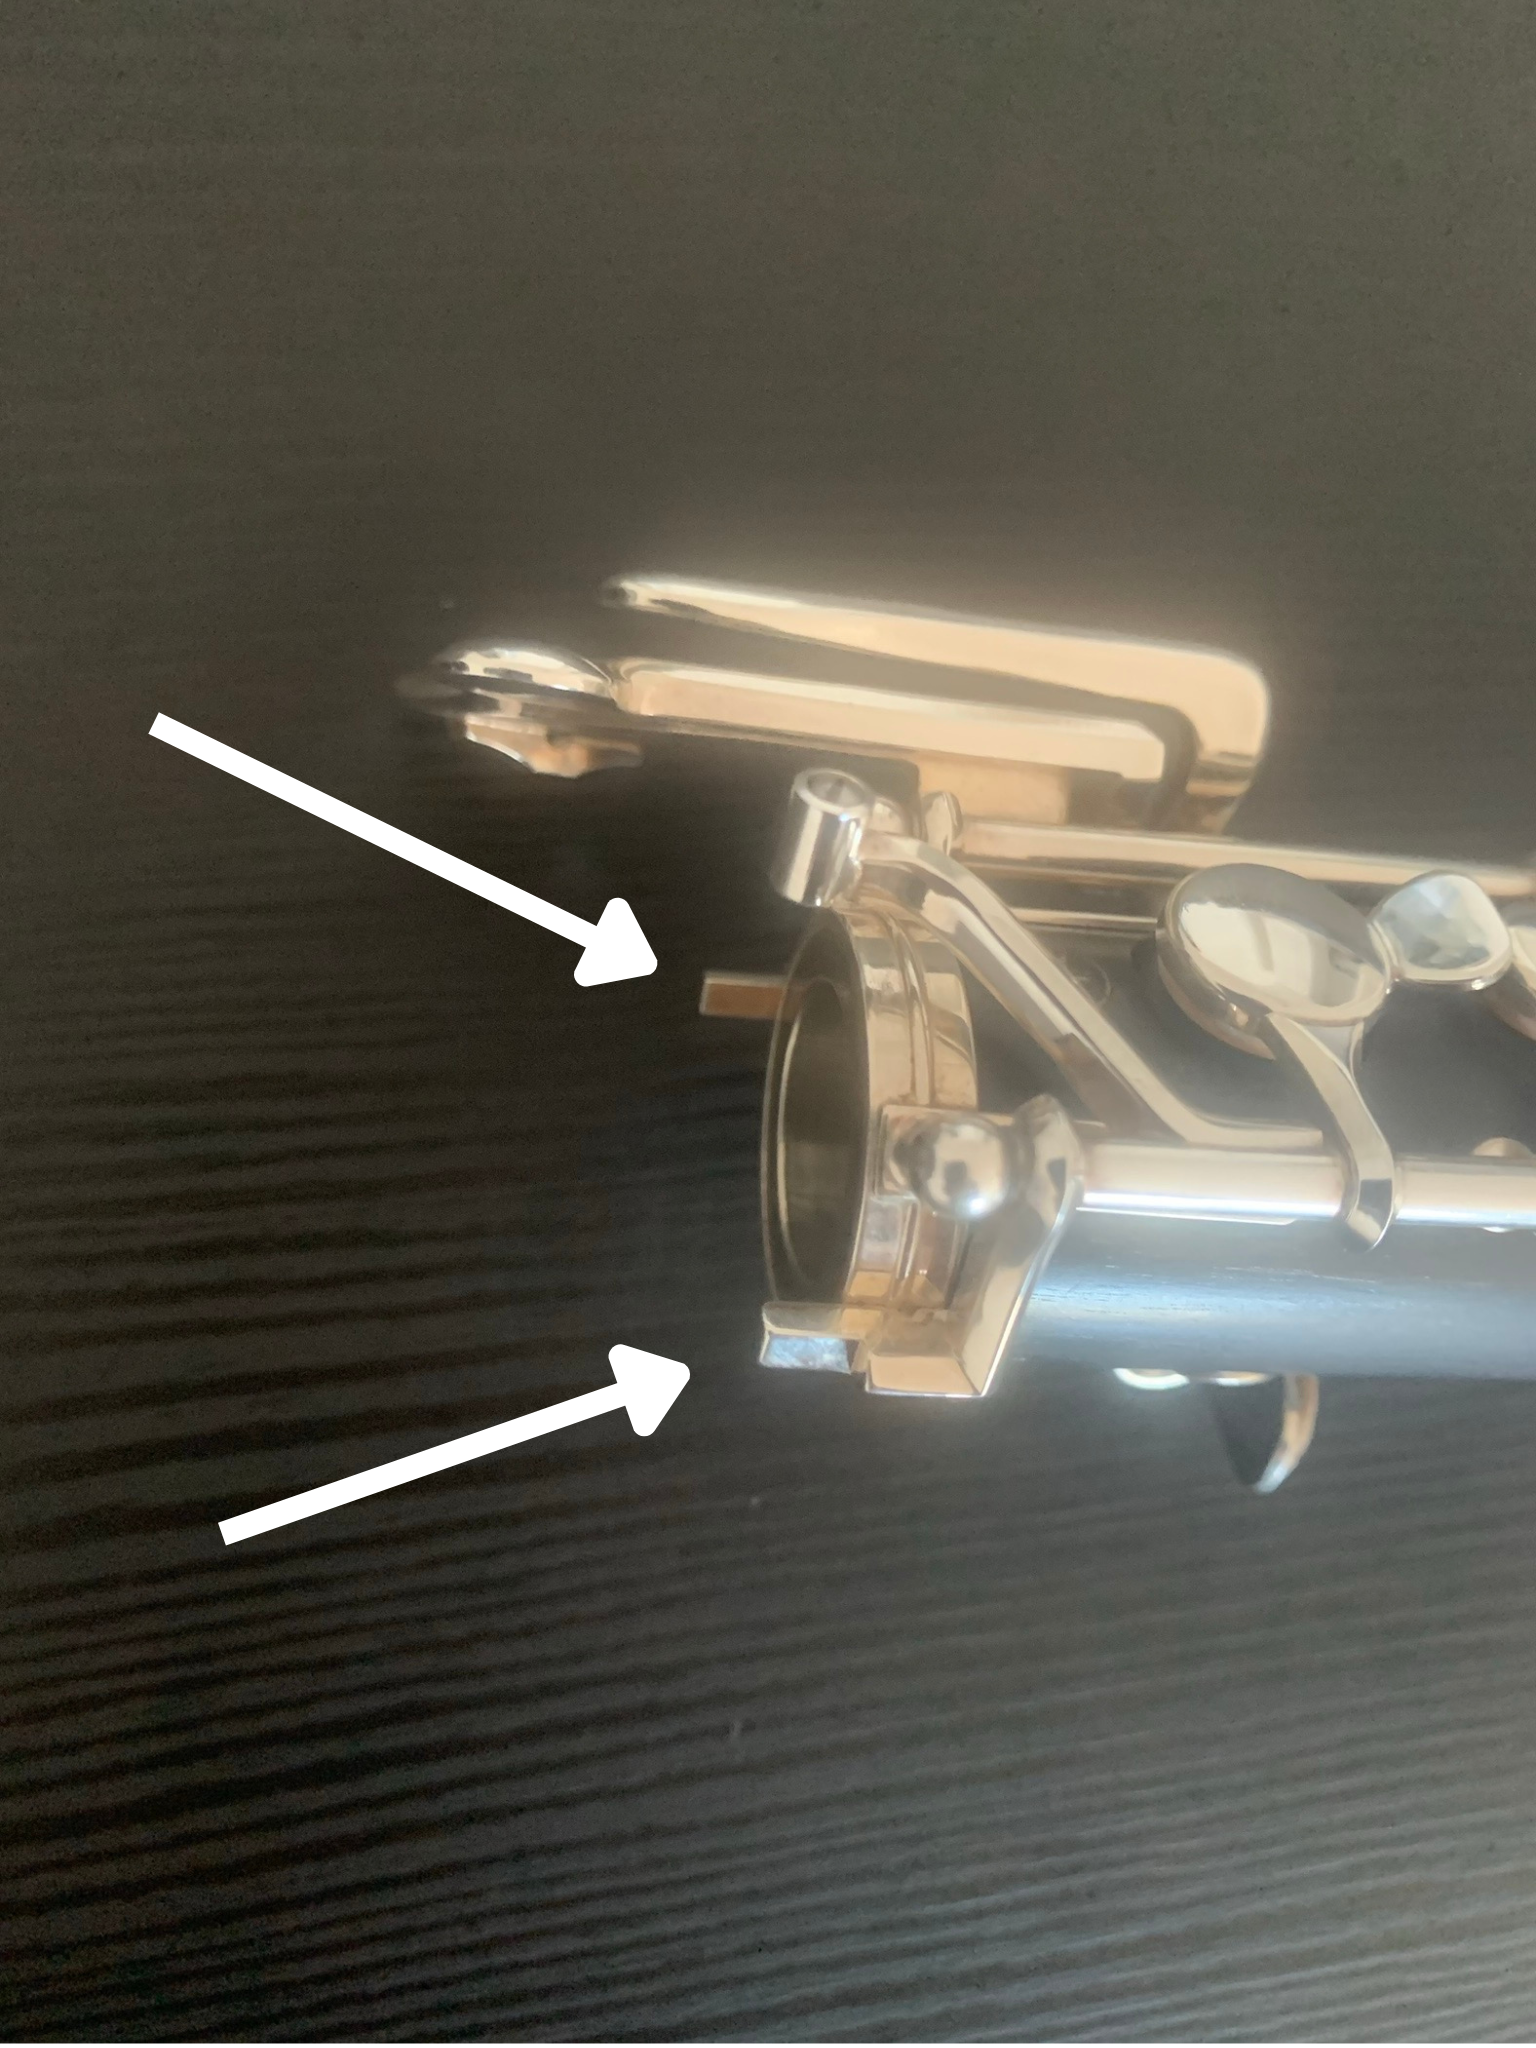
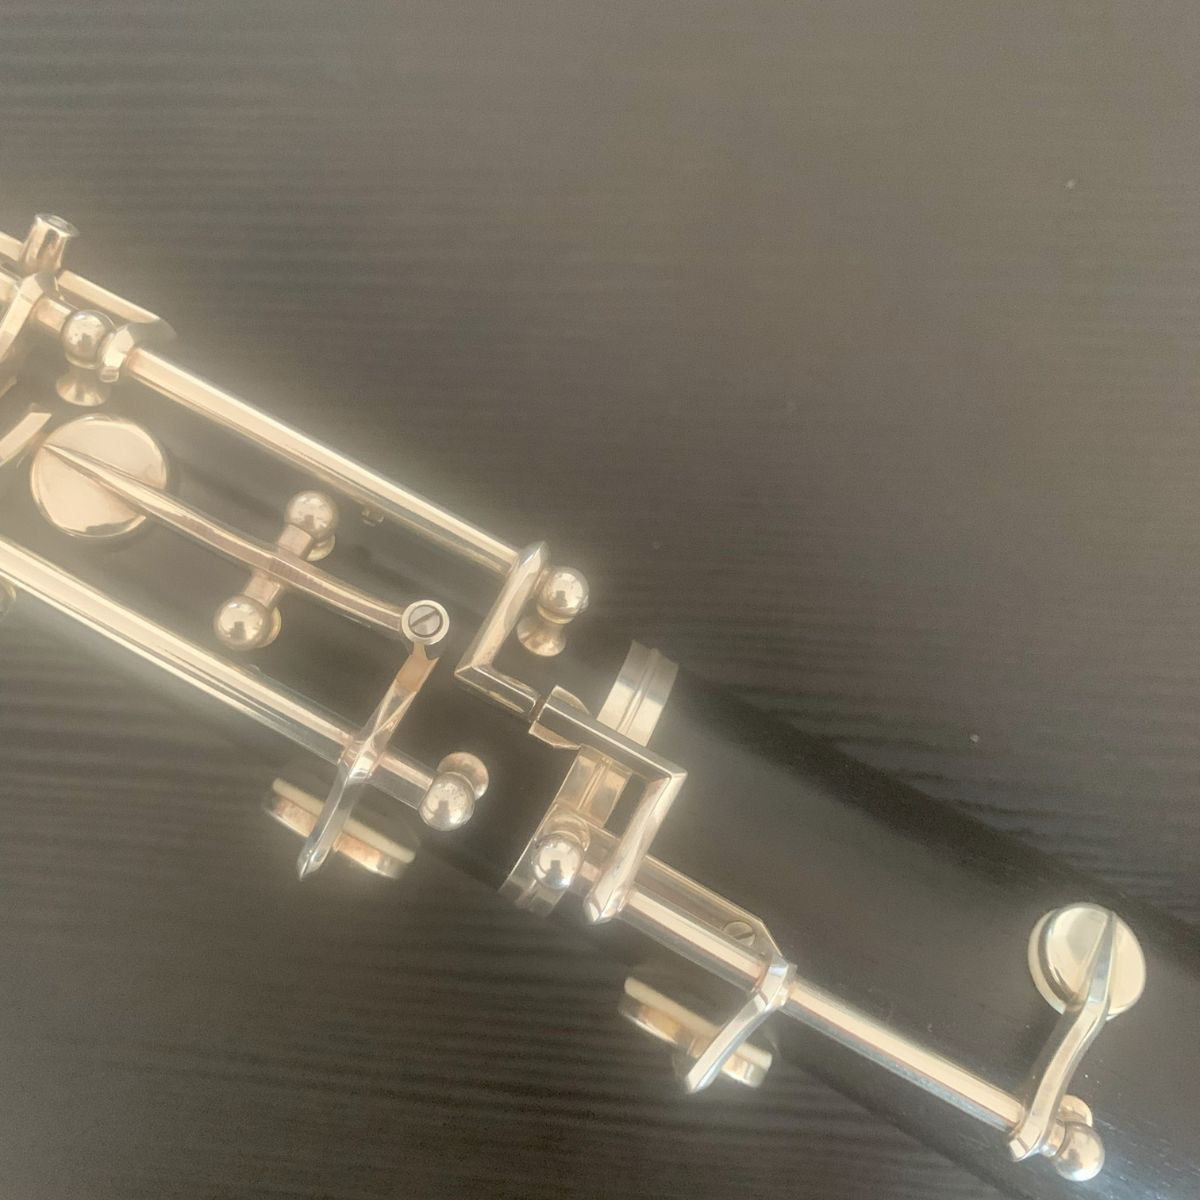
It’s also important to identify and find the key linkages on your instrument. Key linkages are the places where the silver keys touch between two pieces of the oboe. All oboes have two key linkages between the middle joint and upper joint, one on either side. Some oboes also have a key linkage between the middle joint and the bell.
Be aware of these key linkages as you put the pieces together so that they don’t get bent or damaged.
Here is what they look like (they’re the small metal pieces sticking out from the top of the middle joint):
Opening Your Oboe Case
A common and easily avoidable mistake when first opening your oboe case is accidentally opening it upside down!
The seam where most cases open is usually not through the middle of the case. Instead, the case will have a thicker side and a thinner side. Knowing which is which can help you reliably open your case upright.
- The handle of the case is usually attached to the bottom side of the case.
- If your case has a pocket, it is usually located on the top side of the case.
- For a latch-style case, usually the loop section of the latch is on the top side of the case, and the latch itself is on the bottom side.
If you still aren’t sure, simply open the case very gently and peek inside. Once you know which way is up, try to spot a reliable way to tell up from down for next time!
How to Put Together the Bell and Middle Joint
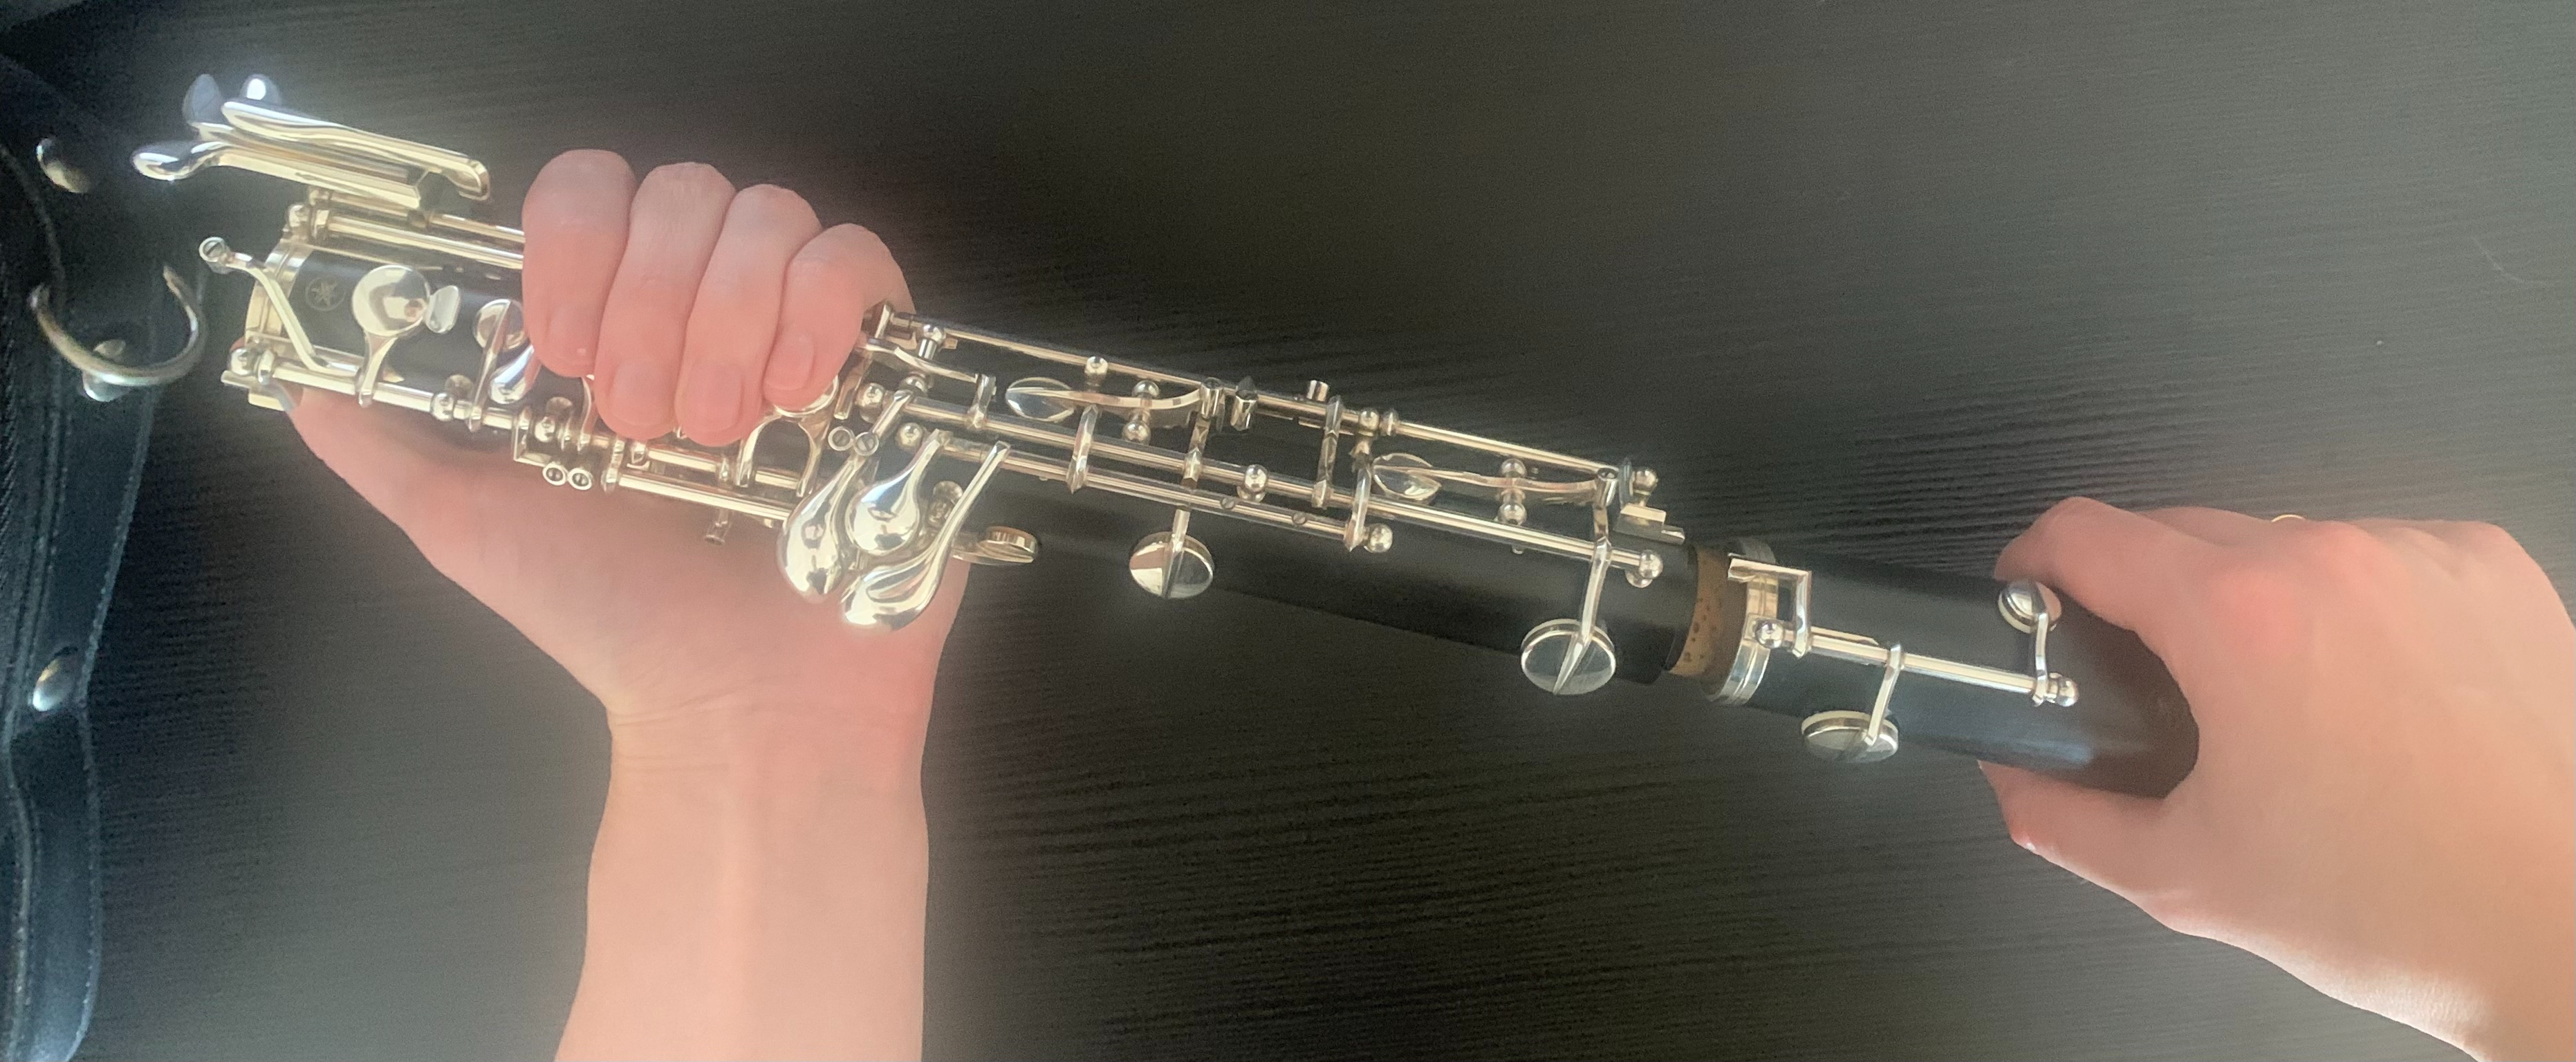
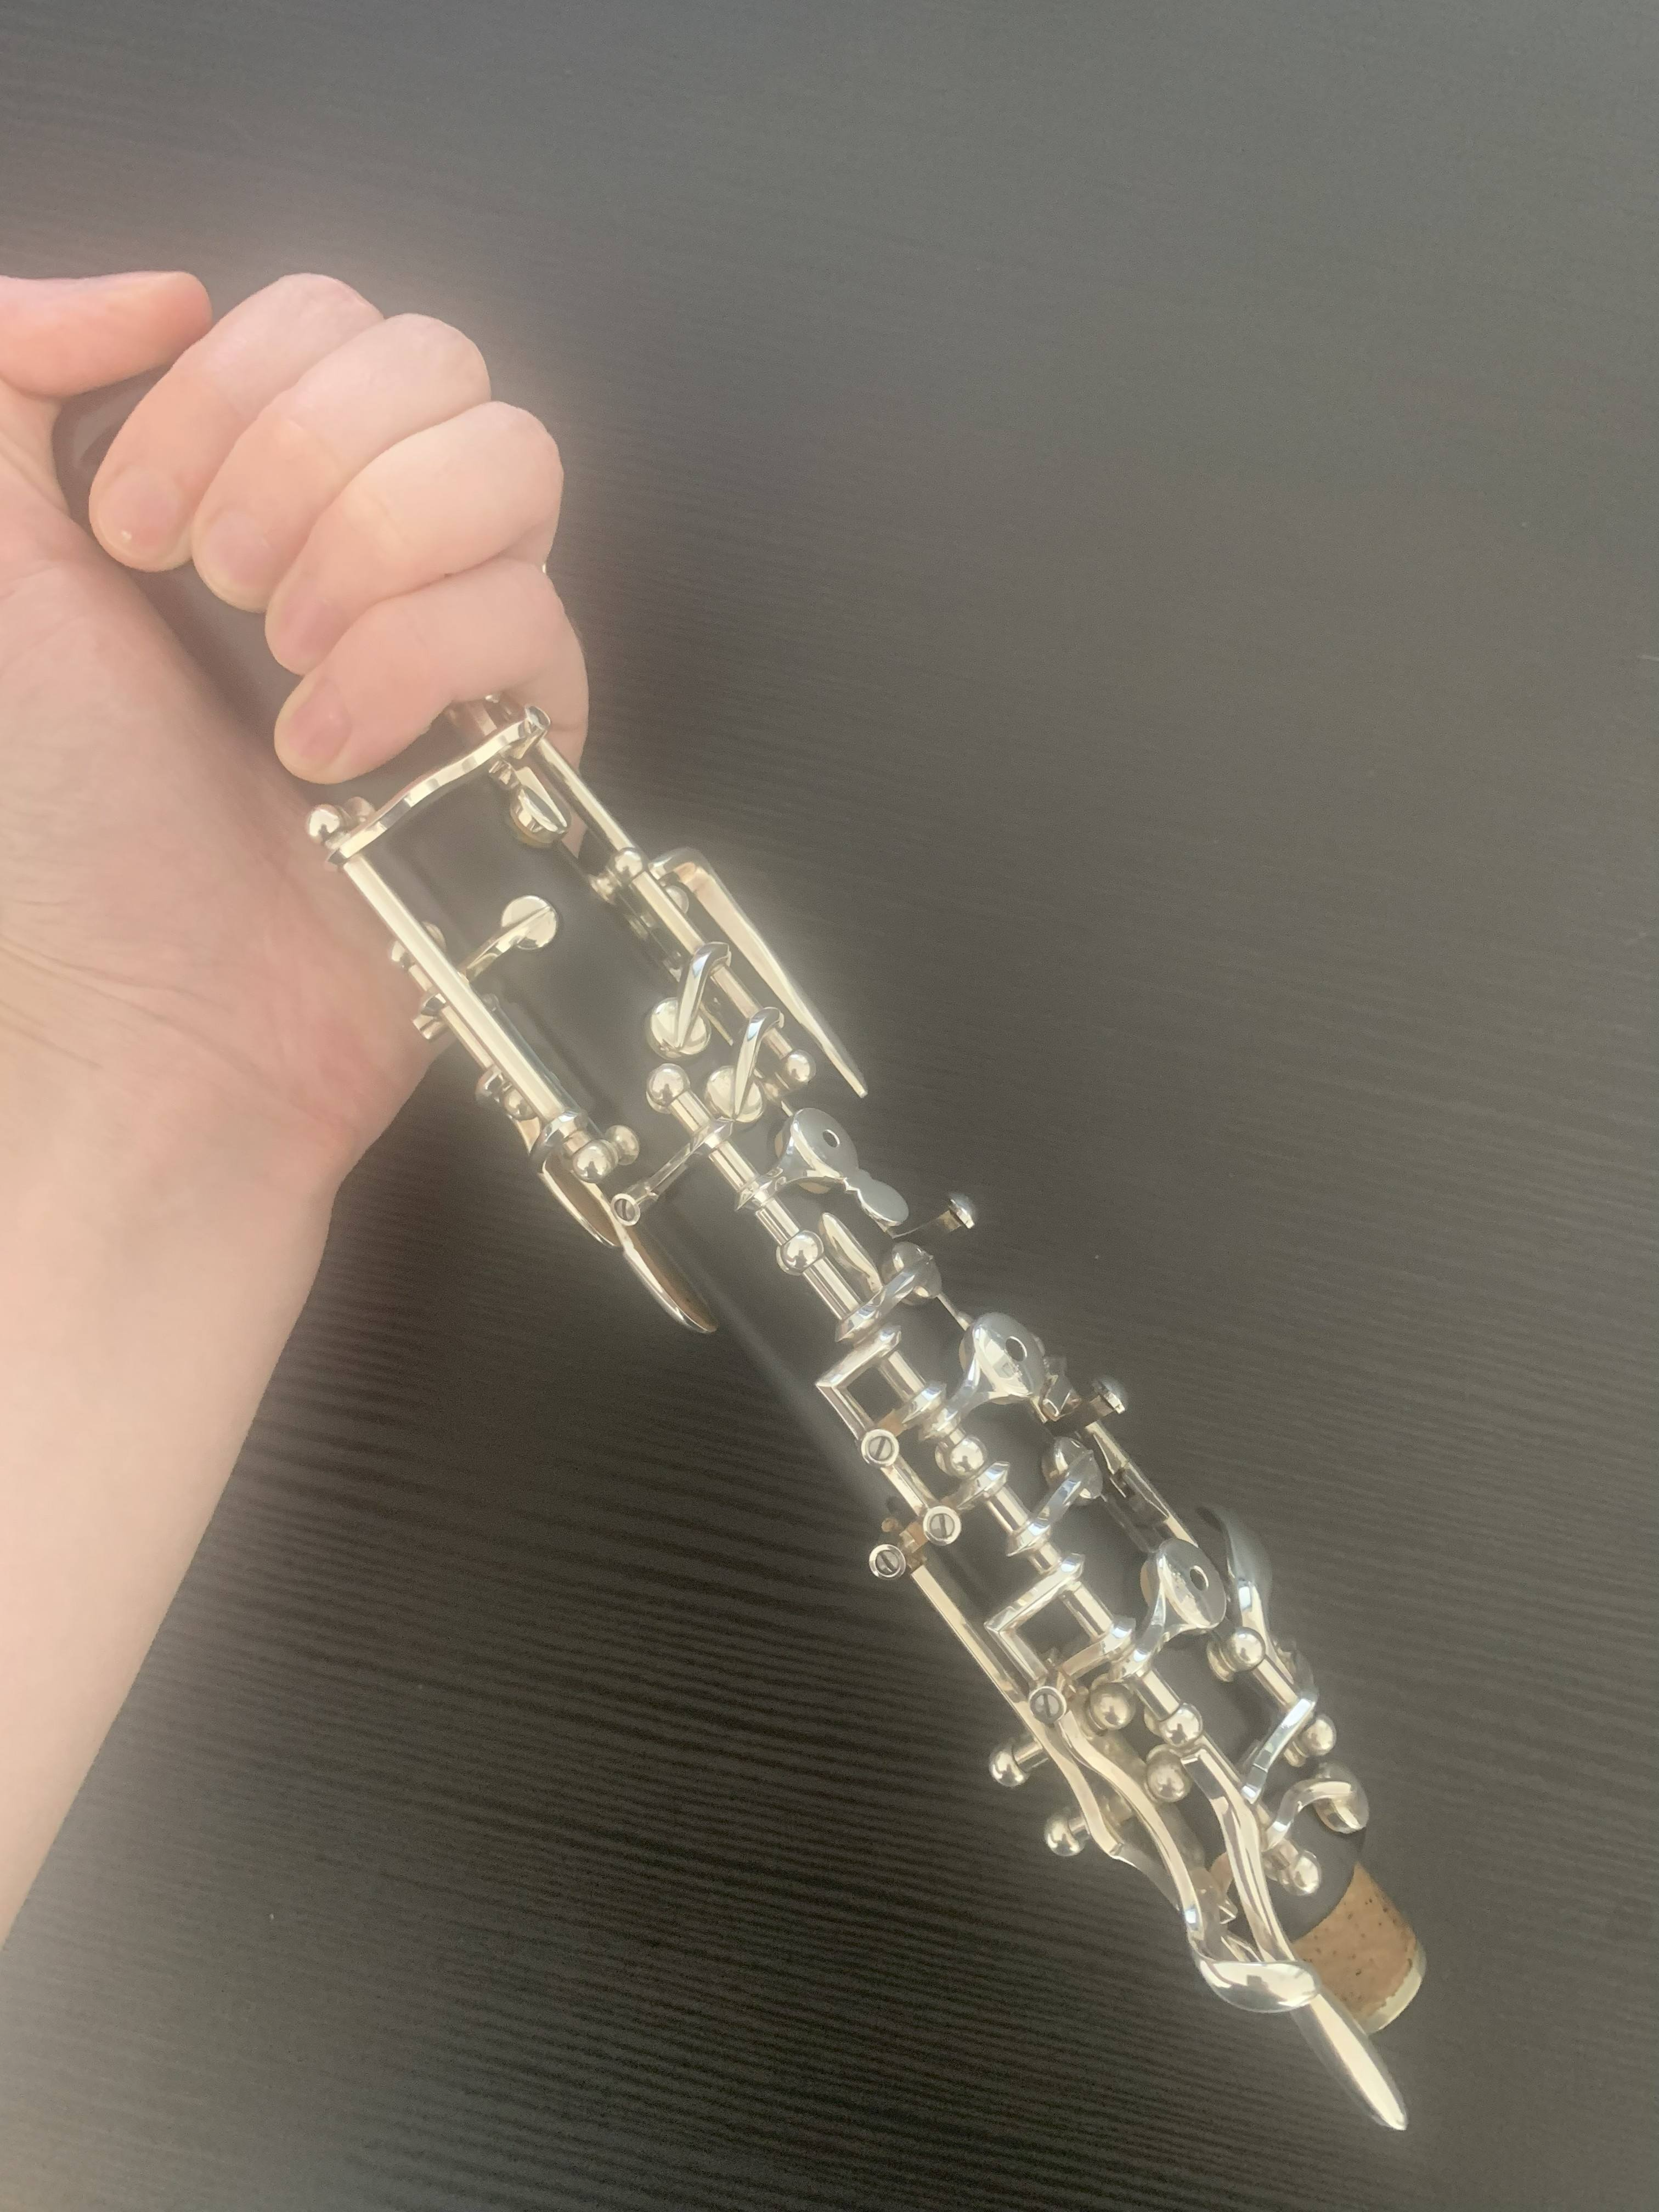
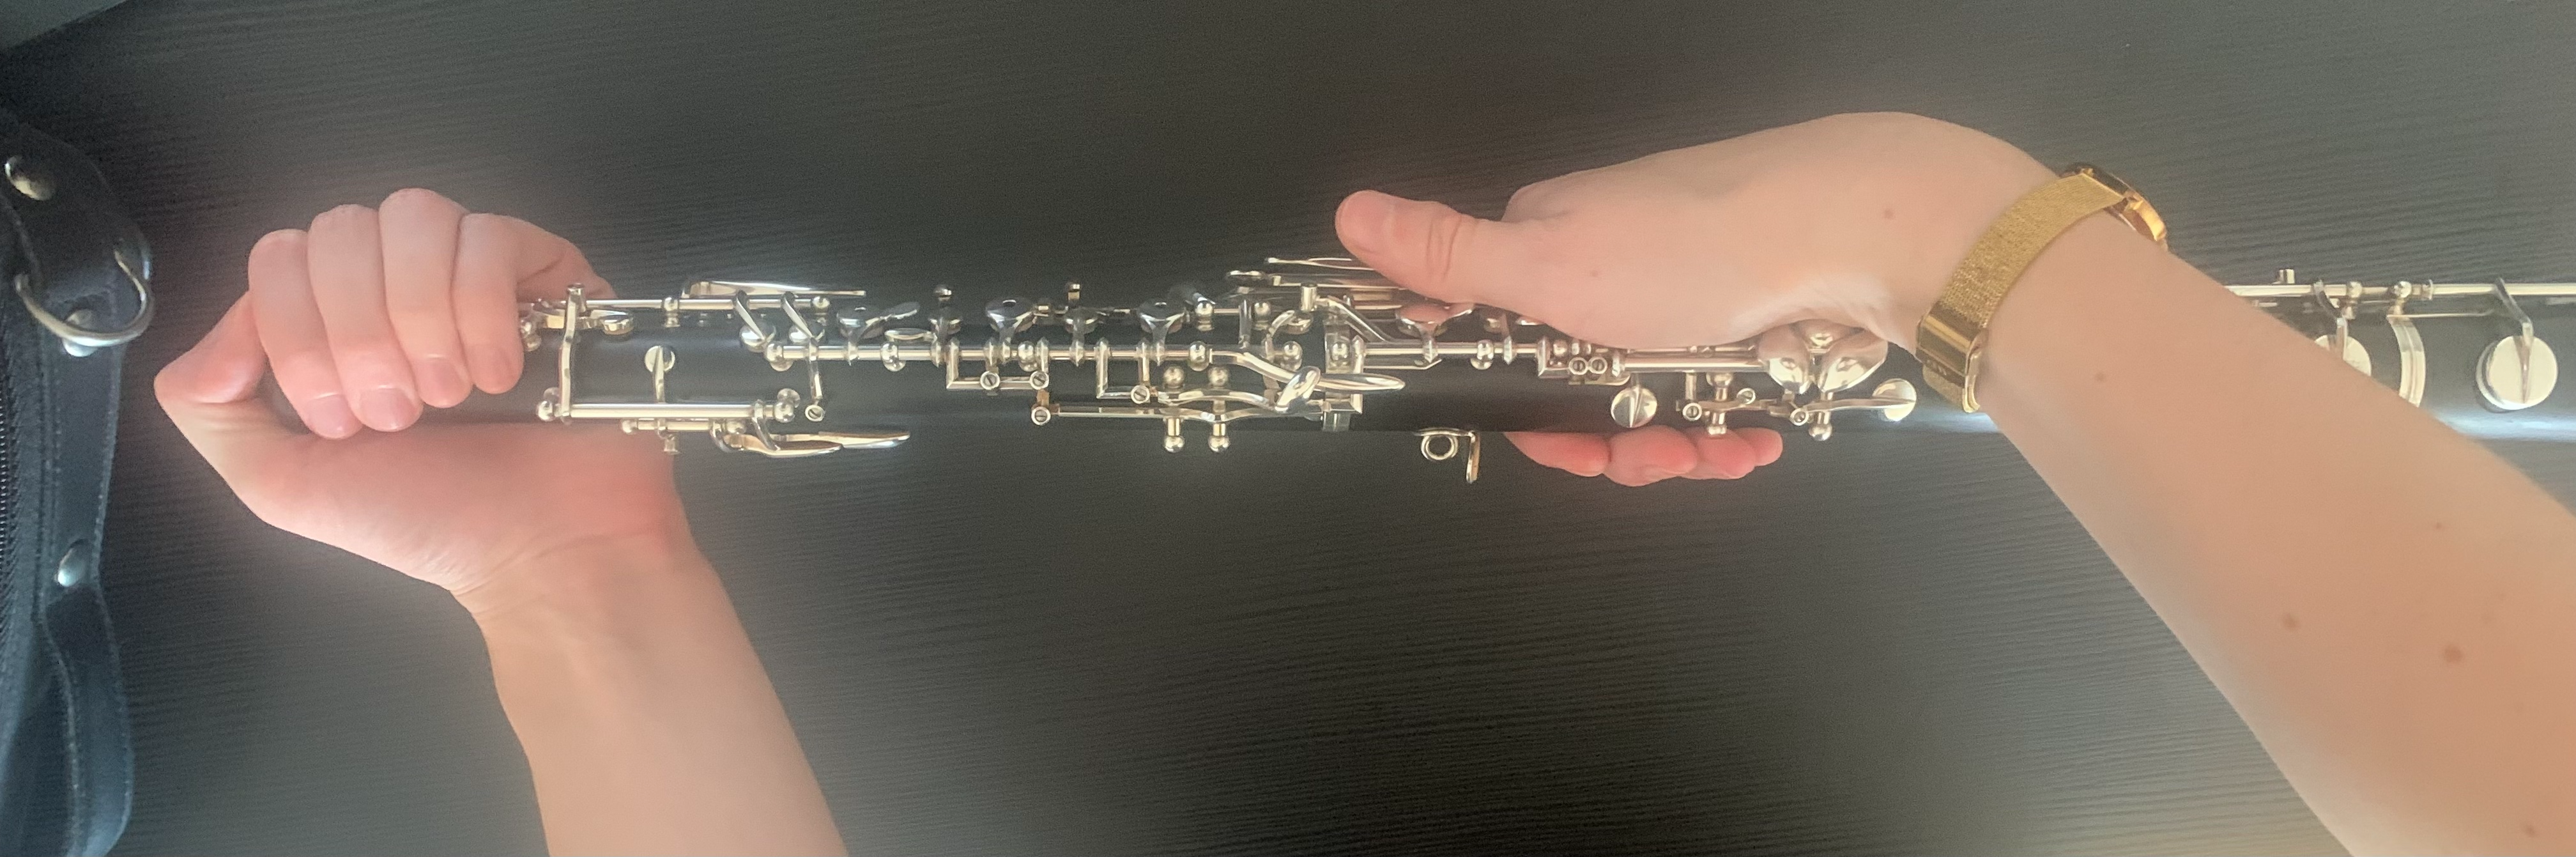
The first step is to assemble the bell and middle joint of your oboe. Pick up the bell in one hand, and hold the middle joint in the other, with your fingers gripping the flat part of the keys, like in the photo below. This will avoid putting extra pressure on weaker parts of the keywork, which could cause damage. The flat parts of the keys are meant to be pressed with your fingers while playing, so they can withstand a bit more pressure.
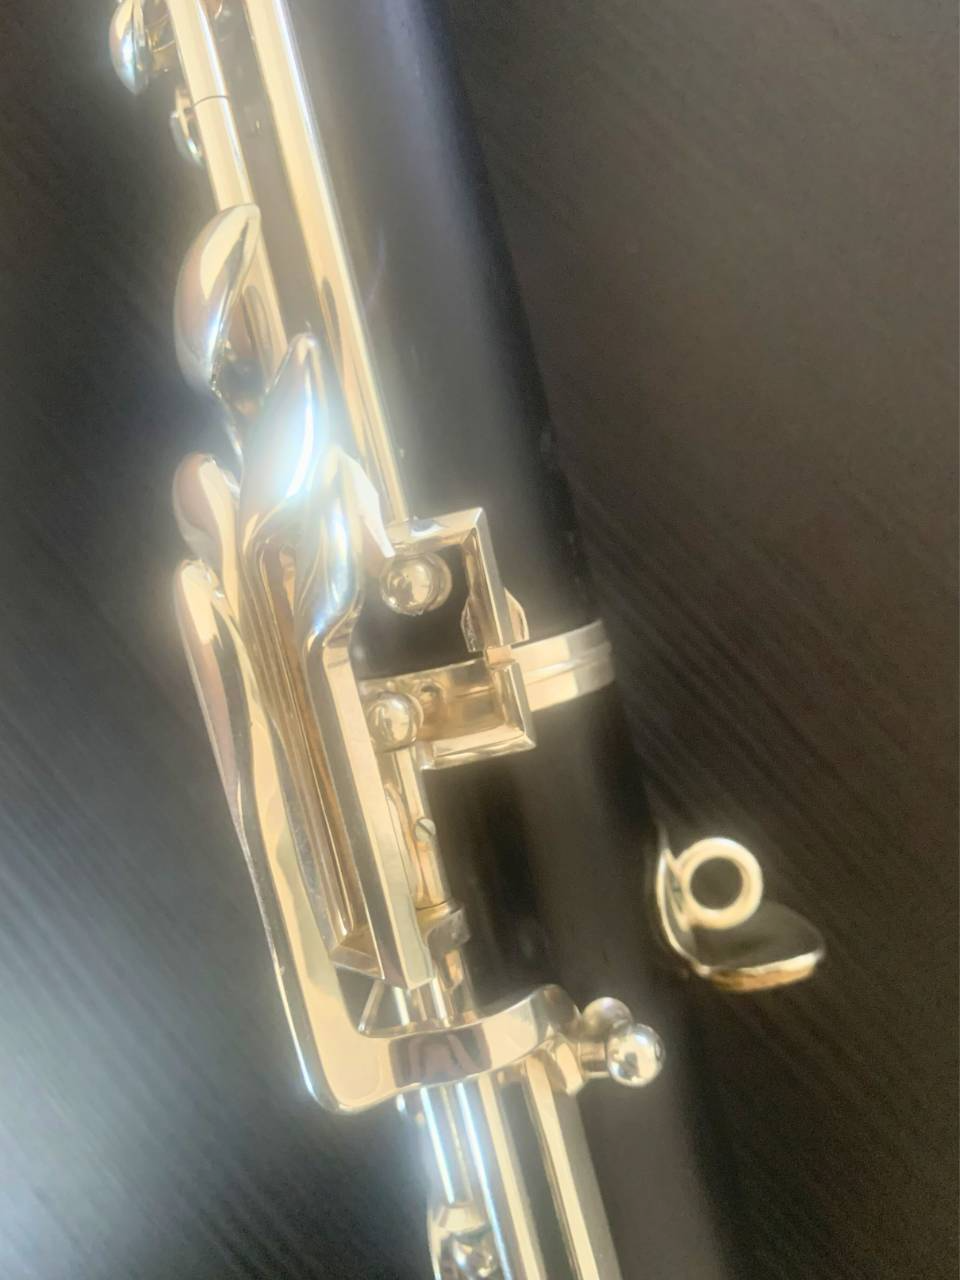
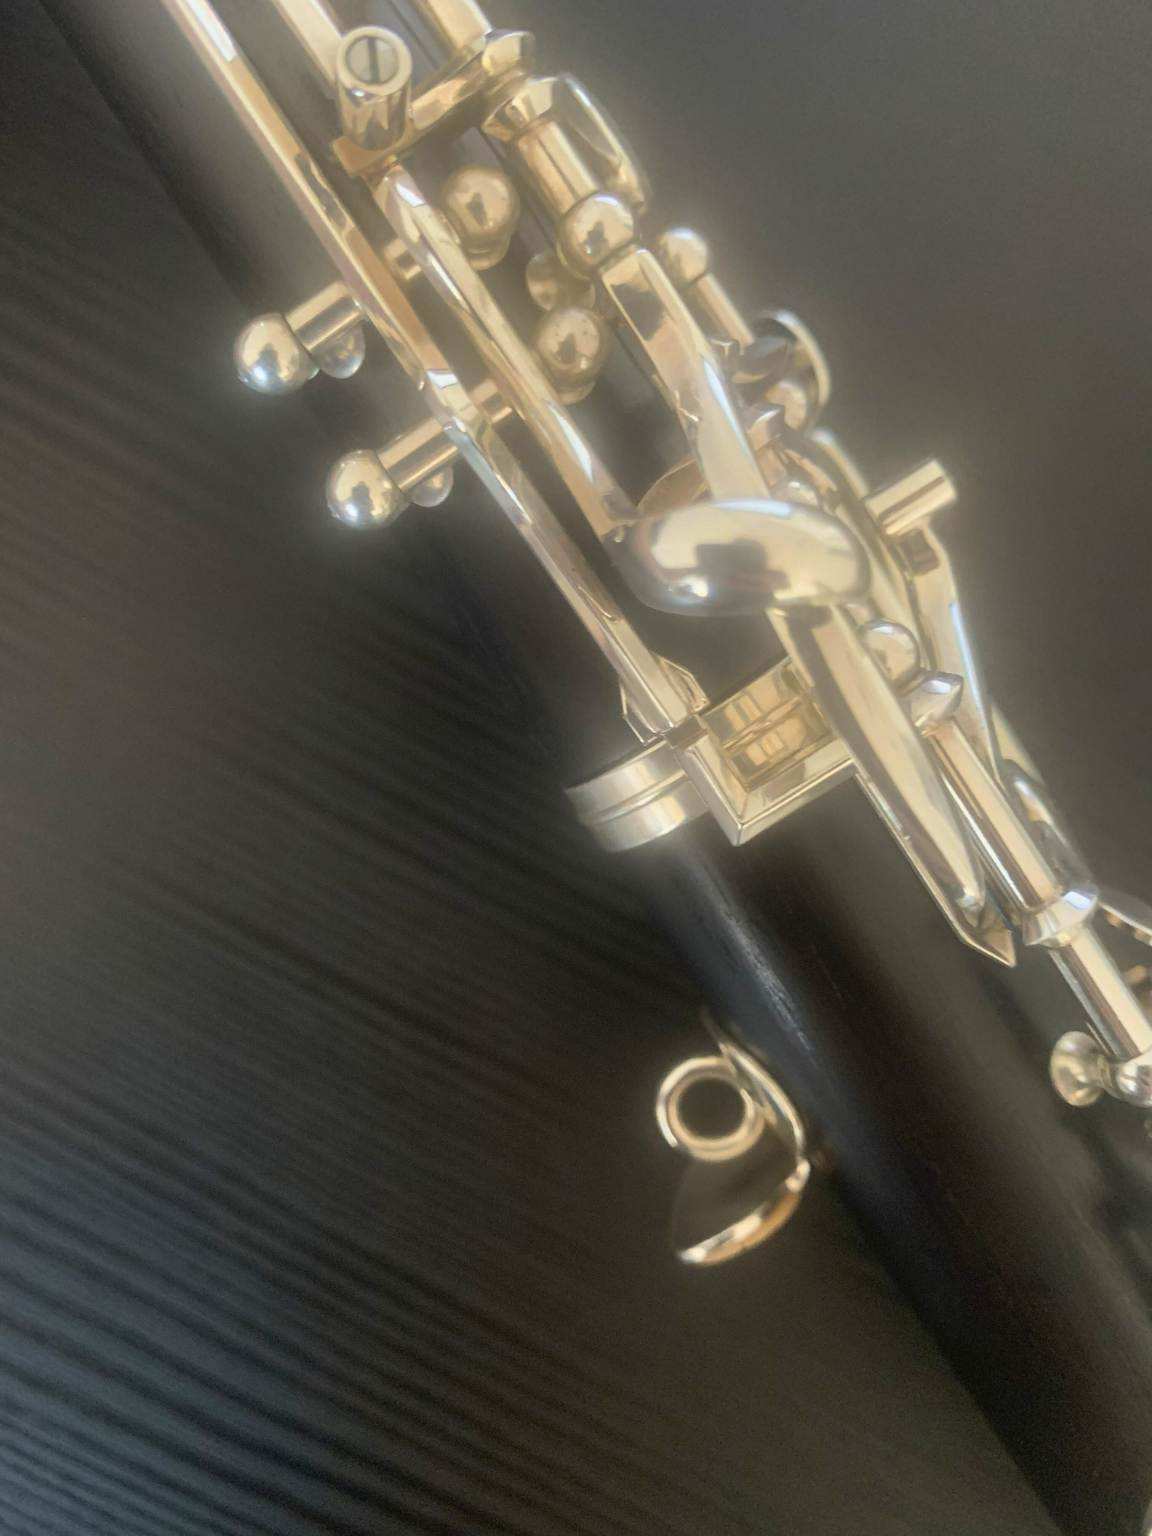
Next, using a small twisting motion, carefully assemble the two pieces. If your bell has keys on it, avoid touching them while you hold the bell, as this can cause the keys to fit together incorrectly. Take care to line up the key linkages between the bell and middle joint (if your oboe has them), so it looks like this:
If your bell does not have any keys on it, it does not need to be perfectly lined up. However, you can align the two holes in the bell so they face left to right (this will enable you to play Low B Flat by covering them with your knees!).
Avoid Damage-Don’t Twist Too Far!
Remember those key linkages I mentioned earlier? This part of the instrument could be damaged if you’re not careful. To keep your oboe safe, look at the key linkages as you put the joints together, and stop twisting as soon as they line up with each other.
Keep this in mind as you put the bell and middle joint together, and as you put the middle and top joint together.
How to Add the Top Joint and Reed
The next step is to add the top joint of the oboe. Remove the top joint from its case, holding it from the top section, like so (this avoids putting pressure on more sensitive parts of the metal):
Next, make sure that the front keys are on the same side for both the top and middle joints, and that the key linkages are aligned with each other.
I recommend placing the bell of the oboe on your leg during this entire step, which will give you leverage as you slowly push the joints together.
During this step, make sure to avoid pressing any keys on the middle joint! This can cause the key linkages to fit together improperly, potentially bending the metal. Here’s what the key linkages look like when they are lined up properly:
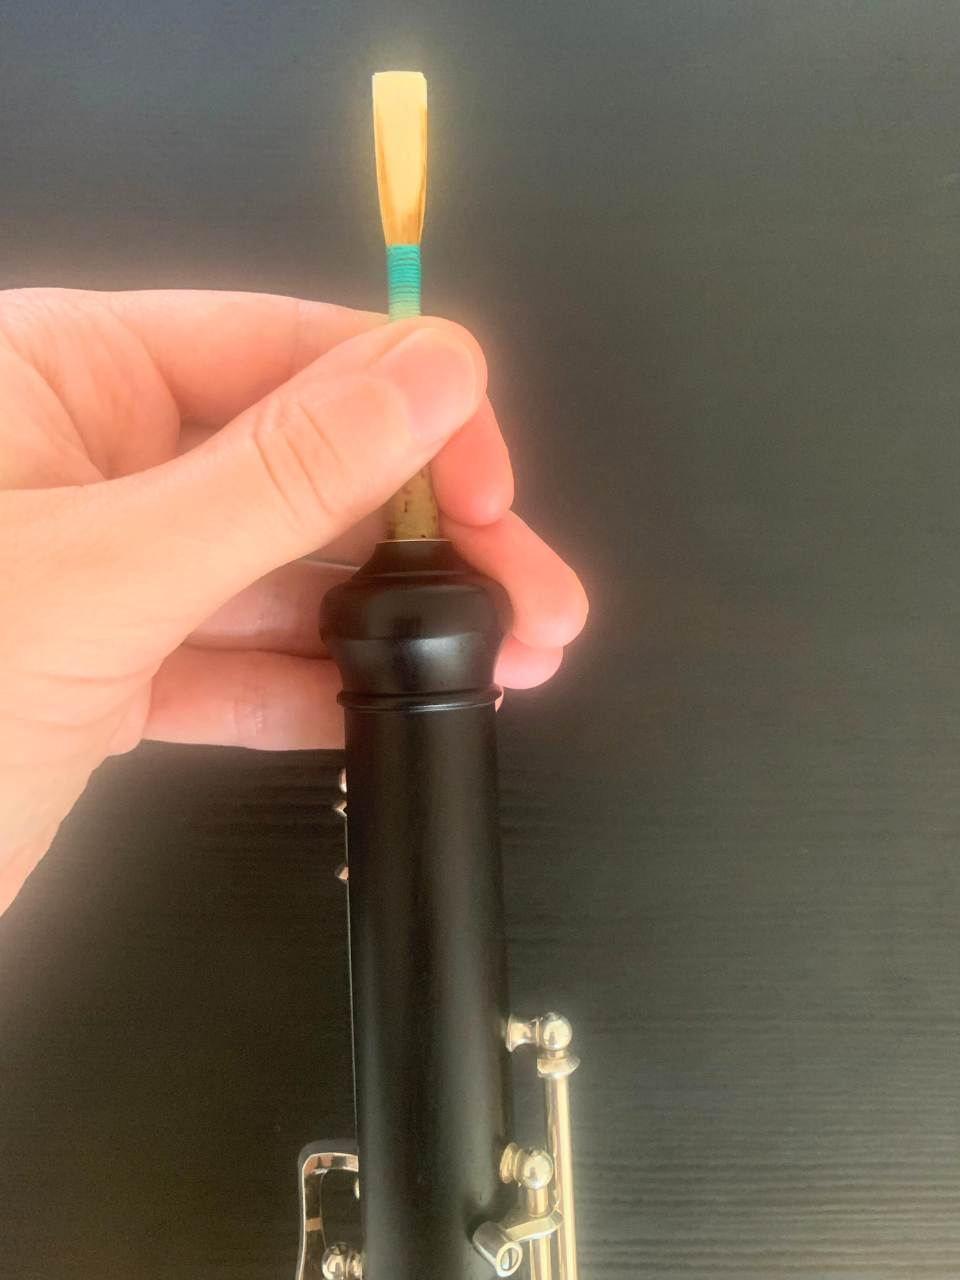
Finally, add your reed to the top of the top joint! I also like to keep the bell of the oboe resting on my leg while I add the reed. Make sure that the reed is pushed in all the way. You should feel a bump once the reed is fully pushed in, and there should be about 1.5cm of cork exposed. It will look like this:

What to Do If Your Reed Is Tight
It’s possible for a reed to be too tight to add to your oboe. This is very common, especially if your reed is brand new! Basically, the cork (the bottom section of the reed) needs to be compressed a bit to ensure a good fit in the reed well (which is the metal part of the top joint where the reed is inserted).
You can try inserting a small portion of the cork into the reed well and then rocking the reed side to side in order to squish the cork. Push the reed in a little further and repeat the process until the reed can move smoothly.
If it’s still too resistant, you can also put a very small amount of cork grease on the cork part of the reed.
If this seems like a hassle, don’t worry. The more you use that reed, the more the cork will compress, and the easier it will be to put the reed onto your oboe.
How to Take Apart the Oboe
Basically, you should take your oboe apart in the opposite order you put it together. So first, remove the reed and put it away. Next, take off the top joint and replace it in the case. You can hold the flat part of the keys on the middle joint for leverage during this step, like this:
Finally, take apart the bell and the middle joint, and put them safely back in the case, too. Be gentle during this whole process, and you will keep your oboe in great shape.
Always make sure to zip/latch your case closed before putting it away as well!
What to Do If Your Reed is Stuck
If your reed ever gets stuck in your oboe, don’t panic, this is also common! First, always make sure to grip the reed from the cork part, and if you need a bit of extra leverage, you can grip the lower portion of the thread as well.
Next, try pushing the reed forwards and back and side to side, as if you are trying to squish and compress the cork. This may loosen the reed enough to pull it off normally.
If that doesn’t work, grab the cork part of the reed with your shirt for extra grip, and repeat the rocking motion.
General Tips
- While damage can occur if the oboe is put together incorrectly, a simple, easy rule to avoid damage is: be gentle!
- Make sure you are sitting down while you put your oboe together for added stability. You can also keep your case on your lap this way.
- If you feel like you need to use lots of force in order to put the pieces together, you probably need to use some cork grease. See our Oboe Care and Maintenance article to learn more about how to use cork grease.
Conclusion
I hope you enjoyed this guide on how to safely assemble and disassemble your oboe. As a side note: you should always swab your oboe before taking it apart! See our Oboe Care and Maintenance article for more information on how to properly swab your oboe.